
Realistic Character Skin Shader Blender: Step-by-Step Guide
Learn how to create a realistic character skin shader in Blender using subsurface scattering, proper texture setup, and scale considerations.
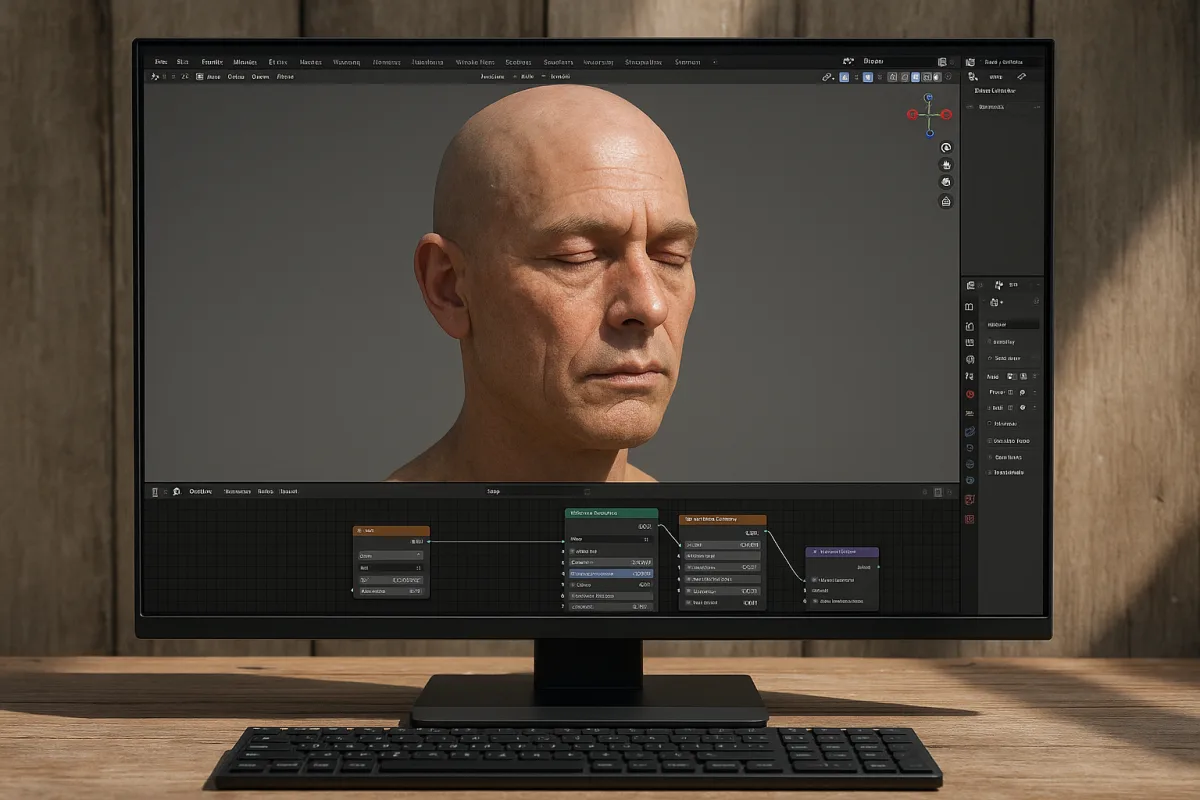
Start with scale, before touching the shader
I am working in Blender 4.5 LTS with Cycles here. That version matters because skin scattering behaviour and shader controls have shifted across Blender releases, and old tutorials often describe settings by names that no longer match the interface.
A skin shader is not a material you can paste onto any-sized head. Subsurface scattering is a distance-based effect, so a character head scaled like a toy or a building changes how far light appears to travel beneath the surface. [6]
Set the character to credible real-world dimensions before shader work. Blender’s practical convention is 1 Blender Unit equals 1 metre, which makes the scene, lights, camera, and scattering controls easier to reason about together. [6]
If your character was sculpted in ZBrush, Nomad Sculpt, or another package at an arbitrary scale, do not assume the imported mesh is usable as-is. Check its dimensions in Blender, apply sensible transforms, and only then judge the skin.
This does not mean every stylised character must be physically measured. It means you need a consistent scale. A deliberately oversized head can work, but its scattering settings need to be tuned for that proportion rather than copied from a realistic scan.
Prepare the maps before diagnosing the material
The first visible failure is often not the shader. It is a colour-management mistake in the textures. Blender needs to know whether an image represents visible colour or numeric surface data, because those images must be interpreted differently. [1]
Connect the albedo, sometimes labelled base colour or diffuse, to the Principled BSDF Base Color input and leave that image texture in sRGB. The albedo should contain pigment information, not painted shadows, highlights, ambient occlusion, or a fake rim light. [1]
A baked-lighting albedo locks one lighting situation into the face. When you add a key light later, cavities double-darken and cheeks develop highlights that do not respond properly to the shot. That is a texturing issue, not evidence that you need more SSS.
Set roughness maps to Non-Color. Roughness is data defining how broadly reflections spread, not a grayscale photograph intended for display. Interpreting it as sRGB shifts its values and makes it harder to judge why the skin looks too greasy or too powdery. [1]
Normal maps also belong in Non-Color mode, then pass through a Normal Map node before reaching the Principled BSDF Normal input. Connecting a normal map directly can produce incorrect surface direction and misleading pore detail. [2]
For a starting normal strength, use roughly 0.3 to 0.8, then assess it at the camera distance you will render. [2] That is a range, not a rule. A scan-derived 8K face and a hand-painted game character should not receive the same treatment.
Build the basic skin response before adding pores
Begin with one Principled BSDF and a clean map set. Add Base Color, roughness, normal, and, if available, a subsurface colour map. This simple setup is easier to troubleshoot than a dense procedural network with five competing masks.
For ordinary human skin, a roughness range around 0.3 to 0.5 is a reasonable initial target. [3] It should not be a single grey value across the face, though. The nose, lips, eyelids, forehead, cheeks, and beard area usually need different reflection behaviour.
Too-high roughness makes the face chalky and dead, particularly under a large soft key. Too-low roughness produces the familiar wet-plastic problem, where pores show up but the face reflects like polished resin. [3]
Use the roughness map to break up highlights, not merely to make the skin noisy. A convincing face has broad changes in oiliness and fine irregularity together. Large patterns describe anatomy and grooming, while small patterns keep a light from forming one perfect, computer-clean highlight.
Specular adjustment matters most when the character is reading too shiny or too dull after roughness is already plausible. Do not use specular as a substitute for a roughness map. Those controls affect different parts of the reflection response.
Make subsurface scattering carry colour at different depths
Skin does not scatter all wavelengths equally. Red light tends to travel and emerge differently from green and blue light, which is why ears, nostrils, fingers, and thin eyelids can warm up when backlit. A uniform SSS radius loses that behaviour. [3]
In Blender 4.5 LTS, enable subsurface scattering on the Principled BSDF and select Random Walk, Skin. Blender’s skin-oriented Random Walk method is designed for this use, including per-channel radius handling and custom IOR support. [3]
Feed a reddish subsurface colour into the Subsurface Color input if your texture set provides one. Do not simply make the Base Color intensely red to compensate. Surface pigment and light transported below the surface are related, but they are not the same signal.
A useful initial RGB radius sometimes quoted for light Caucasian skin is approximately 0.575 red, 0.894 green, and 0.376 blue, with a scale around 0.05 to 0.2. [3] Use that only as a starting point, never as a universal skin preset.
Those values depend on object scale, lighting, and artistic intent. [6] A close beauty render with a bright backlight may need a different balance from a full-body character under diffuse HDRI illumination, even when both assets represent the same person.
There is no well-established table of exact radius values for every ethnicity, nor a reliable measured recipe for every skin tone. Avoid the common habit of presenting one RGB triplet as biological truth. Tune from reference under your actual shot lighting.
Watch thin areas while adjusting. If ears glow like red wax, reduce the apparent scattering through scale or radius. If an ear remains opaque under a rim light, increase the effect gradually, checking that cheeks and lips do not become milky at the same time.
Add detail at the right frequency
Once the base material and scattering hold together, use the normal map for pores, shallow wrinkles, and micro-breakup. The normal should change how light reacts, not carve deep craters into the face. Normal strength has no single correct number because mesh density and map quality vary. [2]
Do not expect a normal map to replace proper silhouette, eyelid thickness, lip volume, or nostril depth. Those are modelling and sculpting problems. A shader can reveal good facial structure, but it cannot create convincing light transport on geometry that has no useful form.
Likewise, a high-resolution pore map will not fix flat colour. Realism generally improves faster when colour, roughness, normal response, and scattering agree than when one channel is pushed to extreme texture resolution.
Light the material so you can actually judge it
A skin material evaluated under one tiny white light is easy to overfit. Start with a three-point arrangement: a key for the main facial form, a weaker fill to control shadow density, and a rim light to separate the head from the background. [5]
Use large area lights for the key and fill when you want soft transitions across cheeks and forehead. Small lights make hard shadows and sharp specular points, which can exaggerate texture defects and trick you into over-roughening the skin. [5]
A warm lighting starting point around 5000K is commonly used for skin-oriented setups. [3] It is not a mandatory complexion setting, but it gives a less clinical baseline than an aggressively cool white light and makes it easier to assess warm subsurface response.
Add an HDRI when the shot needs environmental reflection and broad ambient illumination. It gives skin something believable to reflect, especially in eye sockets, along the jaw, and across the curved planes of the forehead. [5]
Use Blender Light Groups when you need to adjust key, fill, rim, or environment contribution independently in the render workflow. [5] That is more useful than rebuilding a material every time the key is made slightly brighter.
Calibrate exposure before rewriting the shader
If the face looks flat, check camera exposure and colour management before assuming the material is wrong. Exposure changes how visible fine roughness, shadow detail, and highlight roll-off appear, so a shader can seem broken simply because the scene is under- or overexposed. [7]
Adjust exposure with a clear target in mind: retain readable shadow information around the eyes and nostrils while avoiding clipped shine on the forehead, nose, and lips. [7] Then revisit the roughness and SSS only if the material still fails under that balanced image.
Lighting and exposure are not interchangeable controls. The available guidance does not establish a precise percentage of perceived realism attributable to either one, and artistic choices matter. Treat them as a coupled look-development problem rather than a numerical correction.
Keep Cycles practical while you refine
Random Walk, Skin is a sensible quality-to-performance choice for this job, but subsurface scattering still costs render time. [3] Complex shaders, high SSS sampling, multiple large lights, and high-resolution maps all compound the cost of iteration.
Work in small steps. First validate scale and colour spaces, then roughness, then normal strength, then scattering under final-style lighting. Raising quality settings before those fundamentals are correct only makes wrong renders take longer.
Use low-cost previews while judging broad colour, reflectivity, and scattering direction. Increase render quality for close-up checks of eyelids, nostrils, lips, ears, and transitions between light and shadow, where weak skin shaders reveal themselves first.
Do not build a multi-layer custom SSS network merely because it looks advanced. The available guidance supports Blender’s Principled BSDF with Random Walk skin scattering as the practical foundation, but does not provide reliable general rules for advanced layered SSS setups. Keep the network understandable until the shot proves it needs more.
Frequently Asked Questions
How do I create a realistic character skin shader in Blender?
Start by setting your character to a credible real-world scale, ideally with 1 Blender Unit equal to 1 metre, to ensure subsurface scattering behaves realistically. Use the Principled BSDF shader in Blender 4.5 LTS with the Random Walk skin subsurface method, and input separate scattering radii for red, green, and blue channels. Prepare clean texture maps—albedo in sRGB without baked lighting, and roughness and normal maps in Non-Color mode—to avoid color management errors. Begin with a simple shader setup including base color, roughness, normal, and subsurface color maps before adding more complexity.
What are the best settings for subsurface scattering in Blender skin shaders?
Use the Random Walk (Skin) subsurface scattering method in the Principled BSDF shader, which is optimized for skin rendering. Input separate subsurface radius values for red, green, and blue channels rather than a uniform radius; a starting point for Caucasian skin is approximately 0.575, 0.894, and 0.376 respectively, but these should be adjusted iteratively based on lighting and artistic intent. Keep the subsurface scale between about 0.05 and 0.2, and tune quality settings according to your render budget, as high SSS samples increase render times significantly.
How should I prepare texture maps for a skin shader in Blender?
Keep albedo (base color) maps in sRGB color space without baked lighting effects like shadows or ambient occlusion, as these can interfere with lighting interaction. Set roughness and normal maps to Non-Color mode so Blender interprets them as data rather than color, preventing value shifts that degrade realism. Normal maps should pass through a Normal Map node before connecting to the shader, with a typical normal strength between 0.3 and 0.8 depending on camera distance and detail level.
Why is scale important when creating skin shaders in Blender?
Subsurface scattering is a distance-based effect, so the physical scale of your character directly affects how light scatters beneath the skin surface. Using real-world proportions (1 Blender Unit = 1 metre) ensures that scattering distances and shader parameters behave as expected. Arbitrary or inconsistent scaling can cause unrealistic skin appearance because default SSS settings become invalid, requiring manual retuning that is often less intuitive.
How do I avoid plastic-looking skin in Blender shaders?
Avoid uniform roughness values across the face; skin roughness varies by area such as nose, lips, and cheeks. Use roughness maps to create variation in reflectivity, combining broad anatomical changes with fine surface irregularities. Roughness values around 0.3 to 0.5 are typical starting points; too low causes wet-plastic shine, while too high results in chalky, lifeless skin. Properly prepared roughness maps in Non-Color mode help maintain realistic highlights and avoid a waxy or plastic look.
How we researched this
This article was assembled from 7 cited references.
Nothing here is based on hands-on testing. Where a figure or finding appears, it belongs to the source cited beside it, and the writing says so rather than implying otherwise. Every source is listed below so you can check it.
Sources
- PBR texture color space: which maps use sRGB vs Non-Color? · twirl
- Blender Normal Map Color Space and Strength | AITextured
- How to Create Realistic Skin Shaders in Blender (2026 Guide) - Toxigon
- Stop Blaming Your Materials: The Real Reason Your Blender Renders Look Lifeless — BlenderCG
- Blender Render Setup Tutorial: Photorealistic Guide | CGAxis
- A question about scale in sss for skin shaders - Materials and Textures - Blender Artists Community
- How to Adjust Camera Exposure in Blender? | Blender Rendering – Sivo
Related Articles
Using Nodes for Shading in Blender: A Practical Guide
Learn how to use nodes for shading in Blender with tips on Principled BSDF, texture color spaces, and Cycles vs Eevee differences.
Realistic Water in Blender
Learn the best techniques for creating realistic water in Blender using Ocean Modifier, fluid sims, and layered shading for stunning results.
Best Practices for Rigging in Blender
Learn best practices for rigging in Blender, including weight painting, topology, and normalization for smooth character deformation.
Create Realistic Environment in Blender: Step-by-Step Guide
Learn how to create a realistic environment in Blender with tips on terrain, texturing, lighting, and scale for believable 3D scenes.