
Blender Ergonomics for Beginners: Safe Setup and Breaks
Learn Blender ergonomics for beginners with tips on posture, breaks, and workspace setup to work safely and comfortably.
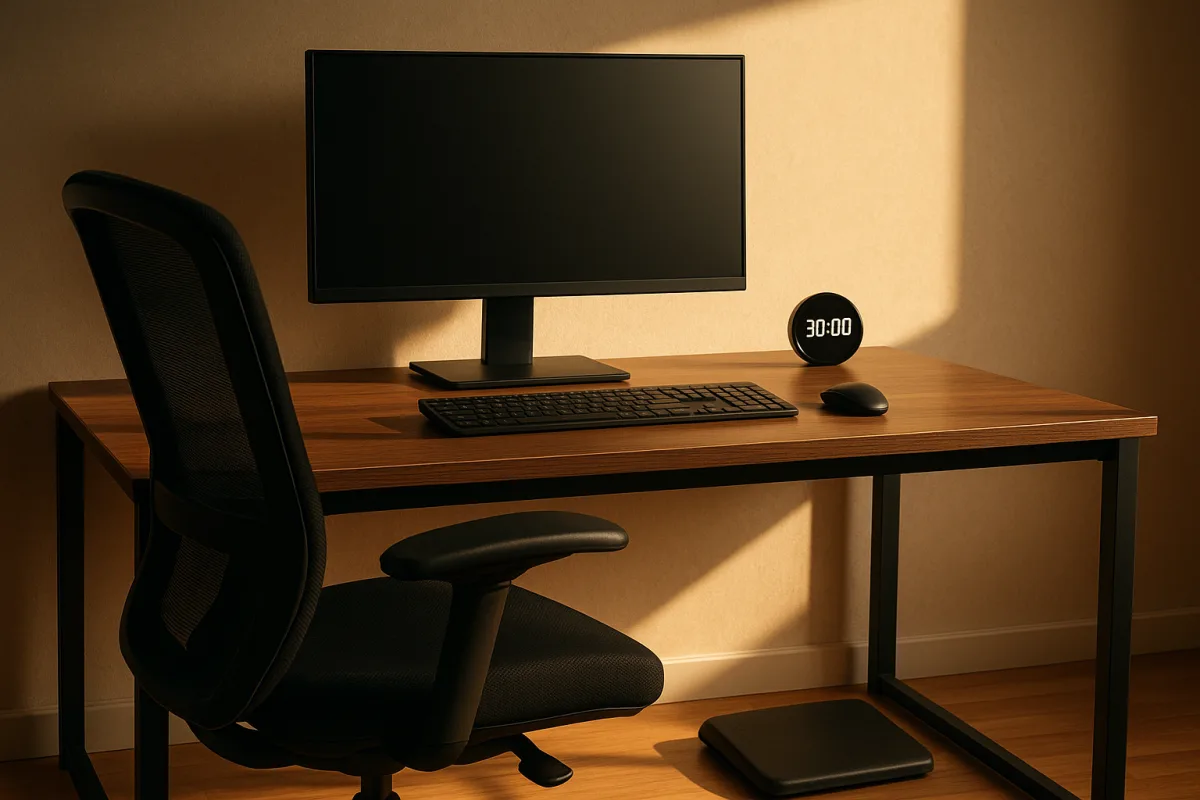
The safety habit worth learning first: the 30-minute reset
Beginning Blender users often assume “safe use” means avoiding a dangerous tool setting or a bad render command. Blender is not a workshop saw, and there is no special Blender-only injury pattern supported by the available research.
The real risk is cumulative. A beginner can spend three hours adjusting a material node tree, retopologising a sculpt, or repeatedly correcting a camera angle without noticing that their shoulders have climbed, wrists have bent, eyes have dried out, and file has not been saved.
That makes the 30-minute reset more useful than a long list of rules. It is a repeatable system that interrupts physical strain and project risk before either becomes expensive.
I am discussing Blender 5.2 LTS concepts here, because its documentation covers data recovery, although the ergonomics apply equally to ZBrush, Substance 3D Painter, Houdini, Nomad Sculpt, or a spreadsheet. This is general computer-work safety, not a Blender-specific discovery. [11]
A reset is simple: save the current stage of work, take your hands off the input devices, stand or shift position, focus into the distance, then return with your chair and body still properly arranged. The point is not to be ceremonious. It is to prevent uninterrupted tension from becoming your default posture.
Why 30 minutes is a useful interval
The useful part of a break is not its duration alone. It changes the loading on your body. During Blender work, the mouse hand often holds a low-level grip, the keyboard hand hovers over shortcuts, and the eyes remain fixed at one distance.
That sustained stillness is the problem. Modeling is especially deceptive because it feels active. You may be moving vertices constantly, but the larger muscles around your neck, upper back, forearms, and hips can remain almost static.
WorkAssess recommends brief movement or stretching breaks every 30 minutes, with short micro-breaks lasting roughly 30 to 60 seconds. [1] For a Blender beginner, that is a practical interval because it is short enough to remember and long enough to finish a small task.
Do not interpret the timer as permission to work badly for 29 minutes. A reset works best when the starting position is reasonable. It is a correction loop, not a cure for a chair that leaves your feet dangling or a monitor positioned at chin height.
The familiar 20-20-20 eye rule can run alongside it. Every 20 minutes, look at something around 20 feet away for 20 seconds. It is a way to break continuous close focusing, not an eye workout or a substitute for addressing pain. [3]
Once each hour, take a slightly longer break of around three minutes. Walk to refill water, open a window if the room needs it, or do a few shoulder and hand movements. The movement matters more than finding the perfect stretch sequence. [1]
For creative work, I would tie these breaks to milestones rather than waiting for an alarm to feel arbitrary. Finish a blockout pass, save. Apply a UV edit, save. Before launching a heavier render, stand up and look away.
That is a habit, not a rule. If you are in the middle of a delicate weight-paint adjustment or setting a render that needs watching, finish the immediate operation first. The mistake is treating “I am concentrating” as a reason to skip breaks indefinitely.
Start with the body, not the fancy chair
A good ergonomic setup starts with support, not accessories. Sit fully back in the chair so its support reaches from the hips toward the shoulder blades. Your back and neck should be upright, without forcing your chest into an exaggerated military posture. [1]
Put both feet flat on the floor. If the chair height that suits your desk leaves them unsupported, use a footrest. Knees and hips should sit at approximately the same level, rather than pushing the knees sharply upward or letting the legs hang. [1]
Then let the shoulders drop. Many Blender users unconsciously raise them while orbiting a dense scene or holding a stylus precisely. Raised shoulders are usually a sign that the desk, chair, input device, or monitor position needs attention.
Aim for elbows around 90 to 100 degrees. That range leaves the forearms supported and avoids reaching forward to the keyboard or mouse. Keep the wrists neutral, broadly within 15 degrees of straight rather than cocked upward, downward, or sideways. [1]
For a mouse-and-keyboard Blender workflow, place the mouse close enough that you do not lead every movement with the shoulder. For pen sculpting in Blender or ZBrush, apply the same test to the tablet: the hand should not have to bend sharply just to reach its active area.
This is why a giant desk can be worse than a smaller, organised one. If the keyboard is central but the mouse lives 40 centimetres to the right, every navigation action becomes a reach. Blender’s shortcut-heavy workflow does not exempt it from basic joint mechanics.
A wrist pad can help some people avoid resting their wrists against a hard desk edge. Basic pads cost about $10, while more elaborate ergonomic support arrangements can exceed $50. That does not make a pad mandatory, and it should not lock your wrist into a bent position. [1]
If hand, wrist, shoulder, or neck pain persists, seek advice from a qualified healthcare professional. No article can diagnose whether discomfort comes from workstation setup, workload, a pre-existing condition, or something else.
Put the screen where your eyes and neck can tolerate it
The monitor should generally sit about an arm’s length away, with the top edge at or slightly below eye level. That arrangement reduces the need to crane your neck upward or lean forward into the screen. [2][3]
A 1920 by 1080 display is a sensible minimum for comfortable general Blender use. It is not a rendering requirement or a quality guarantee, but cramped resolution can make outliner panels, shader graphs, reference images, and timeline controls compete for limited space. [2]
Do not chase resolution as if it solves eye strain by itself. Text scale, interface contrast, screen brightness, room lighting, sleep, dry eyes, and unbroken viewing time all affect how a session feels. A sharp screen can still be tiring when it is much brighter than the room.
Match monitor brightness to the ambient light instead of working with a glowing display in a dark room. A desk lamp and gentle background lighting can reduce the extreme contrast between the screen and its surroundings. Some setups use an LED bias-light strip, often around $15, behind the display. [8]
That strip is optional. The useful principle is balanced lighting, not buying a particular accessory. Avoid a bare lamp reflecting directly in the screen, because glare makes you squint, lean, and reposition your head in ways that defeat an otherwise good setup.
Blinking is easy to forget during close inspection work. When you are looking for faceting in a normal map, judging roughness breakup, or evaluating a small render crop, make a conscious effort to blink and periodically shift focus away from the display. [3]
Save during the reset, because physical safety is not the only safety
A Blender crash will not injure you, but losing an evening’s work can encourage exactly the unhealthy behaviour beginners should avoid: sitting longer, rushing reconstruction, and refusing to stop because the scene is finally back where it was.
Blender’s documentation identifies crashes as a normal software issue with multiple possible causes, including bugs, graphics drivers, memory pressure, and system-level faults. A crash is not proof that you clicked the wrong tool. [9]
Large Blender scenes make the risk easier to understand. High-resolution sculpt meshes consume memory. Dense geometry, large texture sets, simulations, geometry nodes, and high-resolution renders can all increase demand on RAM, VRAM, storage, and drivers.
The practical response is redundancy. Enable Auto Save and Save Versions, make manual saves at meaningful milestones, and use filenames that tell you what changed. Blender’s recovery documentation exists because saved recovery states can matter after an unexpected closure. [11]
A useful filename is not final.blend, followed by final2.blend, followed by final_reallyfinal.blend. Use a project name, task, and version number, such as robot_head_retopology_v07.blend. It takes seconds and makes rollback possible when an edit goes wrong.
Auto Save is not a replacement for regular deliberate saves or external backups. It is a recovery measure, and recovery files can be overwritten or unavailable in the same circumstances that caused the system failure. Keep copies of important projects on separate storage or a reliable backup service. [11]
Keep Blender, your operating system, GPU driver, and add-ons current, but treat updates sensibly. Blender’s development team continues to address stability and quality work, while its crash guidance also points users toward current software and diagnostic information. [9][10]
For a deadline-sensitive project, update one component at a time and confirm that your usual scene opens correctly. An add-on, driver, or beta build can be valuable, but production work benefits from a stable, known setup more than novelty.
Keep the workstation electrically and thermally safe
Blender itself does not create special electrical hazards. The relevant issues are ordinary computer safety: use equipment rated for local voltage and plug standards, maintain proper grounding, and do not overload outlets or extension leads. [4][12]
This matters more in a rendering setup because a desktop, monitor, external drives, tablet, and lighting may share one desk area. A crowded power strip is not automatically unsafe, but it should be appropriate for the load and in sound condition.
Keep air vents clear and periodically remove dust from the computer and peripherals. Intensive viewport work and rendering can raise CPU and GPU temperatures, so a poorly ventilated cabinet or room can turn a long render into unnecessary hardware stress.
Humidity and heat vary by region, but the underlying instruction is straightforward: keep electronics dry, ventilated, and appropriately grounded. If you notice damaged cables, hot plugs, persistent burning smells, or repeated breaker trips, stop using the equipment and address the electrical issue. [4][12]
Optional accessories are not the foundation
Blue-light filtering glasses are often marketed as essential for screen users. Non-prescription pairs commonly cost around $15 to $80, while prescription versions can cost $120 or more. [6]
The evidence does not reliably show that blue-light glasses reduce digital eye strain or improve sleep. Some people report subjective comfort, but that is not the same as establishing them as necessary protective equipment. [6]
If you like tinted lenses and they feel comfortable, they are a personal preference. Put the money into monitor placement, lighting, breaks, or an eye examination first, because those address more established aspects of screen comfort. [3]
The same restraint applies to ergonomic accessories. A wrist support, vertical mouse, footrest, monitor arm, or pen display can be useful when it solves a specific positioning problem. None of them compensates for never moving, poor posture, or working through pain.
The beginner-safe Blender setup is therefore not an expensive kit. It is a repeatable working rhythm: arrange the body well, view the screen sensibly, stop briefly every 20 to 30 minutes, save before you need recovery, and maintain the computer that holds your work.
Frequently Asked Questions
What are the best ergonomics practices for Blender beginners?
Beginners should sit fully back in a chair with support from hips to shoulder blades, keep feet flat on the floor or on a footrest, and maintain knees and hips at about the same level. Shoulders should be relaxed, elbows positioned around 90 to 100 degrees, and wrists kept neutral within about 15 degrees of straight. The monitor should be at arm’s length and eye level to reduce strain.
How often should beginners take breaks when using Blender?
It is recommended to take brief movement or stretching breaks every 30 minutes, lasting about 30 to 60 seconds. Additionally, the 20-20-20 eye rule suggests looking at something 20 feet away for 20 seconds every 20 minutes. Every hour, a slightly longer break of around three minutes for walking or light movement is advised.
How do I set up my Blender workspace to avoid strain?
Arrange your desk so your joints start in neutral positions: sit with back support, feet flat, knees and hips level, shoulders relaxed, elbows near 90 to 100 degrees, and wrists straight rather than bent. Position your monitor at or slightly below eye level and about an arm’s length away. Ensure your chair height allows your feet to rest comfortably, using a footrest if needed.
What is the 30-minute reset method for Blender users?
The 30-minute reset involves saving your work, standing up, relaxing your hands, and looking away from the screen before discomfort arises. This break interrupts physical strain and reduces project risk by preventing sustained tension and encouraging proper posture throughout your session.
Are blue-light glasses necessary for Blender work?
Blue-light glasses are optional and not required protective equipment. Current evidence does not reliably show they reduce digital eye strain. Proper monitor positioning and regular breaks are more effective ways to address eye strain risks.
How we researched this
This article was assembled from 12 cited references.
Nothing here is based on hands-on testing. Where a figure or finding appears, it belongs to the source cited beside it, and the writing says so rather than implying otherwise. Every source is listed below so you can check it.
Sources
- Desk Stretches and Movement Breaks | WorkAssess
- Requirements — Blender
- How to Reduce Eye Strain: What Actually Works - ScienceInsights
- Regional Variations - Electronics Guide
- 23 Blender tutorials to boost your 3D modelling and animation skills
- Blue Light Glasses: Do They Work, and Are They Worth It? – Dymesty AI Glasses
- I tried AYO+ Blue Light Therapy Glasses to help combat my crushing morning fatigue - here's how I feel after 3 months
- Home Office Lighting Guide (2026) | DeskSetupPro
- Crashes - Blender 4.4 Manual
- Winter of Quality 2026 — Blender Developers Blog
- Recovering Data - Blender 5.2 LTS Manual
- Electrical Safety Advice for Blenders/ Blenders Safety
Related Articles
Blender Safety Tips for Beginners
Learn essential Blender safety tips for beginners on ergonomics, data backup, hardware care, and digital security to work safely and efficiently.
Using Blender for Education
Learn how to use Blender for education with tips on setup, hardware, and teaching modeling, lighting, and rendering effectively.
Blender Tips for Beginners: Master Object and Edit Modes
Learn essential Blender tips for beginners, including object vs edit mode, applying scale, and mastering transform shortcuts for better 3D modeling.
Sculpting in Blender for Beginners
Learn sculpting in Blender for beginners with key brushes, workspace setup, and dynamic topology tips to start your 3D sculpting journey.