
Create Realistic Environment in Blender: Step-by-Step Guide
Learn how to create a realistic environment in Blender with tips on terrain, texturing, lighting, and scale for believable 3D scenes.
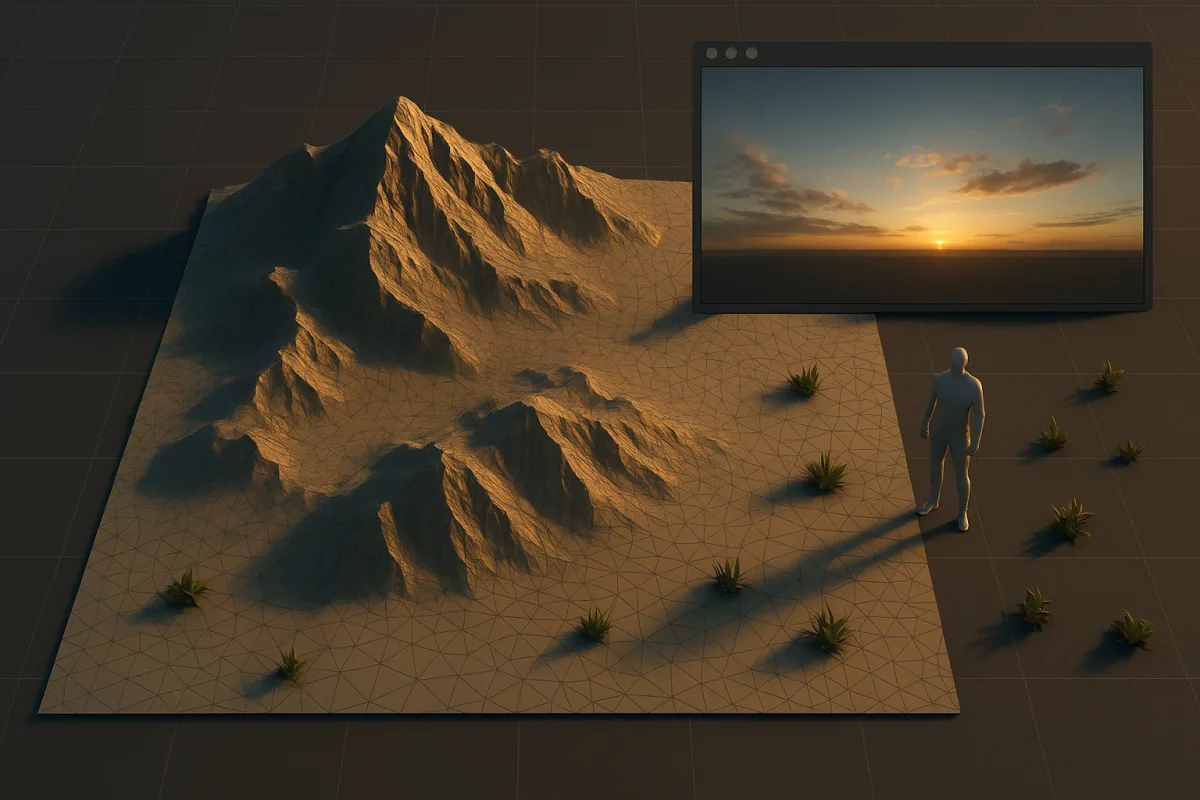
Start with the shot, not the forest
This guide uses Blender 4.5 LTS, with Cycles or Eevee for look development. The exact panel positions will change between Blender releases, but the underlying problem does not: realism begins with what the camera needs to explain.
Pick a camera angle before making terrain. Establish where the viewer stands, what occupies the foreground, where the eye travels, and what breaks the horizon. A scene with excellent assets still looks false if every element receives equal visual weight. [6][7]
Place Blender’s default cube at the intended ground level before modeling. Its default dimensions give you a useful two-metre human-scale reference, which helps prevent oversized rocks, implausibly narrow paths and vegetation that feels toy-like. [6]
This is not a rule that every environment needs a visible person or building. It is a useful production habit. Even a natural landscape needs some internal scale relationship, such as grass against stones, stones against a fallen trunk, and trunks against terrain.
Block the landscape with simple forms first. Work in broad elevation changes, drainage lines, cliffs, banks and flat areas where people or objects could plausibly stand. If the silhouette and camera framing fail at this stage, adding leaf cards will only make failure slower to render.
Make terrain that has more than one frequency of detail
A terrain plane displaced by one Noise Texture is rarely enough. It creates an even, procedural wobble, while outdoor ground usually has large landform changes, mid-scale erosion patterns, then small surface breakup. Blender’s procedural texture and displacement tools support that layered approach. [6]
In Blender 4.5 LTS, separate those jobs. Use a broad procedural mask or sculpted height information for hills and depressions, a second noise pattern for weathering and erosion, then a finer texture for soil breakup. Keep the small displacement subtle.
The reason is shading as much as shape. A low sun needs enough mid-scale form to catch light, but micro-displacement should not make soil behave like crushed stone. If every square metre has the same frequency and amplitude, the terrain reads as generated.
Use masks to decide where each material belongs. A slope mask can reduce loose grass on steep banks, a low-area mask can collect darker soil, and a painted path mask can suppress vegetation. Geometry Nodes can use masks and attributes for context-aware placement, including moss or debris distribution. [6]
Do not confuse procedural variation with random variation. Randomly placing every material everywhere looks noisy. Place variation according to a readable environmental logic: exposed areas differ from sheltered ones, paths differ from undisturbed ground, and rock outcrops differ from soil.
Solve the asset budget before you make individual assets
Decide whether the scene is an offline still, an animation, a PC game environment, or a mobile or VR asset. That decision controls texture size and geometry density more effectively than a universal “high quality” setting ever will. [5]
For mobile or VR work, 512 by 512 to 1,024 by 1,024 textures are suggested ranges. PC game assets commonly use 2K maps, while 4K belongs on hero assets that need close inspection. [5]
For offline renders, 4K to 8K textures can be reasonable where the camera genuinely resolves that detail. A distant cliff covered in 8K maps is not automatically more realistic, it is often just heavier to load and slower to manage. [5]
General polygon guidance is similarly contextual. Simple props can fall around 500 to 2,000 polygons, complex props around 2,000 to 10,000, and detailed environments around 50,000 to 200,000 polygons. These are planning ranges, not quality scores. [5]
Use the extra geometry where it affects silhouette, cast shadows or close highlights. A rock near camera needs convincing broken edges. A distant rock can often use a simpler form, with normal and roughness information carrying much of its apparent surface detail.
Avoid modeling thousands of unique leaves early. The research brief specifically identifies this as a common efficiency mistake. Build a small kit of grass clumps, stones, branches and leaf forms, then distribute instances through Blender Geometry Nodes. [6]
Instances let you control density, rotation, scale and exclusion without manually managing an unworkable scene. More importantly, they let you revise the art direction. A forest edge is usually improved by changing distribution rules, not by hand-moving ten thousand objects.
Make materials describe use, exposure and wear
A realistic environment material is not simply a colour texture connected to Principled BSDF. It needs believable relationships between base colour, roughness, normal detail and placement. Blender’s node system is well suited to building those layered surface responses. [6]
Start by making roughness variation do useful work. Dry exposed soil, damp-looking low areas, broken rock faces and compacted paths should not all return light identically. Small roughness shifts can make a material feel far less uniform without pushing colour into obvious noise.
Use procedural masks and texture maps at different scales. Broad colour variation prevents repetition across a field, medium variation distinguishes deposits or erosion, and fine normal detail gives light something to catch. Keep their patterns from lining up, or the shader exposes its construction.
For assets that need hand-painted edge wear, decals or tightly art-directed masks, Substance Painter is the more appropriate tool than forcing Blender to perform every task. Prepare clean topology and UVs in Blender 4.5 LTS, export FBX or OBJ, then bring exported base-colour, roughness, metallic and normal maps back into Blender. [8]
Check imported textures under the actual render engine rather than trusting a flat material preview. The brief recommends testing Substance Painter exports in Eevee or Cycles, because a correct map set can still need adjustment once it meets the scene’s lighting. [8]
Scatter with cause, not just coverage
A bare landscape feels empty, but blanket coverage is not realism. Use Geometry Nodes in Blender 4.5 LTS to distribute pebbles, grass and debris according to terrain masks, slopes and distance from paths. [6]
Give each scatter layer a job. Pebbles break up bare earth, short grass softens soil transitions, taller plants establish growth zones, and occasional larger debris gives the eye scale. If one scatter system is trying to solve all four, it will look statistically even.
Leave some ground visible. Artists often respond to emptiness by increasing density until the terrain disappears. That can make the scene look like a carpet and also multiplies render and viewport costs. Variation in absence is part of natural distribution.
For very large procedural worlds, Houdini can be a better generator than Blender. The supported workflow is to generate complex environment assets in Houdini, export FBX or Alembic geometry, materials or animation, then import the result into Blender while keeping the pipeline non-destructive through linking or referencing. [9]
That is not an argument that Houdini is required for every field of grass. Blender Geometry Nodes is a strong fit for scene-level scattering and controlled iteration. Houdini becomes attractive when procedural world generation itself is the central production problem. [9]
Light the world before grading the render
Load an HDRI through an Environment Texture in Blender’s World Shader Editor. HDR images provide environmental illumination and reflections, which gives outdoor surfaces something coherent to reflect instead of placing every source by hand. [1][2]
Use a Mapping node to rotate the HDRI until its dominant light direction serves the camera. Adjust World strength for overall brightness, but do not expect strength alone to solve a composition where the sun direction is fundamentally wrong. [1][2]
Choose HDRIs with visible strong light sources when you need readable outdoor shadows. If the panorama gives attractive ambience but weak directional shadows, combine it with a Blender Sun or point light for direct control. That hybrid setup is explicitly recommended for HDR lighting workflows. [2]
For a faster, art-directable sky, use Blender 4.5 LTS’s Sky Texture with the Multiple Scattering model and adjust turbidity. Use an HDRI, including panoramas such as those offered by HDRI Hub, when detailed sky appearance and reflection information matter to the shot. [3][4]
If physical sun placement matters, enable Blender’s Sun Position add-on and enter the geographic location, date and time. It can position the sun from those inputs, which is useful when the environment must match an architectural brief or photographic reference. [11]
The Helio extension offers another route, using NOAA Solar Calculator data to control sun and sky parameters including colour temperature and intensity. It suits artists who need more specific solar controls, although it is not necessary for a stylised or purely compositional setup. [12]
For manual time-of-day work, the briefing places sunrise and sunset around 3,000 to 3,500 K, with a low sun and roughly 1,570 W/m². Noon is described around 5,500 to 6,500 K and roughly 15,600 W/m². [11][12]
Use those figures as starting points rather than commandments. Exposure, HDR brightness, camera response and artistic intent all change the image. The useful principle is that sun angle, shadow length and colour must agree, otherwise viewers recognise a lighting contradiction immediately.
Add atmosphere last, and use less than you expect
Atmospheric depth can separate foreground from background, but it cannot repair weak landforms or lighting. First establish the camera, terrain scale, materials and sun direction. Only then add mist to support distance and depth. [6][7]
In Blender 4.5 LTS, use Principled Volume conservatively. Density above 0.1 can become opaque enough to hide surfaces and flatten the image, while the recommended working range is approximately 0.01 to 0.1. [6]
Keep the fog from becoming a universal grey filter. Let major shapes remain legible and evaluate it from the final camera, not only from the viewport. Excessive fog, glare, saturation and extreme depth blur are all identified as frequent causes of artificial architectural-style renders. [7]
There is no supported evidence in the supplied research that real regional humidity or air quality directly changes Blender render outcomes. You can art-direct haze and mist as visible atmosphere, but avoid presenting a Blender setting as a measured simulation of local weather conditions.
Finish with restrained exposure and contrast adjustments. Grade to clarify the lighting hierarchy, not to rescue it. If the scene only works after heavy glare, saturation or blur, return to the assets, materials and light direction first. [7]
Plan revisions as part of the environment
A simple prop can take hours, medium-complexity work one to three days, and a complex environment two to four weeks of modeling. Detailed texturing may add several days to a week, while advanced lighting can take several days. [10]
Rendering adds its own schedule. Simple scenes may finish in hours, while complex scenes can require days, and a high-quality environment including revisions may take several weeks to months. Hardware, artist experience and scene complexity make these approximate ranges rather than promises. [10]
The practical response is to establish checkpoints. Approve the camera and blockout before high-frequency terrain work, approve lighting before final scatter, and approve material direction before committing to large texture exports. This protects the work that takes longest to replace.
Frequently Asked Questions
How do I start creating a realistic environment in Blender?
Begin by selecting a camera angle that defines what the viewer will see and where the eye travels. Establish scale references using Blender’s default cube at ground level to maintain believable proportions. Block out the terrain with simple broad forms before adding details like vegetation to ensure the scene reads as natural rather than miniature or synthetic.
What are the best practices for terrain modeling in Blender?
Use multiple layers of detail rather than a single noise texture for displacement. Combine broad elevation changes with mid-scale erosion patterns and subtle fine surface breakup. Apply masks to control material placement logically, such as reducing vegetation on steep slopes or highlighting paths, and avoid random variation by following environmental logic.
How can I optimize texture resolution for Blender environments?
Choose texture resolutions based on the final use of the scene: 512×512 to 1,024×1,024 for mobile or VR, 2K (2,048×2,048) for PC games, and 4K to 8K for offline renders where the camera closely inspects surfaces. Avoid unnecessarily high resolutions on distant objects to reduce load and improve performance.
What lighting setups help create realistic environments in Blender?
Use HDR images loaded into Blender’s World Shader Editor for broad illumination and reflections. Supplement HDR lighting with a Sun or other conventional lights only when specific shadow directions are needed. Adjust sun position using Blender’s Sun Position add-on or tools like Helio for accurate time-of-day lighting, and keep volumetric densities low to preserve depth cues.
How do I manage scale and detail for believable Blender scenes?
Maintain consistent scale relationships by referencing the default cube and comparing objects like grass, stones, and trunks within the scene. Control detail frequency in terrain and assets to avoid uniform patterns, and allocate polygon counts and texture resolutions according to the scene’s purpose to balance realism and performance.
How we researched this
This article was assembled from 12 cited references.
Nothing here is based on hands-on testing. Where a figure or finding appears, it belongs to the source cited beside it, and the writing says so rather than implying otherwise. Every source is listed below so you can check it.
Sources
- How to Add an HDRI Background in Blender | Skillademia
- HDR Lighting: Blender Environment Tips - Blender Base Camp
- Create Realistic Sky in Blender
- HDRI for Blender: World Node Setup, 161 Skies | HDRI Hub
- Texture Resolution Guide: What Size Do You Actually Need in 2026? | TextureX
- Why your Blender environments look fake and how to fix them - Toxigon
- 8 Common Mistakes to Avoid in 3D Architectural Rendering | SampleBoard
- Peut-on utiliser Substance Painter avec Blender ? - Apprendre Blender
- Building Natural, Urban and Procedural Worlds in Houdini | BSM3D
- How Long to Create 3D Art: Timelines & Factors
- Sun Position — Blender Manual
- Helio — Blender Extensions
Related Articles
Best Practices for Creating 3D Environments in Blender
Learn best practices for creating modular, efficient 3D environments in Blender with topology, LOD, and Geometry Nodes tips.
Create 3D Logo in Blender: Step-by-Step Modeling Guide
Learn how to create a 3D logo in Blender with SVG import, extrusion, beveling, lighting, and export tips for web and print.

Create Realistic Sky in Blender
Learn how to create a realistic sky in Blender using procedural textures, HDRIs, and sun direction for believable outdoor lighting.
Realistic Fire Effect in Blender
Learn how to create a realistic fire effect in Blender using Mantaflow, shaders, lighting, and simulation tips for photorealistic results.