
Realistic Water in Blender
Learn the best techniques for creating realistic water in Blender using Ocean Modifier, fluid sims, and layered shading for stunning results.
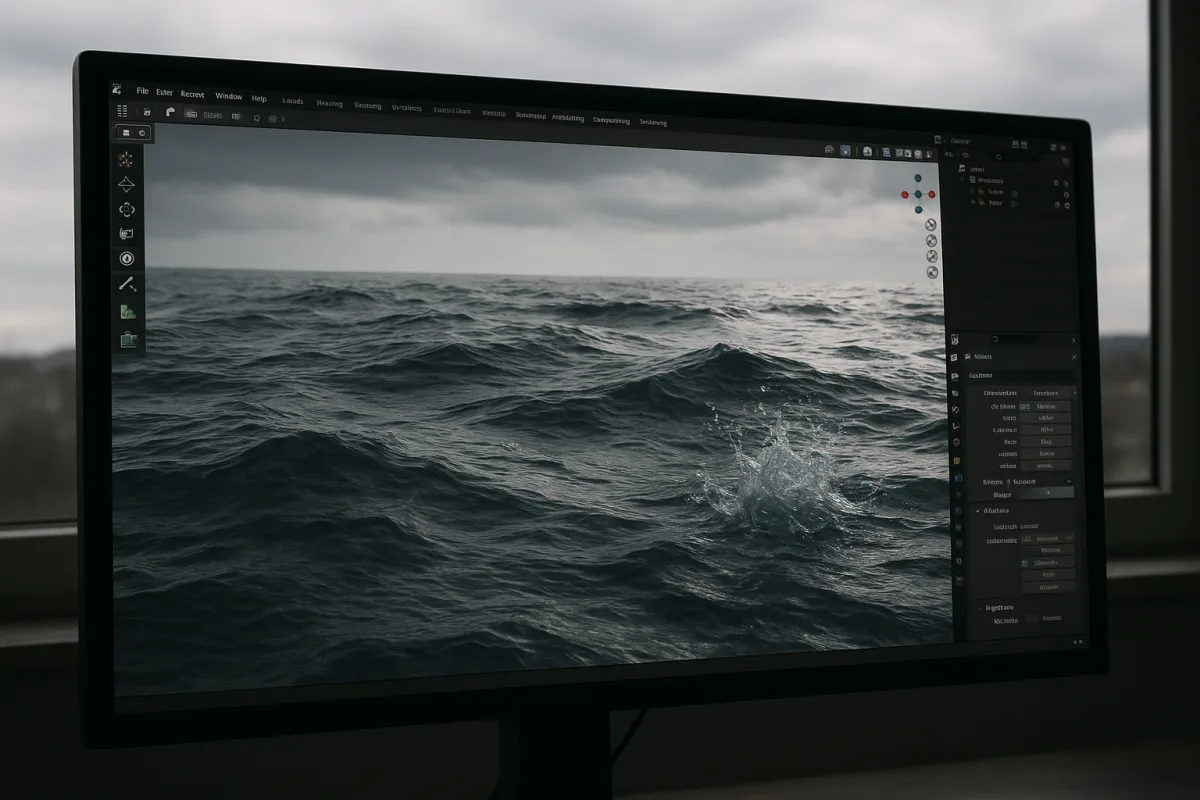
Realistic Water in Blender Starts With Scale Separation
The useful idea: water is several scales of motion at once
The best way to enhance a water simulation is not usually to push one simulator harder. It is to decide which scale of motion deserves geometry, which belongs in particles, and which should exist only in shading.
Water looks complicated because it carries detail across a ridiculous range of sizes. A tidal swell might span hundreds of metres, a boat wake several metres, a ripple a few centimetres, and surface sparkle less than a millimetre.
No practical Blender scene needs to simulate all of that literally. Even if it could, the cache would be expensive, the mesh would become difficult to manage, and most of the calculation would disappear in the final pixels.
Think of a water shot as three overlapping frequency bands. The low-frequency layer establishes volume and direction, the middle layer supplies interaction and recognizable fluid behaviour, and the high-frequency layer controls highlights, roughness and apparent detail.
That division is not a law. A close-up of a droplet landing on a wet table needs more real geometry than a distant aerial ocean shot. It is, however, a durable production habit.
I am using Blender 5.1 terminology here, specifically its documented Ocean Modifier. The interface changes over time, and FLIP Fluids, Houdini and Marmoset Toolbag each have their own version-dependent import and cache details.
Broad motion: why the Ocean Modifier is not a splash simulator
Blender 5.1’s Ocean Modifier is designed for broad ocean surfaces. Its wave pattern is generated with an FFT, short for Fast Fourier Transform, a mathematical method that combines many wave components into one surface. [12]
The important consequence is that it does not solve water colliding with your boat, cliff or character. It generates a plausible statistical sea surface, with waves that share a coherent direction, scale and distribution.
That makes it a strong choice for the low-frequency layer. A camera looking across open water needs horizon-scale variation, wave trains and changing silhouettes more than it needs physically exact interaction at every crest.
The modifier’s value is also that its broad displacement gives the shader something real to light. A perfectly flat plane with a noisy normal map can reflect an HDRI, but it will not change silhouette or cast convincing self-shadowing.
Do not ask the Ocean Modifier to make fine wind chop do all the work. Increasing geometric detail can become costly, while tiny waves often contribute more through broken specular reflection than through visible mesh displacement.
Instead, let the ocean mesh carry the large forms. Add a second, smaller displacement or bump layer in the material for capillary-scale breakup, and ensure its direction does not blindly match every broad wave.
That last point matters. If every layer shares identical scale, direction and speed, the surface reads as a procedural pattern. Real water can have a dominant wind direction while still carrying cross-ripples, reflected waves and local disturbance.
A pool material tutorial published by BlenderNation similarly centres displacement and shader-node work, which is the right mental model for contained water. [1] The simulation or modifier establishes form, then the material makes that form read as wet, deep and reflective.
Local events: choose a fluid solver only when interaction matters
When water must pour from a pipe, strike a surface, wrap around an obstacle or throw a wake, the middle-frequency layer needs a fluid simulation. This is where Mantaflow or FLIP Fluids is more appropriate.
Blender’s fluid workflow can use Mantaflow-style settings to control the simulation domain, resolution and time stepping. A splash tutorial indexed by Foro3D focuses on particles alongside Mantaflow, reflecting an important practical point: a liquid mesh alone seldom sells impact. [3]
FLIP Fluids is aimed at small- to medium-scale liquid effects. Its own limitation documentation makes clear that it is not intended to cover every scale, including microscopic droplets or an entire sea. [7]
That limitation is not a defect. It tells you where to stop simulating. A glass filling with water, a breaking wave against a rock, or a small waterfall can justify a FLIP-style solve. An ocean horizon does not.
For a mixed shot, use the Ocean Modifier as the far-field water and reserve the fluid domain for the interaction near the camera. The two surfaces must share believable scale, water level, colour and wave direction, but they need not be one simulation.
This separation also makes iteration possible. You can alter the weather, camera timing or broad ocean shape without recaching every splash, and you can re-simulate the interaction zone without rebuilding the entire sea.
Resolution, particles and time steps: the cost behind “more detail”
Fluid resolution divisions determine the size of the simulation’s cells. More divisions mean smaller cells, which can describe thinner sheets, tighter curvature and smaller motion, but they also raise memory and cache costs quickly.
The trap is assuming that doubled resolution means twice the work. A fluid domain is volumetric. Increasing resolution across width, height and depth can multiply the number of cells dramatically, before particles, meshing and render-time displacement enter the picture.
Particle count has a related trade-off. More particles can support smoother, more stable liquid detail, but a dense particle system still needs to be simulated, stored, meshed and often converted into secondary effects.
Adaptive time stepping helps because it allows the solver to use shorter steps when motion is fast enough to risk missing an event. The CFL setting, which limits how far fluid can travel per step, balances stability and cost.
Lowering the permitted travel distance can improve accuracy around fast collisions and thin splashes. It also means more steps, longer simulation time and potentially a much larger cache. There is no universally correct CFL value for every Blender scene.
That is why “best Mantaflow settings” articles often disappoint. The correct settings depend on the real-world scale of the domain, the smallest feature visible to camera, collision speed, shot duration and available hardware, not a magic preset.
Start from the framing, not from the solver. If a splash occupies 150 pixels, simulation detail far below a pixel may not survive motion blur, depth of field, mesh smoothing, denoising or video compression.
Run a deliberately cheap cache first. It should answer visual questions: Does the water hit at the right time? Does it carry enough mass? Does the wake travel in the right direction? Only then spend resolution on the visible failure.
Whitewater is a separate visual problem
A common reason simulated water feels like gel is the absence of entrained air. Foam, bubbles and spray are not merely white material added to a crest. They are evidence of turbulence, impact and breaking water.
At the scale of a hero splash, secondary particles can represent droplets and foam. At a longer distance, use masks driven by velocity, curvature, depth or wave cresting, then feed them into colour, roughness and normal variation.
The key is to avoid painting foam everywhere. Calm water is usually darker, smoother and more reflective. Whitewater should gather where energy is high, such as collisions, shore break, wake edges and steep, overturning waves.
If the hero fluid work begins in Houdini, export flowmaps and whitewater data alongside the mesh rather than expecting Blender to infer all motion afterward. Those maps can drive directional ripples, foam drift and breakup after import.
Marmoset Toolbag is useful downstream for real-time look development and presentation, particularly when flowmaps need to survive into an asset workflow. Keep units and scene scale consistent across Houdini, Blender 5.1 and Marmoset, or foam speeds and texture scale will drift.
The research brief also identifies LiquiGen as an option for base-fluid simulation in a cross-tool workflow. That does not mean it replaces Blender’s ocean, material or lighting work. It is another choice for the local-fluid layer.
The material resolves detail the simulation cannot afford
For water, the Principled BSDF is not a shortcut around physics. It is a useful surface model, but it needs geometry, normals and an environment worth reflecting before its specular response can do its job. [2]
Keep roughness variation subtle and purposeful. A clean pool, rain-disturbed puddle, silty river and breaking sea should not share one roughness map, because roughness is standing in for surface disturbance below mesh resolution.
For depth, use volume absorption and volume scattering cautiously. Absorption removes light through water and gives thickness-dependent colour, while scattering introduces suspended material and softens visibility. Together they can suggest depth, turbidity or sediment.
Too much scattering makes water read as foggy plastic. Too little absorption leaves deep water looking like a thin tinted sheet. The right balance depends on the depth of the water volume and the conditions being represented.
Blender-specific evidence for seasonal water setups remains limited, so this is an application of general fluid and shading principles rather than a proven seasonal preset. Colder, muddier or stormier water can be suggested through adjusted flow, suspended particles, absorption and scattering.
Wind is another bridge between simulation and look development. It can alter broad ocean direction, push spray and particles, and justify a stronger, more broken normal layer. It should not be represented solely by turning up shader noise.
Reflections are the environment, not a water setting
Water reflects its surroundings. If the surrounding world is empty, a physically plausible water shader can still look black, grey or lifeless. This is why HDRI choice is part of water look development.
HDRI lighting guides consistently stress strength and rotation as the fundamental controls. Strength changes illumination and reflection brightness, while rotation moves the bright sky, sun and horizon across the water surface. [4][5][6]
A sunny HDRI creates sharp, directional reflection paths and strong specular sparkle. An overcast HDRI produces broader, softer values and can be more useful when you need to judge surface shape without a blown-out sun streak.
Rotate the HDRI to compose reflection, not just to make the background look nice. A bright patch placed outside the camera view can still become the most important visible feature because it travels across the water as reflected light.
This is especially important for ocean shots. The mesh may be correct, but without a useful reflection angle the broad waves lose their readable planes. Artists then often add excessive displacement, when the missing ingredient is lighting.
Plan for uncertainty in performance
There are no comprehensive 2026 benchmarks that establish exact render or cache times for high-resolution Blender water. Treat any precise time estimate as suspect unless it matches your scene, resolution, solver, renderer and hardware.
Blender’s own requirements are a baseline rather than a fluid-simulation guarantee. [9] Current hardware recommendations for demanding Blender rendering include at least an eight-core CPU, 64 GB of RAM and high-end GPUs such as NVIDIA’s RTX 5090, but that is capacity guidance, not a promise of fast water caches. [10]
For enhancement work, RAM and storage matter as much as headline GPU performance. Fluid caches, particle data, meshed surfaces and high-resolution displacement can consume substantial space before Cycles begins rendering a frame.
The practical method is simple: validate scale separation early. Simulate only the interaction that changes the silhouette or timing, shade the detail that mainly changes highlights, and use the environment to reveal both.
Frequently Asked Questions
What are the best techniques for creating realistic water in Blender?
Realistic water in Blender relies on separating motion scales: use the Ocean Modifier for broad, repeating ocean waves and add smaller ripples and surface roughness through material displacement and shader nodes. For local fluid interactions like splashes or wakes, use fluid simulators such as Mantaflow or FLIP Fluids. Additionally, build whitewater and foam as separate layers since fluid simulations alone rarely capture these details convincingly.
How do I combine Ocean Modifier and fluid simulations for water in Blender?
Use the Ocean Modifier to generate the large-scale, low-frequency ocean surface, providing volume and wave direction. Then, add fluid simulations with Mantaflow or FLIP Fluids to handle middle-frequency local events like splashes, wakes, or collisions. This layered approach allows broad ocean motion to coexist with detailed fluid interactions without overloading a single simulation.
When should I use Blender's Ocean Modifier versus Mantaflow or FLIP Fluids?
The Ocean Modifier is best for simulating large bodies of water with broad, statistical wave patterns, such as seas or lakes, where detailed fluid interaction is not required. Mantaflow and FLIP Fluids are suited for smaller-scale, local fluid events involving interaction, such as pouring water, splashes, or wakes. They are not intended for simulating entire oceans or microscopic spray.
How can I optimize fluid simulation resolution in Blender for water effects?
Increase fluid-domain resolution only in areas visible to the camera to avoid unnecessary computational cost, memory use, and cache times. Higher resolution improves detail but does not automatically enhance shader quality. Balancing resolution with simulation cost ensures efficient use of resources while maintaining visual fidelity.
How does lighting affect realistic water rendering in Blender?
Lighting is integral to water realism; HDRI environments control reflections and highlights. Rotating the HDRI changes which parts of the environment appear in reflections, while adjusting HDRI strength affects the visibility of those reflections. Proper HDRI selection and tuning help water surfaces reflect light convincingly and contribute to the overall realism.
How we researched this
This article was assembled from 13 cited references.
Nothing here is based on hands-on testing. Where a figure or finding appears, it belongs to the source cited beside it, and the writing says so rather than implying otherwise. Every source is listed below so you can check it.
Sources
- Accurate Pool Material Set up (displacement & shader node tutorial) - BlenderNation
- The Cycles Shader Encyclopedia — Blender Guru
- Simulating Water Splashes in Blender with Particles and Mantaflow
- HDRI Lighting in Blender: Image-Based Lighting for Realistic Scenes - Blog - CGI Academy Hub
- HDRI Lighting: A Complete Guide - Attemptry Blog - Attemptry
- How to use an HDRI for lighting in Blender | HDRI Knight
- Limitations of the FLIP Fluids addon · rlguy/Blender-FLIP-Fluids Wiki · GitHub
- Lighthouse Bay – Fluid Simulation - Finished Projects - Blender Artists Community
- Requirements — Blender
- Best CPUs for Blender Rendering in 2026 | PCBuildRanked
- Rain.Water Shader - Blender
- Ocean Modifier - Blender 5.1 Manual
- https://wiki.blender.jp/Doc%3A2.6/Manual/Modifiers/Simulate/Ocean?utm_source=openai
Related Articles

Create Realistic Sky in Blender
Learn how to create a realistic sky in Blender using procedural textures, HDRIs, and sun direction for believable outdoor lighting.
Realistic Hair Techniques in Blender: Guide to Particle Hair
Learn realistic hair techniques in Blender using particle systems, guide hairs, and grooming tools for natural, believable hairstyles.
Best Lighting Techniques for Blender Rendering
Discover the best lighting techniques for Blender rendering using Cycles and Eevee to create realistic, well-shaped 3D models.
Blender 5 Beginner Tutorial Series: Learn 3D Modeling Basics
Explore a Blender 5 beginner tutorial series that teaches 3D modeling, topology, lighting, and rendering with a focus on workflow dependencies.