
Best Practices for Creating 3D Environments in Blender
Learn best practices for creating modular, efficient 3D environments in Blender with topology, LOD, and Geometry Nodes tips.
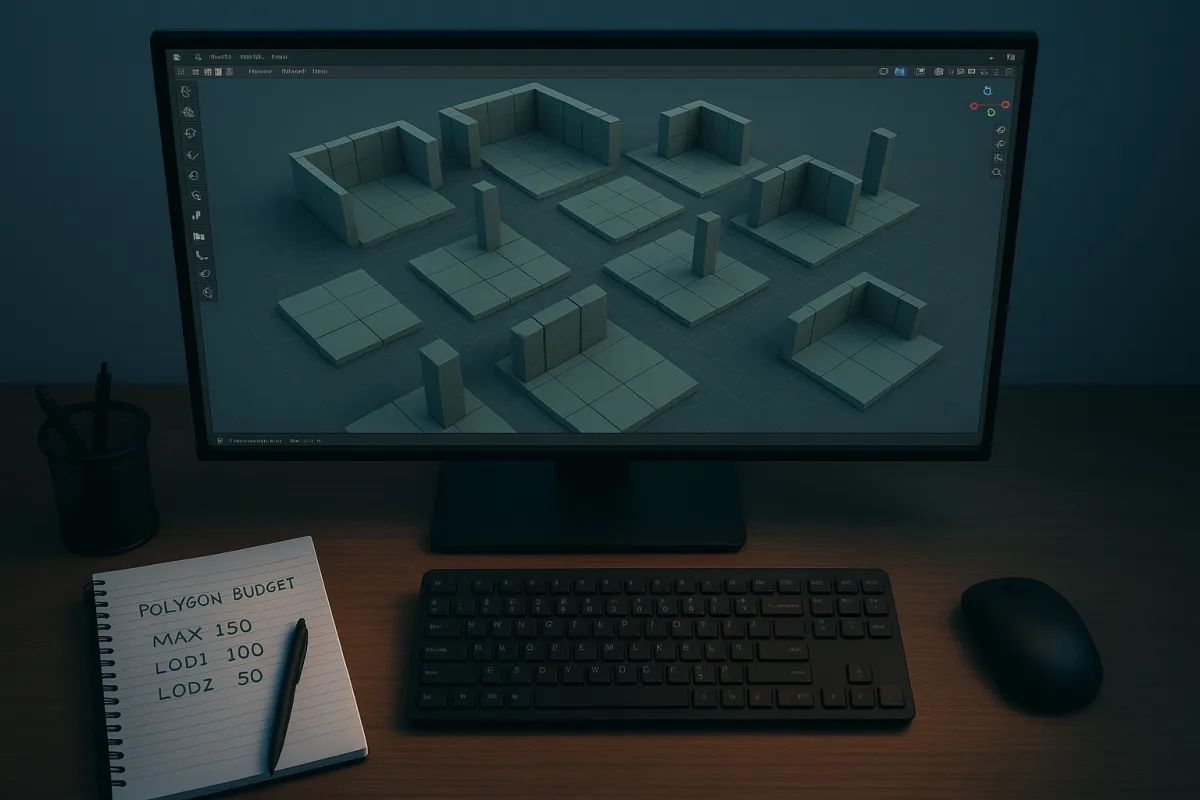
The efficient environment is an asset system
The most useful idea in environment modelling is not a modifier, an add-on or a clever Geometry Nodes graph. It is the modular asset system: a set of compatible pieces that can be assembled into many spaces without being remodelled each time.
I am working in Blender 4.5 LTS for the workflow described here. The principles apply equally in Unreal, Unity, Houdini, Substance 3D Painter or a proprietary engine, because the important part is not Blender’s interface. It is deciding what can repeat.
A modular system starts with a grid. A wall bay, floor slab, curb, door opening, stair riser or building column must share a deliberate unit of measurement. That shared unit lets one edit propagate across an entire district.
Blender for Visual Investigation describes modular modelling as constructing larger forms from reusable elements rather than modelling the whole structure as a unique object.[2] That sounds elementary, but it changes the cost of every later decision.
If a building facade is one mesh, changing window spacing means moving geometry, repairing UVs, reconsidering trim, and checking every affected material boundary. If the facade is a kit, the change may mean replacing one module and adjusting placement.
That is the real efficiency gain. A modular workflow does not necessarily make the first wall faster to model. It makes the tenth wall, the late art-direction pass and the inevitable request for a second layout much cheaper.
Start by defining what may repeat
Before modelling detail, divide the environment into three categories: structural modules, repeatable dressing assets, and hero assets. Structural modules are the kit. Dressing assets create lived-in variation. Hero assets earn the bespoke modelling time.
For a small industrial scene, the structural kit might include straight wall sections, inside and outside corners, a door bay, window bay, roof edge, floor tile, pipe support and several trim strips. None needs to be visually exciting alone.
A hero asset might be a damaged generator, a collapsed crane or an ornate entrance. It breaks repetition because it is unique in silhouette, story or camera importance. Making every object a hero is the usual route to an unfinished environment.
The grid should answer practical questions. Does a wall module measure two metres wide, four metres wide, or something based on an existing project standard? How deep is a floor? Where do pivots sit? Which parts must tile seamlessly?
These are design constraints, not technical housekeeping. A four-metre facade bay encourages a different building rhythm than a two-metre bay. The grid controls proportions, openings, texture scale and even where the player or camera perceives repetition.
In Blender 4.5 LTS, I would establish the module dimensions while the assets are still plain boxes. Apply object scale before relying on bevel widths, array spacing or procedural scatter, since unapplied scale makes supposedly identical modules behave inconsistently.
Early subdivision works against this stage. AnimSchool identifies premature subdivision, poor edge flow and uncontrolled N-gons among common modelling mistakes.[1] For an environment kit, subdivision before the dimensions are proven creates dense geometry that is harder to resize and less useful to instance.
Topology serves the module’s job
Clean topology does not mean every wall needs animation-ready edge loops. It means the mesh supports the operations it needs: bevels, shading, UV seams, LOD reduction and edits at connection points.
A flat architectural panel can be mostly simple quads with carefully planned supporting edges around openings. A rock scan proxy or broken concrete chunk may tolerate triangles and irregular topology where it will never deform. “All quads” is a useful default, not a religious rule.
The critical places are module boundaries. Vertices must land precisely on the grid, normals must shade consistently, and trim pieces must meet without tiny gaps. A slightly imperfect interior face is often harmless. A visible seam repeated fifty times is not.
Avoid modelling a unique crack, bolt pattern or stain into every structural module. Geometry is expensive to revise, and unique geometry makes repetition obvious rather than hiding it. Save those signals for overlays and dressing, where they can vary independently.
For real-time work, the N-3DS Blender game pipeline guide gives broad ranges rather than a universal target: simple props at 500 to 2,000 polygons, complex props at 2,000 to 10,000, basic environments at 10,000 to 50,000, and detailed environments at 50,000 to 200,000.[3]
Those figures are starting budgets, not permission to fill them. A dense urban scene can contain hundreds of repeated pieces, particles, decals, foliage and characters. The correct budget depends on target hardware, camera distance, engine features and how many assets appear together.
Mobile constraints are much tighter. The same N-3DS guidance places mobile props around 300 to 1,500 triangles and mobile characters around 3,000 to 10,000 triangles.[3] A modular kit helps here because one well-made low-cost piece can cover large visual area.
Make one module carry several distances
Level of detail is where modular modelling becomes a performance system. A far wall does not need recessed screws, individual bricks or a thick interior shell. It needs the silhouette, broad material response and enough contrast to read at distance.
Build the high-detail version only where it is justified, then create simpler representations for farther views. This can mean a reduced mesh, a simplified material, or an atlas-backed card, depending on the environment and target platform.
Do not confuse LOD with careless decimation. The lower-detail asset must preserve the cues that make the module identifiable: its outline, major openings, strong trim shadows and large color divisions. Remove small bevels and hidden backfaces first.
The payoff compounds because each LOD applies to every instance of that module. Reducing one wall section by a modest amount can matter more than optimising a single unique prop, simply because the wall is used throughout the environment.
This is also why early blockout matters. If the silhouette and navigation rhythm do not work with cubes, more polygons will not solve the problem. Blockout tests the expensive decisions, scale, composition and circulation, while changes are still cheap.
Use Geometry Nodes after the kit is reliable
Geometry Nodes in Blender 4.5 LTS is excellent at turning a small dressing library into believable density. A node tree can scatter pebbles, grass clumps, debris, roof vents or pipe brackets across surfaces with controlled random rotation, scale and density.
The useful mechanics are straightforward. “Distribute Points on Faces” generates placement candidates on a mesh surface, while orientation tools such as “Align Euler to Vector” let instances follow surface normals instead of floating upright through a slope.[3]
But procedural distribution only multiplies decisions you have already made. If the three available rubble pieces are the wrong scale, have identical materials, or do not fit the scene’s story, scattering five thousand of them produces five thousand wrong results.
Use attributes and masks to control where assets can exist. Debris should gather near damaged walls or drainage edges. Moss should favour damp, shaded areas. Roof equipment should respect walkways, structural supports and maintenance access rather than appearing at random.
Geometry Nodes has a learning cost, and that cost is real. A hand-placed cluster can be faster for one cinematic shot. Nodes become efficient when the distribution needs revision, must cover large terrain, or should respond automatically when the underlying architecture changes.
For truly large procedural landscapes or city-scale systems, Houdini is often the more natural authoring environment. Artivoxa’s Houdini guide and The Rookies’ Solaris workflow coverage both position Houdini and USD workflows around procedural, large-scale scene construction and interchange.[10][11]
That does not mean Blender has failed. It means the job has changed. Blender 4.5 LTS is capable for modular assets, layout and Geometry Nodes-based dressing. Houdini becomes attractive when rules, variations, terrain generation and pipeline handoff outweigh the cost of its technical learning curve.
UVs make reuse believable
A module system fails visually when every repeated panel reveals the same texture stamp. The answer is not automatically a larger texture. It is consistent texel density plus planned variation.
Keep comparable modules at comparable texel density, place seams where they are less visible, align islands logically, and inspect stretching before committing to materials. Blender Studio’s UV guidance and Blended Boris’s UV best-practice guide both emphasise seam planning, coherent island layout and distortion control.[7][18]
A wall bay and corner piece should share material scale. If their bricks or painted chips differ in size at the join, the audience may not identify the technical reason, but they will read the environment as assembled rather than built.
For many assets, 2048 by 2048 pixels is a practical upper ceiling, with albedo receiving the highest resolution priority and roughness, metallic and occlusion maps often needing less.[3] The right size still depends on screen coverage and intended reuse.
Texture baking gives modular assets a useful compromise. Bake high-poly curvature, ambient occlusion or normal information where it supports the surface, but keep baked lighting separate from base color. Blender’s 4.5 LTS manual distinguishes render baking workflows and the map data involved.[19]
Set normal, roughness, metallic and similar utility maps to Non-Color data in Blender 4.5 LTS. They are numerical instructions, not photographs. Treating them as color data can alter their values and produce incorrect shading.
Variation should sit above the reusable base material. A shared wall material can receive different dirt masks, decals, vertex-painted color, material parameters or small overlay meshes. This preserves the efficiency of instancing while preventing the eye from finding the repeat.
Light the assembled scene, not the isolated asset
Lighting is the test of whether the modular system is actually working. Repeated walls can look acceptable in flat viewport light and immediately reveal seams, inconsistent normals and mismatched roughness under a low-angle key light.
For final realism in Blender 4.5 LTS, Cycles is generally the appropriate renderer, accepting longer render times for more physically grounded light transport. EEVEE is the quicker option when iteration speed or real-time presentation matters more than exact indirect-light behaviour.[4]
Do not raise samples by habit. Sampling, denoising and light-path limits work together, and Blender’s sampling documentation makes clear that render noise and render time are directly connected to those choices.[21] Diagnose fireflies, insufficient light, excessive glossy bounce or bad materials before brute-forcing samples.
NVIDIA DLSS 4.5 support planned for Blender Cycles 5.3 may change the speed-quality balance on supported NVIDIA hardware, according to Creative Bloq.[15] It is promising, but there are no robust production benchmarks in the research brief, so it is not yet a workflow assumption.
The modular environment’s final advantage is simple: it gives you fewer things to fix. When a bevel is too sharp, a material too clean, a UV scale wrong or a LOD too costly, you correct the family asset and let the entire scene inherit the improvement.
Frequently Asked Questions
What are best practices for creating 3D environments in Blender?
Best practices include building environments as modular kits of repeatable parts rather than one continuous mesh, deciding module grid and polygon budgets early during blockout, and applying object scale before adding bevels or subdivision. Clean topology focused on the module’s function and planning for level of detail (LOD) based on camera distance and target platform are also important.
How do modular asset systems improve environment modeling in Blender?
Modular asset systems allow reuse of compatible pieces across many spaces without remodeling, which reduces the cost of revisions and late-stage changes. They enable changes to propagate efficiently across multiple instances and keep scene performance manageable by controlling modeling, UVs, and materials at the module level.
When should I use Geometry Nodes for environment creation in Blender?
Geometry Nodes in Blender 4.5 LTS should be used to distribute already-finished assets rather than to compensate for an unclear asset library or weak composition. They are effective for procedural placement and variation of modular pieces once the asset system is well established.
How do I manage topology and LOD for 3D environments in Blender?
Topology should support necessary operations like bevels, shading, UV seams, and LOD reduction, with particular care at module boundaries to avoid visible seams. LOD should be distance-based, with high-detail geometry reserved for close views and simpler silhouettes for distant objects, tailored to the target platform’s performance constraints.
What is the ideal workflow for building reusable environment modules in Blender?
Start by defining a consistent grid and polygon budget during blockout, model modules as simple shapes with applied scale, and avoid early subdivision. Keep connection areas simple and add variation through trims, decals, vertex colors, and scattered props. Test modules for seamless tiling and ensure vertices align precisely on the grid for easy assembly and editing.
How we researched this
This article was assembled from 21 cited references.
Nothing here is based on hands-on testing. Where a figure or finding appears, it belongs to the source cited beside it, and the writing says so rather than implying otherwise. Every source is listed below so you can check it.
Sources
- 5 Common Modeling Mistakes and How to Avoid Them – AnimSchool Blog
- Modular Modeling | Blender for Visual Investigation
- Modélisation 3D pour le jeu vidéo : pipeline Blender | N-3DS
- Efficient Rendering Techniques in 3D Modeling: Tips and - Toxigon
- How to Model in Blender (2025 Guide) | Easy Step-by-Step Modeling
- Blender 3D Modeling: A Beginner’s Guide to Creating Amazing 3D Models (2024) – progadgetreview
- UV Mapping Best Practices for Clean Textures | Blended BORIS | Digital Art IP
- How to Bake Textures in Blender: A Practical Guide
- PBR Texturing in 2026: AI vs Procedural vs Capture | aukimi Blog
- Houdini in 2026: The Ultimate Guide – Artivoxa – 3D Assets Library & Courses
- How to Use USD Workflow and Houdini Solaris for Large-Scale Environments | The Rookies Blog
- Ultimate Guide - The Best Create 3D Environments Software of 2026
- Hard Surface Modeling in Blender: A Game Artist's Complete…
- How to Convert 2D Concept Art into a Clean 3D Mesh in Blender
- Nvidia's game-changing DLSS is finally coming to Blender
- 3D Model Best Practices
- Place Helper — Blender Extensions
- A UV Unwrapping Guide – Blog — Blender Studio
- Render Baking - Blender 4.5 LTS Manual
- Top 10 Mistakes Blender Artists Make (and How to Fix Them)
- Sampling - Blender 5.1 Manual
Related Articles

Best Practices Exporting Models from Blender
Learn best practices exporting models from Blender, including applying transforms and choosing correct export settings for FBX and OBJ formats.
Realistic Hair Techniques in Blender: Guide to Particle Hair
Learn realistic hair techniques in Blender using particle systems, guide hairs, and grooming tools for natural, believable hairstyles.
Blender 5 Beginner Tutorial Series: Learn 3D Modeling Basics
Explore a Blender 5 beginner tutorial series that teaches 3D modeling, topology, lighting, and rendering with a focus on workflow dependencies.
Using Reference Images in Blender
Learn best practices for using reference images in Blender to ensure accurate scale, alignment, and organization in your 3D modeling workflow.