
Create Game Asset in Blender: Modeling, Topology, and Export
Learn how to create game assets in Blender with tips on modeling, topology, optimization, and exporting for game engines.
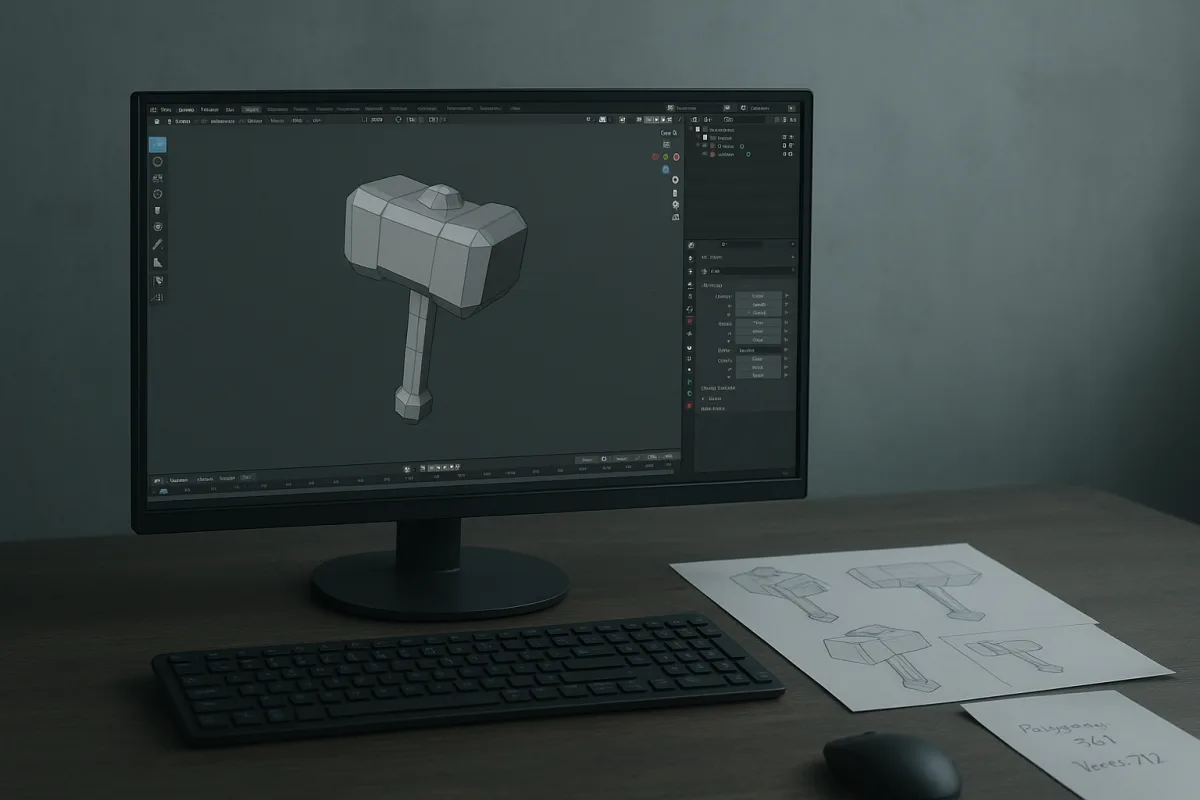
Start with the asset’s job, not a Blender primitive
For this guide I am working in Blender 5.0, because the interface and exporter options shift between releases. The workflow applies to older Blender versions, but check labels against your installed version before relying on any exact setting.
The first real problem is deciding what you are making for. “A game asset” is not enough direction. A bench seen from ten metres in a mobile game, a weapon held in first person, and a modular wall section in a console environment need different geometry, materials and LOD plans.
Write a short asset brief before opening Blender: target engine, target platform, camera distance, whether the object moves, whether players can inspect it closely, and whether it needs collision. That brief tells you where geometry earns its cost.
Current published ranges are useful starting points, not a compliance checklist. Simple props often land around 500 to 2,000 polygons, while complex props may run from 2,000 to 10,000. PC and console props are commonly budgeted around 1,000 to 10,000 triangles. [18]
For mobile, published guidance puts props nearer 300 to 1,500 triangles and characters around 3,000 to 10,000 triangles. PC and console characters can range from 20,000 to 80,000 triangles, which tells you why a character workflow cannot simply be copied from a mobile crate tutorial. [18]
Use triangles when discussing the final game budget, even if Blender’s edit-mode statistics also show faces. Engines render triangles, and a quad can become two triangles. Check the triangulated result before export, especially around n-gons, curved caps and mirrored joins.
Block out silhouette before chasing detail
Start from simple meshes and establish the object’s proportion, silhouette and major planes. At this point, ask whether every visible form changes the outline, affects shadowing, or needs to deform. If it does none of those things, it may belong in a texture.
This is where beginners often make their first expensive mistake: adding bevel segments and small mechanical features before deciding how close the camera gets. A game asset needs convincing information at its intended viewing distance, not maximum geometric description.
For hard-surface props, keep broad surfaces genuinely broad and reserve supporting loops for places where the shape or shading needs them. A few controlled bevels can catch light better than perfectly sharp edges, but bevel width is an artistic and technical choice, not a topology law.
If you need a dense source model, split the work into two meshes. Make a high-poly version for sculpted damage, dense bevels and small manufactured detail. Then build or retopologise a low-poly game mesh that preserves the silhouette and the important shading transitions. [4]
That division matters because normal maps can describe surface direction, but cannot change the object’s outline. A deeply cut handle, a large bolt, or a chunk missing from a corner may need geometry. Fine scratches, stamped text and subtle seams generally do not.
Build topology for shading, baking and deformation
For a static environment prop, clean topology means predictable normals, sensible UV seams and an editable mesh. It does not always mean an all-quad sculpture-grade mesh. Triangles in flat, hidden or non-deforming areas are often entirely reasonable.
Avoid long thin triangles, accidental internal faces, duplicated vertices and n-gons on curved or baked surfaces. These are not aesthetic offences. They can create unpredictable triangulation, visible gradients, normal-map seams and baking artifacts after the asset leaves Blender. [14]
When an object will animate, topology becomes more restrictive. Put edge flow around joints and deformation zones, and remove loops that do not contribute to the silhouette or bend. Extra loops outside a hinge or elbow do not automatically make animation better.
Blender’s retopology tools are enough for modest work, but dedicated helpers can reduce repetitive manual labour. RetopoFlow 4 is positioned as an advanced retopology tool with closer integration into Blender editing, while PolyQuilt is a free manual retopology aid. [6][8]
I have not used every add-on mentioned here, so treat these as category pointers rather than personal endorsements. RetopoFlow 4 suits artists rebuilding cleaner surfaces over a dense source mesh. PolyQuilt suits someone who wants manual control without paying for a separate retopology package. [6][8]
Before UVs, apply the transforms you intend to ship. Unapplied scale is a frequent source of inconsistent baking, collision dimensions and engine import trouble. Check face orientation too, because inverted normals can look acceptable in one viewport condition and fail visibly in another. [12][14]
Make UVs serve the texture budget
Your next problem is fitting useful texture information into limited memory. Mark seams where the object naturally breaks, such as hard edges, undersides, panel joins and hidden back faces. A seam through a broad, highly visible curved surface is harder to hide.
Blender offers fast automatic approaches such as Smart UV Project, but automatic packing is a starting point, not proof that the layout is production-ready. Inspect distortion, island rotation, padding and wasted empty space before deciding the unwrap is finished. [2][3]
Keep texel density consistent across assets intended to sit together. A tiny prop with crisp 4K labels beside a large wall with blurry 1K detail reads as a pipeline mismatch, even when both individual textures looked acceptable in isolation. [11]
For mobile and VR, source guidance places common texture sizes between 512 by 512 and 1024 by 1024. For PC games, 2048 by 2048 is a common standard size, with 4096 by 4096 more appropriate for a hero asset that genuinely fills the screen. [11]
Do not start at 4K because it sounds professional. A player cannot recover wasted VRAM by admiring your source files. Texture streaming, texture LODs and GPU compression formats such as BCn and ASTC are part of making a texture budget survive a real scene. [11]
PNG is useful when you need lossless image data or transparency. JPEG saves space but is lossy and has no alpha channel. OpenEXR is intended for HDR and compositing work, while WebP can be lossy or lossless with transparency, though it is not yet universal in game pipelines. [11][21]
For efficient packing, UVPackmaster 4 PRO is described as GPU-accelerated UV packing. TexTools is a free collection of UV, texturing and baking helpers. Their suitability depends on whether packing speed or a broader set of utility operations is your bottleneck. [9][20]
Bake detail only after the low poly is stable
Bake normal and ambient-occlusion maps after the low-poly mesh, UVs and smoothing decisions are settled. Baking earlier creates a familiar loop of redoing maps every time a seam moves, a bevel changes, or a low-poly piece is renamed.
The normal map carries much of the high-poly surface detail, while ambient occlusion can support grounded creases and contact areas. Neither should be used to hide broken geometry, overlapping UVs or a silhouette that is plainly too simple for the camera distance. [4][19]
Set hard edges and UV seams intentionally. Normal-map shading issues often come from a mismatch between those decisions, incorrect smoothing, or an export pipeline that recalculates data differently than Blender. Render artifacts have technical causes, so diagnose them rather than painting over them. [14]
SimpleBake is an add-on intended to simplify PBR and related baking in Blender. It suits artists who want a more direct bake workflow inside Blender. Its listed role is workflow convenience, not a replacement for understanding cages, ray distances and map validation. [10]
Bake a small test early. Put the low-poly asset beside the high-poly source, apply the normal map, and rotate a strong light across it. If gradients wobble, seams appear or details project onto the wrong surface, fix the cage, normals or UVs now.
Texture for the engine’s material model
Use a PBR texture set appropriate to the target engine, commonly base color, normal, roughness, metallic and ambient occlusion where the engine’s material setup calls for it. Verify channel packing requirements with the project, because teams often combine grayscale maps differently. [19]
The material should communicate what the geometry cannot: paint wear, roughness variation, dirt accumulation and fine manufacturing detail. Keep physically meaningful differences in roughness. A surface that is uniformly glossy or uniformly matte often reads as synthetic even with a strong base-color map.
For mobile, reduce shader complexity and lean more heavily on baked lighting and economical textures. PC and console targets can accommodate more complex materials and higher detail, but that does not remove the need for disciplined texture resolution and LOD planning. [11][16]
Substance Painter is a sensible companion when the project needs a dedicated texture-painting workflow, while Blender can handle the mesh, UV inspection and scene assembly. The right tool is the one matching the production requirement, not the one you happen to know best. [17]
Add LODs and collision before calling it finished
An asset that looks good in Blender can still be too costly when repeated fifty times in a level. Make LODs for assets seen across a range of distances. Remove small silhouette features, hidden backsides and fine bevels progressively rather than merely running blind decimation.
A typical LOD chain can fall from roughly 8,000 polygons on the highest version to about 400 on a distant version. The exact ratios depend on the object, screen size and engine settings, but the principle is to spend detail only when players can perceive it. [1]
Create collision separately from render geometry. A simple box, capsule or a small set of convex shapes is usually cheaper and more reliable than using every visual detail as collision. Collision should describe gameplay contact, not prove how carefully you modelled a hinge. [1]
Name the LOD and collision objects consistently for the engine pipeline you are joining. There is no universal 2026 naming mandate across studios. Project conventions, engine requirements and team preferences are the standard you must actually meet. [15][16]
Export FBX as a checked handoff
Before export, isolate the asset and inspect it like someone else will receive it. Apply transforms, remove unused objects, confirm normals, verify material slots, confirm UV channels, and make sure the exported pivot is where designers need it for placement or rotation.
Scale is a recurring problem because Blender works in metres while Unreal Engine commonly works in centimetres. Orientation is another: Blender is Z-up, whereas Unity uses Y-up. Configure the FBX export and then test-import into the actual target engine. [12][13]
Do not assume an FBX carries every Blender material feature intact. Missing textures, incorrect material connections and absent packed resources are common handoff failures. Pack or deliver the required image files according to the project’s pipeline, then check the imported material rather than trusting the export dialog. [12][13]
Animation needs another inspection pass. Extra bones, unapplied transforms and poorly prepared rigs can produce broken motion after import. Even for a static prop, ensure no stray armature, constraint or hidden object is being exported accidentally. [12][13]
Finally, test the asset under the game engine’s lighting, not only Blender’s viewport lighting. A normal map, roughness response or LOD transition that looks fine in a neutral preview can become obvious under hard sunlight, volumetric fog, mipmapping and the game’s post-processing.
Frequently Asked Questions
How do I create a game asset in Blender for different platforms?
Start by writing a short asset brief specifying the target platform, engine, camera distance, and whether the object moves or needs collision. Mobile assets require lower polygon counts and smaller textures, while PC and console assets can have higher detail and texture resolution. Adjust geometry, materials, and LOD plans accordingly to fit the platform’s performance budget.
What is the recommended polygon count for game assets in Blender?
Polygon counts vary by asset complexity and platform. Simple props typically range from 500 to 2,000 polygons, complex props from 2,000 to 10,000 polygons. For mobile, props are usually 300 to 1,500 triangles, while PC and console props range from 1,000 to 10,000 triangles. Characters have higher budgets, for example, mobile characters around 3,000 to 10,000 triangles and PC/console characters 20,000 to 80,000 triangles.
How do I prepare and export game assets from Blender to game engines?
Export assets as FBX files with applied transforms, verified normals, correct axis orientation, and packed textures. Check scale and orientation carefully because Blender’s units and axes differ from some engines (e.g., Blender uses meters and Z-up, Unreal uses centimeters and Z-up, Unity uses Y-up). Verify triangulation and smoothing to avoid rendering artifacts in the engine.
What are best practices for topology and UV mapping in Blender game assets?
Build clean topology with predictable normals and sensible UV seams. Avoid long thin triangles, internal faces, duplicated vertices, and n-gons on curved or baked surfaces to prevent baking artifacts and shading issues. For animated objects, ensure proper edge flow around joints and deformation zones. Use Blender’s retopology tools or add-ons for efficient mesh cleanup and UV unwrapping.
How do I optimize a Blender model for use as a game asset?
Start with a low-poly mesh that preserves the silhouette and important shading transitions, then bake high-poly details into normal and ambient occlusion maps. Keep bevels and supporting loops only where they improve shading or silhouette. Treat polygon count, UV layouts, and texture sizes as project budgets, adjusting them to the asset’s viewing distance and platform constraints.
How we researched this
This article was assembled from 21 cited references.
Nothing here is based on hands-on testing. Where a figure or finding appears, it belongs to the source cited beside it, and the writing says so rather than implying otherwise. Every source is listed below so you can check it.
Sources
- LODs and Collisions in Game Art: Guide for Blender and Unreal Engine 5
- Low Poly in Blender - Make, Reduce & Export Models (Free Guide)
- How to Create Low Poly 3D Models in Blender
- High poly to low poly 3d workflow - BlenderNation
- Game Assets Workflow | AUGI - The world's largest CAD & BIM User Group
- Blenderアドオン「Retopoflow 4」リリース! 定番リポトロジーツールが全面刷新、新機能追加、Blenderの編集モードとのシームレスな統合、パフォーマンス向上
- Best Blender Retopology Addons in 2026: What Actually Works Now – Gachoki Studios
- PolyQuilt addon for Blender 2.8 - #590 by Dangry - Released Scripts and Themes - Blender Artists Community
- The Best Free Blender Add-ons in 2026 (That Actually Save You Hours) | 3DxDEV
- SimpleBake - Simple PBR and other baking in Blender - Superhive (formerly Blender Market)
- Texture Resolution Guide: What Size Do You Actually Need in 2026? | TextureX
- The Complete AI-Powered Blender-to-Unreal Asset Pipeline | StraySpark
- Blender to Unity FBX Export Settings & Workflow Guide | serdarozden.com
- Rendering Artifacts: What Really Causes Them - 3DSkillUp
- AI 3D for Game Development in 2026 — What Actually Ships — Yugma
- Game Asset Design | CMPT 3167 | Douglas College
- Game Asset Creation with Blender and Substance Painter [Video]
- What is the Ideal Polygon Count? | 3D Asset Optimization – Sivo
- texturing - Game Asset Workflow and Software Pipeline - Blender Stack Exchange
- Best Blender Add-ons for Game Developers in 2026 (Free and Paid) | Cinevva
- Supported Graphics Formats - Blender 5.0 Manual
Related Articles
Best Practices for Creating 3D Environments in Blender
Learn best practices for creating modular, efficient 3D environments in Blender with topology, LOD, and Geometry Nodes tips.
Blender 5 Beginner Tutorial Series: Learn 3D Modeling Basics
Explore a Blender 5 beginner tutorial series that teaches 3D modeling, topology, lighting, and rendering with a focus on workflow dependencies.

Create Realistic Sky in Blender
Learn how to create a realistic sky in Blender using procedural textures, HDRIs, and sun direction for believable outdoor lighting.

Best Practices Exporting Models from Blender
Learn best practices exporting models from Blender, including applying transforms and choosing correct export settings for FBX and OBJ formats.