
Using Blender for Education
Learn how to use Blender for education with tips on setup, hardware, and teaching modeling, lighting, and rendering effectively.
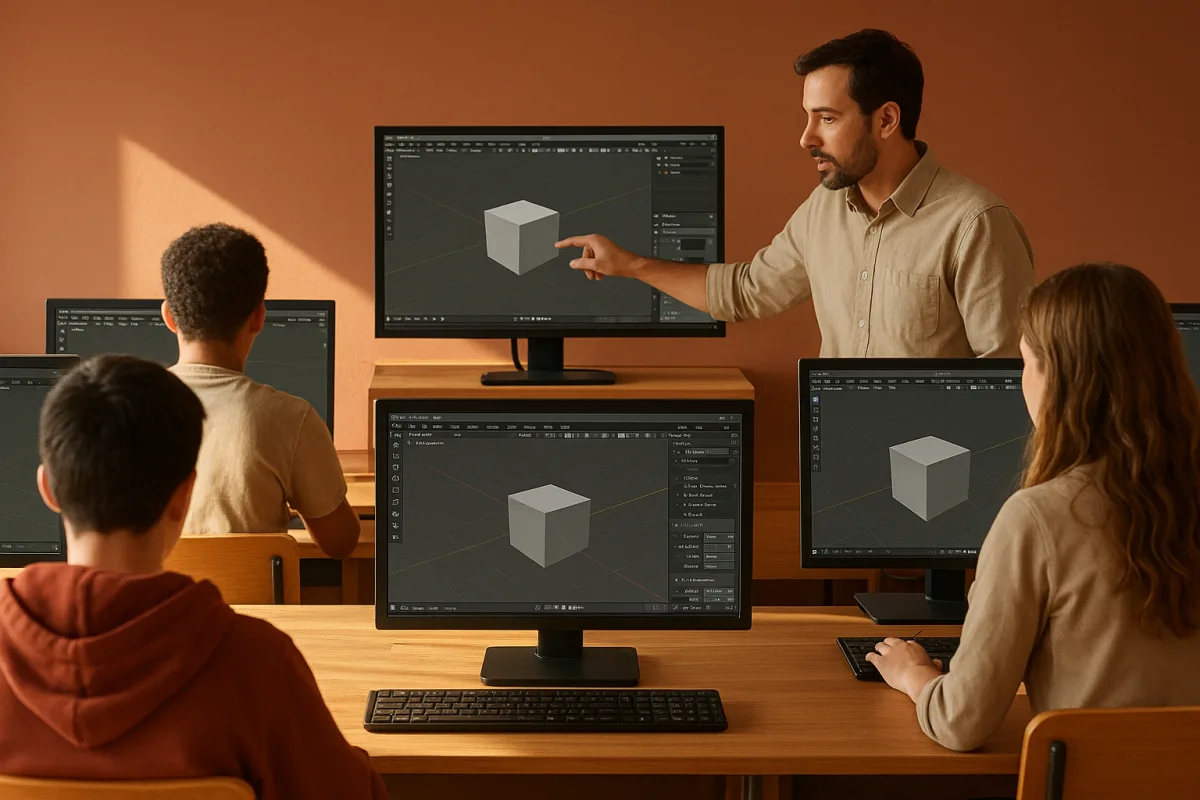
Start by defining what Blender is teaching
The first classroom problem is scope. Blender can model, sculpt, unwrap, texture, light, render, animate, composite and edit video in one application, which makes it unusually useful for education but also easy to overstuff a course. [18]
I would begin by deciding what students should be able to explain and make by the end. “Learn Blender” is not an outcome. “Model a simple manufactured object, use clean shading, light it, and render an image that communicates its form” is teachable.
That distinction matters because 3D craft is cumulative. Students who cannot see why a bevel changes highlights will struggle to judge a render, even if they can follow a sequence of modelling operations.
Blender’s free, open-source licence removes per-seat software fees, and it runs on Windows, macOS and Linux. [18] That makes a mixed-device classroom more practical than courses built around a single paid desktop platform.
It does not mean Blender is effortless or universally appropriate. Blender has a dense interface and a steep initial learning curve, both recurring concerns in educator and beginner guidance. [11][13] A good course narrows the visible problem before it expands the toolset.
Lock the version and check the machines
Before writing lessons, pick one Blender version. The research brief identifies Blender 5.2 LTS and Blender 4.5 LTS as the stable long-term-support choices as of September 2026. Blender’s release history is the place to verify what remains supported when your term starts. [8]
This is less glamorous than planning a first render, but version drift causes needless friction. A tutorial recorded in one release may use renamed menus, changed defaults or tools that a student’s older installation does not have.
For a minimum classroom specification, plan around a four-core CPU, 8 GB of RAM and 2 GB of VRAM. For substantially smoother work with heavier scenes and rendering, the brief recommends an eight-core CPU, 32 GB of RAM and 8 GB of VRAM.
That gap is important. A machine that opens Blender is not necessarily a machine that lets thirty students sculpt, use high-resolution textures, and render within a lesson. Hardware constraints are one of the main practical barriers teachers report when introducing 3D. [13]
Budget estimates in the research range from roughly $1,500 to $3,000 per workstation. Blender itself is free, but that figure is for the computer rather than desks, display hardware, networking, IT support, replacement parts, or long-term maintenance, for which the brief found no comprehensive cost data.
Set up a learning workspace, not a professional cockpit
The next issue students hit is visual overload. Blender’s interface exposes several disciplines at once, and that is powerful for a working generalist, but intimidating when a learner only needs to move vertices and inspect a silhouette.
Create a course startup file with a predictable viewport layout, sensible units, a basic collection structure, and a camera and light that students can recognise. Customized workspaces are a cited mitigation for the UI complexity teachers and learners encounter. [13]
Do not hide every advanced panel permanently. Instead, reveal tools when they solve a problem the class has already met. A learner who has struggled with faceted highlights is ready to understand smooth shading, Auto Smooth behaviour, normals and bevels.
This is a teaching habit, not a topology rule. Some students learn happily through exploration, but a shared baseline prevents the common classroom failure where half the room is following the design lesson and the other half is searching for an editor.
Make the first project teach form, not buttons
Start with an object that has a clear function and a limited set of forms, such as a desk lamp, hand tool, stool, or small consumer product. Avoid an early character project, since anatomy, sculpting, retopology, UVs and hair can bury the actual lesson.
Have students identify primary, secondary and tertiary forms before modelling. The primary silhouette reads at distance, secondary forms describe construction, and tertiary details sell scale. This gives them a way to diagnose a weak asset without treating every missing detail as a modelling problem.
Use that project to introduce topology as a response to deformation, curvature and shading. A static hard-surface prop does not need the same edge flow as an animated face. Clean loops and sensible density matter because they make edits predictable and surfaces shade cleanly.
Beginner modelling guidance repeatedly flags unconsidered topology and shading as common mistakes. [12] The useful educational move is not demanding perfectly elegant wireframes immediately, but asking students to show why an edge exists and what would break if it were removed.
Teach materials and lights before chasing realism
Once students have a stable model, move into material response. The goal is not to memorise every Principled BSDF input. It is to understand that roughness changes highlight width, metallic changes the energy path, and surface imperfections should support scale rather than disguise poor modelling.
Give the class one neutral studio-light setup and require a clay render before materials. If the clay render does not describe the form, a complex texture set will not fix it. This is an especially useful checkpoint for product and environment work.
Then ask students to light for a purpose. A large soft source explains broad curvature, a smaller source produces tighter highlights, and rim light can separate a dark silhouette from a dark background. They should move lights and observe, rather than simply copying values.
Blender’s integrated renderer and shading tools support this entire sequence without exporting between applications. [18] That is a real teaching advantage: modelling choices, material choices and render results remain visible in one file and one interface.
Build lessons as short production loops
A practical beginner unit can run as repeated loops: reference and blockout, proportion revision, topology cleanup, basic material, lighting, render, critique. Each loop produces a visible image, which gives students evidence of progress before they reach animation or simulation.
There is no single proven duration for Blender education. Current youth offerings range from intensive one-week programmes at providers including Full Sail Labs, iD Tech and Mile High Animation, to a year-long Blender course from My Computer Design School. [2][4][7][20]
That variation is useful evidence that scheduling should follow learners and institutional goals, not a universal template. A short course can teach visual reasoning and pipeline literacy. A year-long programme can accommodate animation, portfolio work, revision and deeper technical foundations.
Courses aimed at learners aged roughly 12 to 18 commonly include modelling, texturing, lighting and animation. [3][5][6] Those are sensible headline subjects, but sequence them. Texturing is much easier to evaluate after students can model forms that catch light clearly.
Assess decisions, not only final renders
The first polished render can be deceptive. A student may have followed a tutorial accurately without understanding scale, topology or lighting. Ask for process evidence: reference images, blockout screenshots, wireframes, clay renders and a short explanation of revisions.
A useful rubric separates silhouette, proportion, topology appropriate to the asset, material readability, lighting intent and file organisation. Students do not need production-perfect assets, but they should be able to describe trade-offs, such as where they used a bevel instead of extra geometry.
Include peer critique with specific prompts. Ask what reads first, where the surface appears too sharp or too soft, whether materials distinguish parts, and whether the lighting supports the object. This makes critique about observable image evidence rather than personal taste.
Blender Education provides teaching documentation, structured resources and curricula, plus education badges intended to support standards alignment. [19] Use those materials as a starting framework, then adapt the project briefs to the visual disciplines your course actually serves.
Add specialist software only when it earns its place
Blender need not be the only application students see. For organic high-frequency sculpting, ZBrush and Nomad Sculpt are worth introducing as category examples. For procedural systems and effects, Houdini has a distinct role that Blender Geometry Nodes does not erase.
For texture-authoring workflows, Substance 3D Painter is a relevant specialist tool. For real-time material and presentation checks, Marmoset Toolbag fits a different niche. For precision sketch-based solid modelling, Plasticity may suit a product-design exercise better than forcing every operation into polygon modelling.
The point is not to turn one class into seven software introductions. Use Blender as the shared language for mesh structure, UV logic, shading and render communication, then explain why another tool may be chosen for a particular production constraint.
The brief does not provide comparative cost-benefit evidence between Blender and proprietary alternatives. Do not claim that Blender is always cheaper in total practice, particularly where training, plugins, rendering infrastructure or specialist software subscriptions enter the programme.
Plan optional services as separate budget lines
Blender is free, but educational delivery may not be. Training in the research ranges from about $199 for self-paced learning to more than $3,000 for expert instruction, depending on provider and format. [15][16][22]
Optional plugins can cost about $20 to more than $100, while cloud render farms are estimated at roughly $50 to $500 monthly. These prices do not include workstation hardware, staff time, storage, or internet capacity, and they should not be assumed necessary for a first course.
Use cloud rendering only after students understand why local rendering is slow and what render settings trade away. A classroom can learn sampling, resolution, denoising and lighting on modest scenes without treating a remote render service as the default solution.
Treat VR, LMS and AI as pilots
VR can make spatial scale and scene review more immediate. Blender’s VR Scene Inspection add-on is one route, while the CATWALK project presented at Blender Conference 2025 demonstrates a VR-driven production workflow rather than merely a headset novelty. [9][10]
That said, VR adds headset management, room safety, hardware compatibility and lesson-time overhead. It suits an inspection exercise, architectural scale review or presentation module better than replacing the core modelling curriculum for beginners.
For formal online delivery, platforms such as SimLab Studio can connect 3D learning material to SCORM or xAPI workflows, while VREd is cited as a VR-classroom example. These are ecosystem options, not evidence that every Blender class needs an LMS-specific 3D platform.
Generative AI combined with 3D visualisation and education remains an emerging area. A 2026 survey found promising systems, but mature implementations that combine AI, VR and Blender-based teaching are still limited. [21] Present AI experiments clearly as experiments.
Adapt for language, access and regional reality
Blender supports internationalisation and localisation, but English remains dominant in much of the interface documentation and learning material. [23] If students work in another primary language, translate project briefs, define technical vocabulary, and allow time for terminology rather than treating language friction as lack of ability.
There is no evidence in the brief of formal region-specific restrictions on Blender. The practical differences are hardware availability, bandwidth, local teaching support and language adaptation. A course designed for powerful lab PCs may fail when moved unchanged to mixed home devices.
Finally, show students that Blender is used within a wider professional 3D ecosystem, not as a hobbyist exception. Its active development, broad pipeline and zero licence cost make it an unusually accessible foundation, while craft judgement remains the skill that transfers between applications. [1][18]
Frequently Asked Questions
How do I set up Blender for classroom teaching?
Set up a learning workspace with a predictable viewport layout, sensible units, and a basic collection structure including a camera and light that students can easily recognize. Customize workspaces to reduce visual overload by revealing advanced tools only when relevant to the lesson, helping students focus on the current task without being overwhelmed by Blender’s full interface.
What Blender version is best for education?
Standardize on Blender 5.2 LTS or 4.5 LTS, as these long-term-support versions provide a stable interface and file compatibility. Locking the version prevents issues caused by interface changes or renamed tools that can confuse students and disrupt lessons.
How can Blender be used effectively in 3D education?
Use Blender as a foundation to teach modeling, materials, lighting, and rendering as interconnected decisions through short, focused projects. Begin with simple objects to teach form and topology before expanding the toolset, and introduce specialist tools only when the course clearly requires them.
What hardware is recommended for Blender in schools?
Plan for at least a four-core CPU, 8 GB of RAM, and 2 GB of VRAM for minimum functionality, but for smoother performance with complex scenes and rendering, an eight-core CPU, 32 GB of RAM, and 8 GB of VRAM are recommended. Budget roughly $1,500 to $3,000 per workstation, noting that Blender itself is free but capable hardware is the main cost.
How to teach modeling and rendering with Blender?
Start with projects focused on clear, simple forms such as a desk lamp or hand tool, avoiding complex subjects like characters early on. Teach students to identify primary, secondary, and tertiary forms, and explain topology as a response to deformation and shading needs. Introduce shading and rendering concepts progressively, linking them to modeling decisions to build cumulative understanding.
How we researched this
This article was assembled from 23 cited references.
Nothing here is based on hands-on testing. Where a figure or finding appears, it belongs to the source cited beside it, and the writing says so rather than implying otherwise. Every source is listed below so you can check it.
Sources
- 3D artists are so blown away by Blender's latest update, it's hard to believe it's free software
- Blender Fundamentals | Full Sail Labs
- 3D Modelling Course in Blender for Teens | Kodland Online School
- 3D Modeling with Blender | Virtual Online Course for Teens | iD Tech
- 3D modeling course at Blender for children from 12 to 18 years old - Progkids online school
- 3D-анимация в Blender (Блендер) для подростков 14-17 лет
- 3D Modeling and Animation in Blender | Mile High Animation
- Releases — Blender
- Blender VR Integration: Enhancing Your 3D Modeling Workflow | Alpha3D
- Step Inside the Viewport: CATWALK’s VR-Driven Production Workflow — Blender Conference 2025 – Blender.fi
- Why Is Blender 3D Hard To Learn? - Blender Base Camp
- Common Mistakes in Blender Modeling
- Challenges Teachers Face When Introducing 3D Technology to Students
- Why Is Blender So Bad? The Honest Truth About Its Downsides
- Blender for 3D Modeling and Animations Training
- Training Blender Expert - Master Professional 3D… | Learni
- Blender or Maya in 2026 – which one fits your 3D work? - Toxigon
- About Blender - Blender 5.3 Manual
- Blender Education Documentation
- 3D-моделювання у Blender — My Computer Design School
- Capabilities of Generative Artificial Intelligence and Three‐Dimensional Visualizations in Education: A Survey of Recent Systems - Vilaça - 2026 - Computer Applications in Engineering Education - Wiley Online Library
- Join the Blender Guru Beginners Academy
- Internationalization and localization - Blender Developer Documentation
Related Articles
Blender Architectural Visualization Workflow
Learn the Blender architectural visualization workflow: import CAD, model accurately, set scale, and create realistic materials and lighting for renders.
Blender Project Setup for Animation: Best Practices
Learn how to set up a Blender project for animation with proper folder structure, naming, frame rate, and collaboration tips.
Using Nodes for Shading in Blender: A Practical Guide
Learn how to use nodes for shading in Blender with tips on Principled BSDF, texture color spaces, and Cycles vs Eevee differences.
Create a Character Rig in Blender: Step-by-Step Guide
Learn how to create a character rig in Blender with bone placement, weight painting, and testing for smooth animation.