
Blender Project Setup for Animation: Best Practices
Learn how to set up a Blender project for animation with proper folder structure, naming, frame rate, and collaboration tips.
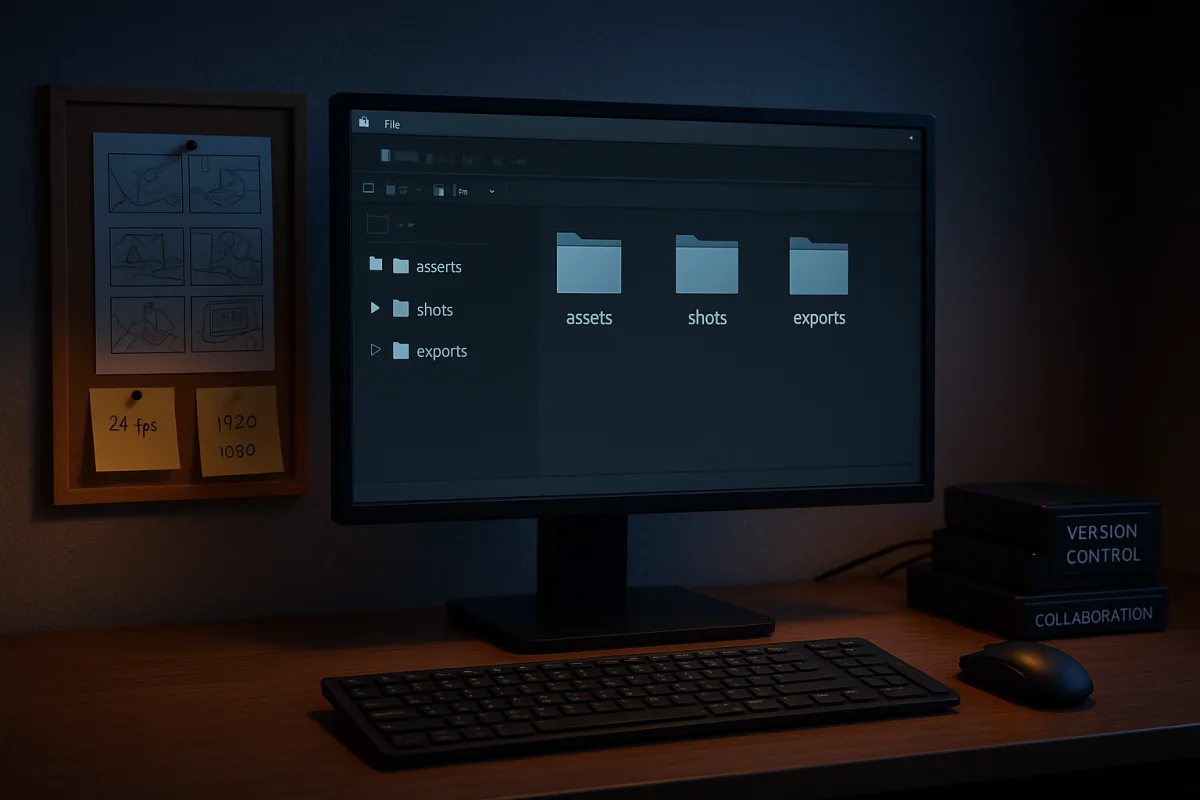
Start by deciding what the project must deliver
Before opening Blender 5.2 LTS, get one answer from whoever receives the animation: where will it play? A web film, a cinema-style short, and US broadcast can all be 1920 by 1080, but they do not necessarily use the same frame rate or finishing format. [5]
For a cinematic or typical web delivery, 24 frames per second is an established choice. European television commonly uses 25 fps, while US broadcast commonly expects 29.97 fps at 1920 by 1080. Pick the delivery rate, write it into the project notes, and do not let individual shots drift. [5]
This is not a purely administrative setting. An animator judging a two-second pause at 24 fps is placing 48 frames. At 29.97 fps, the same duration is approximately 60 frames, so changing rate later changes both editorial timing and any keyed animation.
In Blender 5.2 LTS, set the scene’s frame rate before blocking. Set start and end frames for the current cut, then use Preview Range for the section currently under review. Preview Range is a practical way to stop Blender repeatedly playing material outside the shot you are solving. [4]
Set Scene Properties, Units to Unit Scale 1.0, Length Meters, Mass Kilograms, and Time Seconds. [4] Meters are useful because they give a consistent scale reference for cameras, lights, simulations, asset exchange, and physically based texture work.
A familiar habit is to say scale does not matter if a render looks right. That is only partly true. You can fake scale in a still, but inconsistent object scale becomes expensive when a Houdini simulation, a Substance Painter texture set, or a camera move enters the project.
Build the folders before building the scene
A single folder full of blend files works until the first revision, alternate texture, or second shot arrives. Blender Studio’s documented structure separates the things you make from the shots that assemble them: Assets, Maps, Shots, and Editorial Export. [3]
Inside Assets, create characters, props, libraries, and sets. This separation makes a useful distinction: a character rig is an asset, while a camera, lighting setup, and animated instance of that character belong to a shot file.
Use Maps for textures that are genuinely shared across the project. Put asset-specific maps inside that asset’s own folder instead. Blender Studio’s convention, for example, keeps general maps under the project maps directory while a prop’s unique texture files stay with that prop. [3]
Put shot work under Shots, organized first by sequence and then by shot identifier. Keep Editorial Export for edit exports and rendered material supplied to editorial. That prevents a temporary playblast from being mistaken for source animation or an approved final render. [3]
For a small project, this may feel formal. It is still worthwhile because the structure answers basic questions quickly: which file owns this texture, which blend file contains this shot, and which output was actually sent for review?
Name files for the work they contain
In Blender 5.2 LTS, filenames do not alter the scene, but they determine whether an asset can be found, linked, and updated without guesswork. Blender Studio recommends lowercase letters and underscores, avoiding spaces and special punctuation. [3]
Use dashes to separate the major parts of a name, and dot notation for variants. An asset filename can follow the pattern type, asset name, task, such as char-gabby-modeling.blend. A shot can follow sequence number, shot identifier, task, such as 010_0030-anim.blend. [3]
The important part is the task suffix. A file called final_new_reallyfinal.blend tells nobody whether it contains modeling, rigging, animation, lighting, or compositing. A task-based name tells the next artist what kind of edit belongs there.
Name texture variants with the asset and material context intact. Blender Studio’s example prop-dresser_wood.faded-modeling.png conveys that it is a dresser map, identifies the wood material, and preserves a faded variation rather than overwriting it. [3]
Do not substitute personal shorthand for this system halfway through production. A naming convention is not an aesthetic preference. It is a lookup system, and it only works when names remain predictable across assets, shots, textures, and revisions.
Separate asset production from shot production
Model, rig, and texture a character or prop in its asset file. Animate, light, and render its appearance in a shot file. This division means a corrected hand topology or revised texture can be updated without turning every shot blend into a different master asset.
For Blender 5.2 LTS projects, keep the working shot focused on shot-specific decisions: camera, layout, animation, shot lighting, and render settings. Keep reusable material libraries and other shared resources in the Libraries branch of Assets. [3]
This is also where topology affects organization. A clean, stable mesh and UV layout are not merely a modeling preference when animation is planned. They are the contract a rig, texture set, simulation, and linked shot are built around.
Apply object transforms and verify UVs before sending an asset out to Substance 3D Painter. The cited Substance Painter workflow recommends FBX or OBJ export with appropriate settings, including applied modifiers where needed, then checking scale and UVs on import. [2]
The source does not identify a specific Substance Painter release, so do not assume menus match a current install. Record the actual application version used by the project alongside the export preset, because a repeatable handoff needs both.
Export Painter textures in Blender-friendly image formats such as PNG or TIFF, using a preset appropriate for Cycles or Eevee, then connect those maps in Blender’s Shader Editor. [2] Test one material on one asset before exporting every texture set for a sequence.
For Houdini, the same principle applies. Export an applied-transform FBX from Blender 5.2 LTS, verify scale and UVs in Houdini, create the procedural effect or simulation, and bring the modified model or animation back as FBX for final materials, lighting, and rendering. [2]
The research does not specify a Houdini version. Document it in the project’s handoff notes rather than pretending all Houdini releases interpret an interchange file identically. Small test imports are faster than repairing a sequence of broken caches or mismatched orientation later.
Keep playback useful while animation is changing
A heavy look-development scene can make animators judge stutter instead of motion. In Blender 5.2 LTS, use Solid shading for animation previews when final materials and lighting are slowing interaction. This is not a downgrade in craft, it separates motion review from look review. [1]
Enable Simplify in Render Properties when reduced scene complexity helps the viewport remain responsive. [5] Use it deliberately: simplify is for working speed, not permission to forget what the final render contains. Check final hair, subdivision, displacement, and texture behavior before approval.
Blender’s documented hardware baseline includes a CPU with at least four cores and SSE4.2 support. For demanding scenes, the briefing recommends an eight-core processor, 32 GB of RAM, and a GPU with at least 8 GB of VRAM, including NVIDIA RTX 30 or 40 series and AMD Radeon RX options. [1]
Those are planning targets, not a guarantee that any particular scene will be fast. Large textures, dense geometry, simulation caches, and high sample counts all compete for memory. Increase Blender 5.2 LTS’s Memory Cache Limit where available so playback can retain more cached data. [1]
For Cycles renders, use GPU acceleration when the installed hardware supports it, then balance samples against noise and render time. [1] Do not choose samples by superstition. Render a representative difficult frame, such as glossy metal in low light or a volume-lit shot, and judge that result.
Save as though the file will fail
Blender’s Auto Save and Save Versions are useful safety measures, but they are not collaborative version control. Blender Studio recommends systems including SVN, Git LFS, and Perforce, and identifies SVN as its preferred solution for handling large binary files. [3]
Use numbered or system-managed revisions rather than overwriting yesterday’s approved file. A revision needs to preserve a recoverable point, especially before destructive topology edits, animation polish, cache generation, texture repacking, or major lighting changes.
For a team spread across machines or regions, Blender Studio’s approach distinguishes local, shared, and version-controlled directories. [3] Shared storage can hold ephemeral material, while the controlled repository preserves files that must be traceable and recoverable.
Network drives, Syncthing, and Dropbox can help distribute shared data, but they are not automatically substitutes for asset history and conflict management. Establish which location is authoritative before artists begin linking files or saving render outputs into shared folders.
Keep the Blender version consistent across the team. Blender files have limited forward compatibility, so opening a production file in a newer release can create problems for a collaborator still on an older one. Use intermediary versions when safe conversion is required. [3]
Blender Studio’s Project Tools can manage multiple Blender installations per project. [3] Whether or not a team uses those tools, the operational rule is simple: record the approved Blender version, and do not silently update a production file.
Render in a form that survives interruptions
For Blender 5.2 LTS animation renders, output an image sequence rather than rendering directly to one movie file. PNG and OpenEXR sequences preserve completed frames if a render stops, and they leave room for compositing or correction before final encoding. [5]
Use PNG when a straightforward web-oriented sequence is sufficient. Use OpenEXR when the finishing process needs more image data and post-processing flexibility. The choice is tied to the finishing pipeline, not to which format has the most impressive technical reputation. [5]
For web delivery, H.264 in an MP4 container is the stated final format, with 1920 by 1080 or 1280 by 720 as supported resolutions. Eight-bit color is generally sufficient for that use. [5]
For broadcast, the brief identifies ProRes as preferable, with 10-bit or 12-bit color recommended where color accuracy matters. Match pixel aspect ratio, color management, frame rate, and audio settings to the target specification, or a technically clean render can still be delivered incorrectly. [5]
Frequently Asked Questions
How do I organize files and folders for a Blender animation project?
Use Blender Studio’s folder structure by creating separate top-level folders named Assets, Maps, Shots, and Editorial Export. Inside Assets, further organize by characters, props, libraries, and sets. Maps hold shared textures, while asset-specific textures go inside each asset’s folder. Shots are organized by sequence and shot identifier, and Editorial Export contains edit exports and final renders to avoid confusion.
What are the best practices for setting frame rate and units in Blender animation?
Set the frame rate at the start based on the delivery target—24 fps for cinematic or typical web, 25 fps for European TV, and 29.97 fps for US broadcast. Lock this frame rate before animating to avoid timing errors. In Scene Properties, set units to Unit Scale 1.0, Length to Meters, Mass to Kilograms, and Time to Seconds to ensure consistent scale for cameras, simulations, and textures.
How should I separate asset and shot files in a Blender animation project?
Save shot files separately from asset files. Assets include characters, props, rigs, and libraries, while shots contain camera setups, lighting, and animated instances of assets. This separation clarifies which file owns which part of the project and helps manage revisions and updates more efficiently.
What naming conventions should I use for Blender animation files?
Use lowercase letters and underscores, avoiding spaces and special characters. Separate major parts of filenames with dashes and use dot notation for variants. For assets, use the pattern (type)-(asset name)-(task).blend (e.g., char-gabby-modeling.blend), and for shots, use (sequence number)_(shot identifier)-(task).blend (e.g., 010_0030-anim.blend). Task suffixes should clearly indicate the file’s purpose, such as modeling, rigging, or animation.
How do I prepare Blender projects for collaboration in animation workflows?
Ensure all collaborators use the same Blender release version to avoid compatibility issues. Establish shared, local, and version-controlled storage before linking assets or moving caches between machines. Use Blender’s Auto Save and Save Versions as backups but rely on a proper version-control system for managing revisions and collaboration.
How we researched this
This article was assembled from 5 cited references.
Nothing here is based on hands-on testing. Where a figure or finding appears, it belongs to the source cited beside it, and the writing says so rather than implying otherwise. Every source is listed below so you can check it.
Sources
- Requirements — Blender
- Mastering Substance Painter with Blender - Toxigon
- File Naming | Blender Studio
- Scene Properties - Blender 5.2 LTS Manual
- Rendering Animations - Blender 5.2 LTS Manual
Related Articles
Create a Character Rig in Blender: Step-by-Step Guide
Learn how to create a character rig in Blender with bone placement, weight painting, and testing for smooth animation.
Best Practices for Rendering Animations in Blender
Learn the best practices for rendering animations in Blender, including sample settings, adaptive sampling, denoising, and output formats.
Realistic Fire Effect in Blender
Learn how to create a realistic fire effect in Blender using Mantaflow, shaders, lighting, and simulation tips for photorealistic results.
Using Nodes for Shading in Blender: A Practical Guide
Learn how to use nodes for shading in Blender with tips on Principled BSDF, texture color spaces, and Cycles vs Eevee differences.