
Troubleshooting Texture Painting Issues in Blender
Learn how to troubleshoot texture painting issues in Blender, including seam lines, bleed problems, UV layout, and multi-material painting.
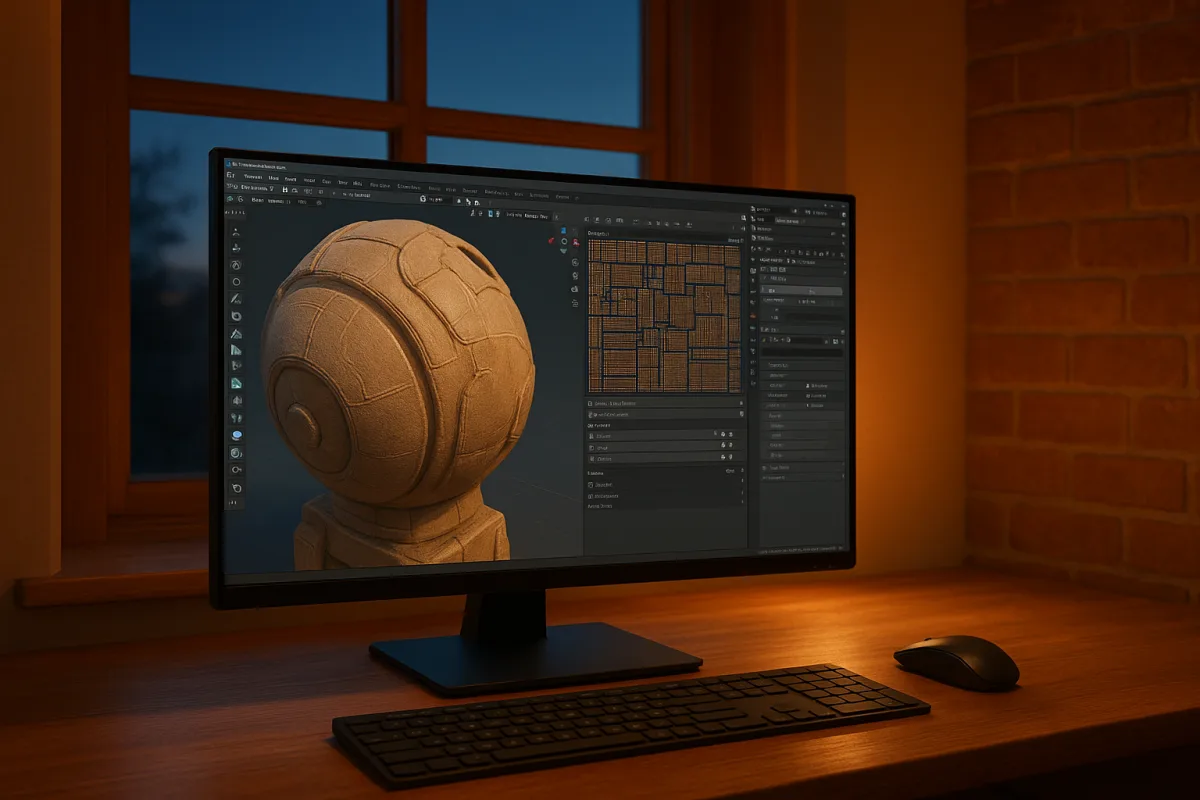
The pale line at a painted seam
A thin unpainted line appears where two painted areas meet, often around a tight joint, a hard edge, or the border between two materials. You paint over it repeatedly in Blender 3.5 and later, but the line returns in the viewport or after baking. [1][9]
That line is usually a failure of texture coverage, not a failure of hand control. Texture paint puts color into an image through the mesh’s UV layout, so every visible painted surface depends on a usable UV location and an active image receiving the stroke. [4][5]
The central troubleshooting idea is this: a brush stroke only reaches the texels available to the active texture and UV island. If those texels do not extend cleanly beneath a seam, Blender has no shared painted area to display there.
What Bleed actually covers
Bleed extends painted color beyond the edge of a UV island. Its job is to place extra color outside the island’s visible boundary, helping prevent a bare or contrasting border from appearing when the texture is filtered or viewed from a distance. [7][10]
It is a margin, not a bridge. If two UV islands sit close together, if their margins are too narrow, or if the seam crosses separate material assignments, increasing Bleed may still leave visible pixel holes. Blender’s issue tracker records this behavior in narrow UV joints during projection painting. [9]
This is why turning Bleed up can feel like a fix in one area and a dead end in another. It can extend an existing paint result, but it cannot guarantee clean coverage through every narrow space or create one continuous texture field across multiple materials. [9][10]
We would start by inspecting the UV layout, not by chasing brush settings. A seam that lands in a cramped UV channel needs more room, a different island arrangement, or a deliberate texture and material plan before painting can become reliable.
UV space decides how much detail survives
A UV map translates the model’s surface into positions on a texture image. The scale of those islands, and the resolution of the image assigned to them, determine how much painted detail the surface can hold. [7]
Small islands occupy fewer pixels, so a brush mark, scratch, or edge transition has less room to resolve. Higher-resolution maps provide finer painting detail, but they also consume more memory and make files and viewport work heavier. [7][3]
Square, power-of-two image sizes such as 256 by 256, 512 by 512, and 1024 by 1024 are recommended for performance. Those dimensions are a starting point, not a quality guarantee, because the UV layout decides how those pixels are distributed over the model. [7]
A large texture does not rescue a poor unwrap. If the face needing crisp paint occupies a tiny portion of a 4K image, it may still have less usable detail than a better-packed island on a smaller map.
Blender 3.5 and later also support UDIM workflows, which distribute UV islands across multiple texture tiles. That lets you reserve high-resolution texture space for selected areas instead of forcing every part of an asset into one oversized image. [10]
UDIMs solve allocation, not every seam problem. Each tile, image, UV island, and material still needs to be organized so that the paint target is clear and the visible boundary receives enough surrounding color.
Multiple materials break the assumption of continuity
A model can look like one object while its surface is divided among several material slots and image textures. In Blender 3.5 and later, that division can interrupt the result you expect from Bleed because the neighboring faces may not be painting into the same image. [1][6]
This is common around assembled assets, separate trim materials, or meshes with different texture sets. A stroke can appear to stop abruptly because the active material or texture slot belongs to only one side of the visible joint. [5][11]
Check which material is assigned to the faces around the line, then check the active texture image in that material. If the two sides use separate images, each image needs its own painted edge coverage. [4][5]
Do not assume that a continuous-looking mesh has one continuous paint destination. We would keep related seam areas on the same texture set when continuity is important, and use separate materials only where their production benefit outweighs that extra paint management.
Overlapping UVs create a different version of the same problem. Texture painting does not support them as independent paint locations, so a stroke may affect an unintended area sharing those coordinates. [5][6]
Overlaps can be intentional for repeated parts, but they are a constraint, not a transparent shortcut. If each repeated part needs unique dirt, wear, lettering, or color variation, it needs unique UV space.
The five checks before you repaint anything
Before changing UVs, verify that Blender 3.5 and later is in Texture Paint mode. Painting in the wrong mode is a basic but frequent reason that a brush produces no visible result. [4][5]
Next, confirm that the object has a proper UV unwrap and that the intended image texture is active. Without usable UVs or an active image texture assigned as the paint target, Blender has nowhere appropriate to store the brush stroke. [4][5]
Then check the active material and texture slot. A model with several materials can accept paint on a texture you are not currently viewing, leaving the intended surface unchanged while another image receives the mark. [5][11]
Inspect the mesh normals as well. Flipped or inverted normals can prevent paint application, especially when the affected surface looks correct only from one viewing direction. [5][6]
Finally, save the painted image. Painting changes the texture data in Blender, but failing to save that image can make completed work disappear when you reopen the file or move the asset to another stage. [4]
These checks are boring because they are structural. They are also faster than rebuilding a texture, and they isolate whether the missing mark is a target problem, a UV problem, or a surface-direction problem.
Why brush adjustments cannot repair every artifact
Brush size, strength, spacing, and blend behavior control how a stroke is placed, but there is no authoritative best setup for detailed 4K painting in Blender 3.5 and later. The right settings depend on the asset, UV scale, intended mark, and image resolution. [7]
A smaller brush can help you avoid crossing a tight boundary. Lower strength can build gradual color. Different spacing can change the smoothness and density of repeated brush dabs, but none of these settings creates texels that an undersized island lacks. [7]
The same caution applies to viewport artifacts associated with the In Front option. Reports connect that display setting with texture-painting artifacts, but the behavior is not established as universal across every scene and hardware configuration. [1][6]
Turn In Front off as a diagnostic step when the viewport result looks suspicious, then compare the texture image and material output. Do not build an entire fix around that switch unless it changes the actual symptom on your asset.
Color can also appear inconsistent between 2D image painting and the 3D viewport when color-space settings differ. Compare the image editor, material setup, and viewport color management before repainting a color that may already be correct in the file. [1][6]
Resolution has a memory cost
Large textures, many active images, and demanding scenes can exhaust GPU memory during Blender 3.5 and later texture painting or rendering. The visible result can be an Out of Memory error, a crash, or a painting session that becomes unstable. [3]
Reducing texture resolution and enabling Simplify can reduce that load. This is often a better first response than assuming a damaged file, especially when the problem appears only after adding larger images or more texture sets. [3]
Hardware limits are moving targets. GPUs such as the RTX 5090 with 24 GB of VRAM can mitigate many older memory constraints, but available memory still depends on the scene, active textures, other GPU workloads, and system configuration. [2][3]
Blender runs on Windows, macOS, and Linux, yet painting behavior and performance can vary with hardware capabilities, drivers, color-management defaults, and settings such as Vulkan backend usage. [8] If a color or stability problem appears on one machine, compare the setup before assuming the file itself changed.
Sculpting choices affect the texture path
A Multiresolution modifier keeps a consistent underlying topology while adding sculptable subdivision levels. That stable structure makes it friendlier to workflows where you will bake sculpted detail and paint textures onto an organized UV layout. [7]
Dynamic Topology takes a different route. It changes mesh topology while sculpting, producing irregular polygon distribution that can complicate baking and subsequent texture work. [7]
Neither approach is inherently wrong. Use Dynamic Topology when freeform sculpting needs to drive the form, but expect extra cleanup or retopology before a conventional paint-and-bake pipeline becomes dependable.
For an asset headed toward controlled texture painting, we would reach for Multiresolution first. It preserves the relationship among the sculpt, UVs, and later bake targets, which removes one major variable while you diagnose seams and missing paint.
Frequently Asked Questions
Why do unpainted seams appear in Blender texture painting?
Unpainted seams usually result from UV layout and material boundaries rather than brush control. If UV islands are narrow, poorly arranged, or separated by different materials, the brush stroke cannot cover the seam because the paint applies only within the active UV island and image. Blender’s texture paint depends on continuous UV space and a single active texture to avoid these gaps.
How to fix texture paint bleed not covering seams in Blender?
Increasing Bleed extends paint beyond UV island edges but does not bridge narrow UV gaps or cross material boundaries. To fix seam coverage, first inspect and adjust the UV layout to provide more space or rearrange islands, and ensure materials do not interrupt texture continuity. Bleed is a margin extension, not a tool to create continuous paint across separate islands or materials.
What causes texture painting to fail across multiple materials in Blender?
When a model uses multiple material slots and textures, paint strokes only affect the active material’s image. This division breaks the assumption of continuity, causing strokes to stop abruptly at material boundaries. Each material and its texture must be organized carefully to ensure clear paint targets and avoid unexpected gaps.
How to troubleshoot memory errors during texture painting in Blender?
Memory errors, crashes, or stalled viewport updates often occur with high-resolution textures or complex scenes. To troubleshoot, reduce texture resolution or enable the Simplify feature to lessen memory load. Using Multiresolution modifiers instead of Dynamic Topology can also help maintain consistent topology and reduce memory strain during painting and baking.
Why does Blender texture paint leave missing pixels or lines?
Missing pixels or lines typically arise from narrow UV spaces, overlapping islands, or flipped normals preventing paint application. The brush only affects texels within the UV island and active image, so if UVs are cramped or incorrectly mapped, paint cannot fill all visible areas. Checking UV layout, normals, and active texture settings helps resolve these issues.
How we researched this
This article was assembled from 11 cited references.
Nothing here is based on hands-on testing. Where a figure or finding appears, it belongs to the source cited beside it, and the writing says so rather than implying otherwise. Every source is listed below so you can check it.
Sources
- Solving Texture Painting Issues in Blender
- VRAM shortages could be a thing of the past - NVIDIA and DirectX tech drops usage by up to 90% as seen in early tests
- Blender crashes when rendering: causes and fixes
- Blender texture paint not working? Check the image, UVs and saving | BlendShelf
- Blender Can't Paint on Texture: Troubleshooting and Solutions - Texture Gen
- Blender texture painting not working correctly - Materials and Textures - Blender Artists Community
- Blender Texture Paint Tutorial and Workflow Guide | NormalMap.ai
- Requirements, Blender
- #161902 - Texture Paint: Bleed ignores narrow UV space/joints on projection painting, leaving unpainted pixel holes. - blender - Blender Projects
- Introduction, Blender Manual
- texturing - Blender Texture Paint applying to incorrect object - Blender Stack Exchange
Related Articles
Create Seamless Texture in Blender: Step-by-Step Guide
Learn how to create seamless textures in Blender with tips on UV unwrapping, painting, resolution, and fixing seams for perfect tileable results.
Fix Lighting Issues in Blender
Learn how to fix lighting issues in Blender by balancing exposure, HDRI, and light falloff for better renders in Cycles and Eevee.
Common Mistakes in Blender Modeling
Learn common mistakes in Blender modeling focused on scale and transforms, and how to fix them for better results.
Fix Blender Crashing Issues: Troubleshooting and Solutions
Learn how to fix Blender crashing issues with practical troubleshooting tips for rendering, files, add-ons, and hardware problems.