
Create Seamless Texture in Blender: Step-by-Step Guide
Learn how to create seamless textures in Blender with tips on UV unwrapping, painting, resolution, and fixing seams for perfect tileable results.
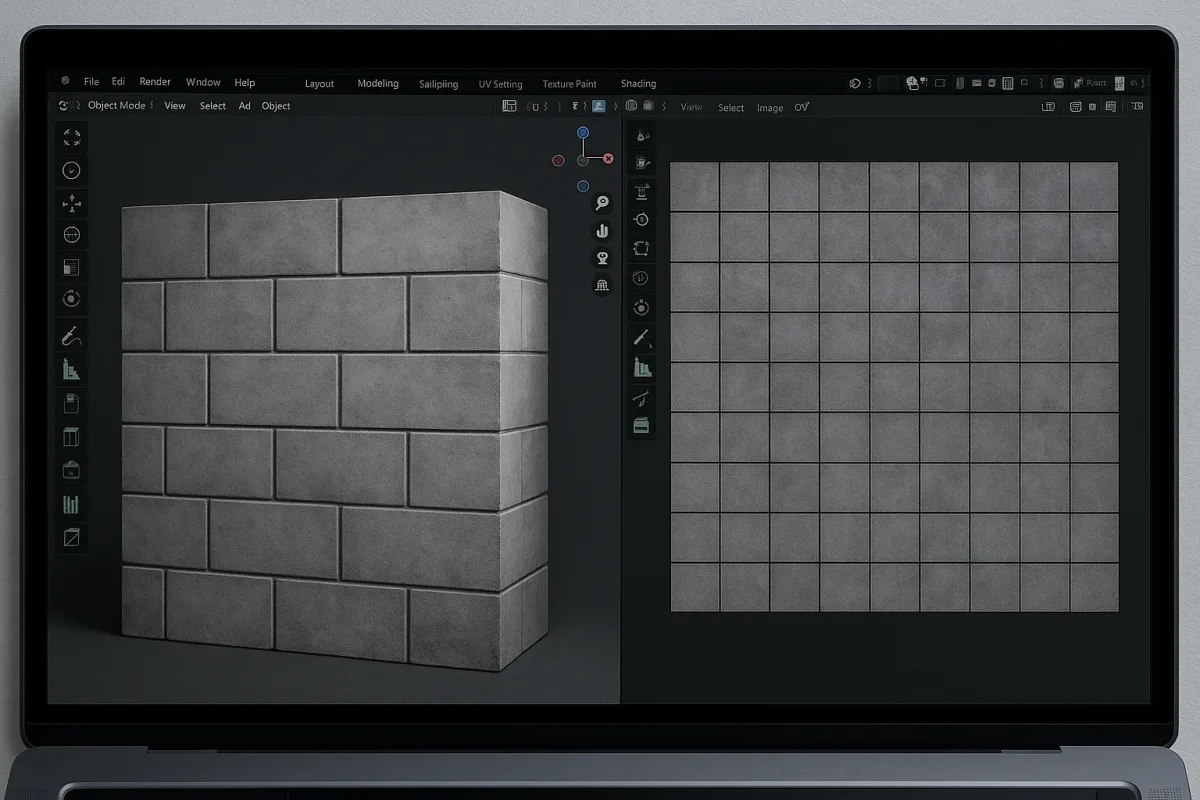
Build a repeatable test tile
A 2 m by 2 m plane gives you a fast, legible surface for building a seamless wall, floor, fabric, plaster, or ground texture in Blender 5.3. Keep it simple at first. The plane is where you find an edge mismatch before it reaches a larger asset.
Create the plane, set its dimensions to 2 m by 2 m, and give it a material with an Image Texture node. Set that image texture’s extension behavior to Repeat, so Blender 5.3 displays copies of the same image beyond its initial UV square. [1]
We would begin here even if the intended target is a room or prop. A flat test surface separates texture problems from model problems, and it lets you see the actual repeating pattern without bevels, lighting changes, or dense geometry concealing it.
Set the image resolution for the asset’s distance
A texture can be perfectly seamless and still look poor if its detail does not match the camera distance. For small or distant details, 512 by 512 pixels can be enough. Medium-distance walls and floors commonly call for 1024 by 1024 pixels. [1][2]
Use 2048 by 2048 for close-up furniture and countertops, where grain, scratches, and edge wear have to hold up near camera. Reserve 4096 by 4096 for hero assets that need exceptional visible detail. [1][2]
Those sizes are starting points, not performance guarantees. Texture memory and scene responsiveness vary with hardware and scene complexity, so do not assume a particular resolution will be cheap or expensive in every Blender 5.3 scene.
Keep texel density consistent
A brick texture looks wrong when one wall has crisp mortar lines and the adjacent wall has soft, oversized bricks. Texel density is the relationship between image pixels and model surface area, and keeping it consistent helps the material read as one manufactured or continuous surface. [2][3]
Check density across objects that share the same finish, especially architectural pieces. A floor, baseboard, and wall do not need identical UV layouts, but they should not reveal wildly different detail scales when they sit in the same shot.
We would establish density on the asset closest to camera, then use it as the reference for the rest. This keeps you from increasing texture resolution only because a neighboring object received much denser UV space.
Unwrap for the material, not for convenience
Before you paint, unwrap the plane in Blender 5.3 with Smart UV Project. It is a suitable fast option for mechanical and architectural objects, where the forms tend to have predictable faces and hard transitions. [4][11]
For a single plane, the UV result is straightforward. On a real mesh, fill holes before unwrapping so the UV layout avoids overlaps that can put unrelated surfaces into the same part of the image. [4]
Choose seams according to what the material will reveal. Put them in less visible areas, behind an object, under an overhang, or along an existing construction break, because a continuous painted finish exposes a poorly placed seam quickly. [4]
Choose the unwrap method that distorts least
Blender 5.3 offers unwrap approaches including Angle Based, Conformal, and Minimum Stretch, also known as SLIM. Their purpose is not to produce a universally correct UV map. They give you different ways to trade shape preservation against distortion. [4][11]
Angle Based and Conformal methods give you useful starting points for different forms, while Minimum Stretch targets distortion reduction. Check Blender 5.3’s UV overlays for stretching before texture painting, because brush marks will stretch with the UVs you approve. [4][11]
Adjust the UV island proportions for the image aspect ratio if your texture is not square. A rectangular image mapped through square assumptions can turn circles into ovals and make a deliberately even pattern look uneven. [4]
Turn on tiling before you paint the texture
In Blender 5.3 Sculpt Mode, enable Tiling so brush strokes repeat across the tile boundaries. This is the central habit behind seamless painting: paint as if the left edge already touches the right, and the top already touches the bottom. [1]
Then switch to Blender 5.3 Texture Paint Mode and ensure the image’s extension behavior remains set to Repeat. Paint your base color, noise, stains, fibers, or wear while the repeated copies are visible, not only in a single isolated image. [1]
A dark stain that ends at the right border must continue naturally at the left border. The same applies to a plank groove meeting the top edge, a woven thread, or a pebble cluster. If it stops abruptly, repetition will expose it.
Build variation without creating a visible grid
A seamless texture does not mean every tile must be visually anonymous. It means the transitions must be continuous. Large, distinctive marks can still work, but they become obvious when the same mark returns at fixed intervals across a broad surface.
Keep your highest-contrast details away from a single tile center if they would create a repeated bullseye. Spread smaller changes in color, roughness, and surface detail through the image, then inspect several repeats at once in Blender 5.3.
We would prioritize believable material scale over aggressive visual noise. A wall finish needs variation that supports paint, plaster, or concrete, while a wood surface needs directionality that supports grain. Random marks alone rarely establish either material.
Offset the image to expose border errors
A seam often hides at the outer edge of the image, where you are least likely to judge it clearly. Blender’s Offset filter shifts texture coordinates so the former outer borders move inward, making mismatched color, height, or painted detail easier to inspect. [10]
Use it after a paint pass, then inspect the newly centered cross-shaped seam. Look for a value jump, a broken line, an interrupted scratch, or a repeated detail that suddenly changes direction. Check the material under more than one viewing angle. [10]
The available documentation describes the Offset filter’s role in seam inspection, but does not establish one exhaustive sequence of settings for every texture. Treat it as a diagnostic view, then correct the visible defect in the image. [10]
Clone across the seam instead of blurring it away
In Blender 5.3 Texture Paint Mode, use the Clone brush to sample existing texture information from the 3D cursor and paint it over a seam. This is often better than softening the border until it disappears, which can leave a muddy stripe in the material. [10]
Adjust brush size and strength to suit the feature you are repairing. A broad, low-strength clone can blend a gradual color shift, while a smaller brush can continue a crack, thread, pore pattern, or grain line across the boundary. [10]
Inspect the model from multiple angles when you finish. A repair that works in flat image view can still reveal itself through stretched UVs, a normal map, specular response, or directional material features on the mesh. [10]
Test the material on a larger surface
Apply the completed image to the 2 m plane in Blender 5.3 and increase its visible repetition. Render test views to check for seams, then return to paint and correct the area that fails. [1]
Do not judge the texture only in a close orthographic viewport. A floor can look fine when one tile fills the screen, then reveal a checkerboard rhythm when twelve copies sit beneath a camera. A wall can show vertical bands under grazing light.
Test with lighting that resembles the asset’s destination. Roughness variation, normal detail, and small color discontinuities can become visible only once light rakes across the surface or reflects at an angle.
Save color data in the right format
Use PNG for most painted seamless texture maps that need clean color, lossless storage, or alpha transparency. PNG supports 8-bit and 16-bit data, and it avoids the compression artifacts that can turn smooth gradients into visible blocks. [10]
JPEG files are smaller, but their lossy 8-bit compression can introduce artifacts and they do not support alpha. We would skip JPEG for a close material where quality is the goal, especially for smooth painted color, roughness control, or subtle masks. [10]
Use OpenEXR where HDR information, high precision, alpha, compositing, or color grading needs justify it. OpenEXR supports 16-bit and 32-bit floating-point data, which helps preserve color precision and reduce banding. [10]
Repair banding and stretched paint at the cause
Color banding can look like a seam even when the UV border aligns. Higher bit depth improves color precision, so use a 16-bit PNG or floating-point OpenEXR when smooth gradients or restrained tonal shifts are central to the material. [10]
Stretching is a UV issue before it becomes a painting issue. Return to the Blender 5.3 UV layout, inspect the stretched area, and adjust the unwrap before repeatedly cloning or repainting distorted marks. [4][11]
For stubborn image defects, manual seam correction in an image editor remains an option. Higher-resolution images can also help, provided the added pixels address a visible need rather than only increasing file size. [5][6][7]
Switch to procedural texture for continuous organic detail
A painted tile can fail on highly detailed or organic surfaces. Dense curvature, uneven forms, and broad gradients can produce visible seams, stretching, or color banding that become expensive to hide with UV edits and clone strokes. [5][6][7]
For those surfaces, use Blender 5.3 shader nodes to generate procedural texture detail. Procedural methods avoid bitmap tile borders and can provide continuous material variation across a model, making them a strong option for some organic or highly irregular work. [5][6][7]
We would reach for procedural texture when the material is fundamentally continuous, such as broad color breakup or fine surface noise. A photographed label, painted graphic, or specific directional grain still benefits from deliberate image mapping.
Move to Substance Painter when the asset needs deeper control
Adobe Substance Painter is the stronger next step when Blender 5.3 Texture Paint cannot give you enough precision on a complex asset. It supports direct painting on models and advanced texturing workflows, including Blender material import and parameter updates through the Substance 3D add-on. [8]
Use it when your model has many parts, detailed organic transitions, or a material that needs controlled layers and higher-fidelity painted information. Blender 5.3 remains a capable place to test, assign, and render the result, especially for simpler seamless surfaces.
For final material presentation beyond Blender’s native render engines, Marmoset Toolbag 3.04 provides real-time rendering with enhanced lighting and material display tools. It fits the stage where you need to judge whether texture scale, roughness, and surface breakup read convincingly under presentation lighting. [9]
Frequently Asked Questions
How do I create a seamless texture in Blender?
Start by creating a simple 2 meter by 2 meter plane and assign it a material with an Image Texture node set to Repeat mode. Unwrap the mesh using Smart UV Project to get a clean UV layout. In Texture Paint mode, enable tiling to repeat brush strokes across the texture, then paint and inspect the repeating pattern on the plane to catch edge mismatches early.
What is the best resolution for seamless textures in Blender?
Choose texture resolution based on the asset's viewing distance. Use 512 by 512 pixels for small or distant details, 1024 by 1024 for medium-distance surfaces like walls and floors, 2048 by 2048 for close-up furniture or counters, and 4096 by 4096 for hero assets requiring exceptional detail. These are starting points and should be adjusted based on hardware and scene complexity.
How can I fix UV stretching and seams when painting textures in Blender?
Before painting, check and fix UV stretching by choosing an unwrap method that minimizes distortion, such as Angle Based, Conformal, or Minimum Stretch (SLIM). Place seams strategically in less visible areas like behind objects or along construction breaks. Use Blender’s Offset filter and Texture Paint Clone brush to inspect and paint over remaining seams, adjusting brush size and strength as needed.
How do I enable tiling for texture painting in Blender?
In Blender’s Texture Paint workspace, enable the tiling option to allow brush strokes to repeat seamlessly across the texture. This works together with an image texture node set to Repeat mode on the material, ensuring that painting on one edge matches the opposite edge, creating a seamless tile.
When should I use procedural shaders instead of bitmap textures in Blender?
Procedural shaders are recommended when painting bitmap textures fails due to visible UV seams, stretching, or color banding, especially on organic or complex models. In these cases, procedural methods or external tools like Substance Painter can provide better results by avoiding the limitations of UV-based bitmap painting.
How we researched this
This article was assembled from 11 cited references.
Nothing here is based on hands-on testing. Where a figure or finding appears, it belongs to the source cited beside it, and the writing says so rather than implying otherwise. Every source is listed below so you can check it.
Sources
- How to Use Seamless Textures in Blender
- Texel density for interiors with Locker3d textures | Locker3d
- Texel density in Blender: values, calculation, checker
- Seams & Islands: Blender UV Mapping - Blender Base Camp
- Fixing Common Seamless Texture Problems | Texturize
- Seamless Textures in Blender: Fix Seams and Tiling - A23D
- Seamless Tileable Textures in Blender: Full Guide, QuickPoly
- Best 3D modeling software of 2025
- Free Update: Marmoset Toolbag 3.04 | Marmoset Toolbag
- Introduction - Blender 5.3 Manual
- A UV Unwrapping Guide, Blog, Blender Studio
Related Articles

Create Realistic Sky in Blender
Learn how to create a realistic sky in Blender using procedural textures, HDRIs, and sun direction for believable outdoor lighting.
How to Bake Textures in Blender: A Practical Guide
Learn how to bake textures in Blender with tips on UVs, resolution, and Cycles baking for game-ready assets and efficient workflows.
Create PBR Materials from Scratch: A Practical Guide
Learn how to create PBR materials from scratch with correct texture maps, workflows, and software tips for realistic 3D rendering.
Realistic Character Skin Shader Blender: Step-by-Step Guide
Learn how to create a realistic character skin shader in Blender using subsurface scattering, proper texture setup, and scale considerations.