
Sculpting Software for Character Creation: Blender vs ZBrush
Compare sculpting software for character creation and learn when to choose Blender or ZBrush for your 3D sculpting needs.
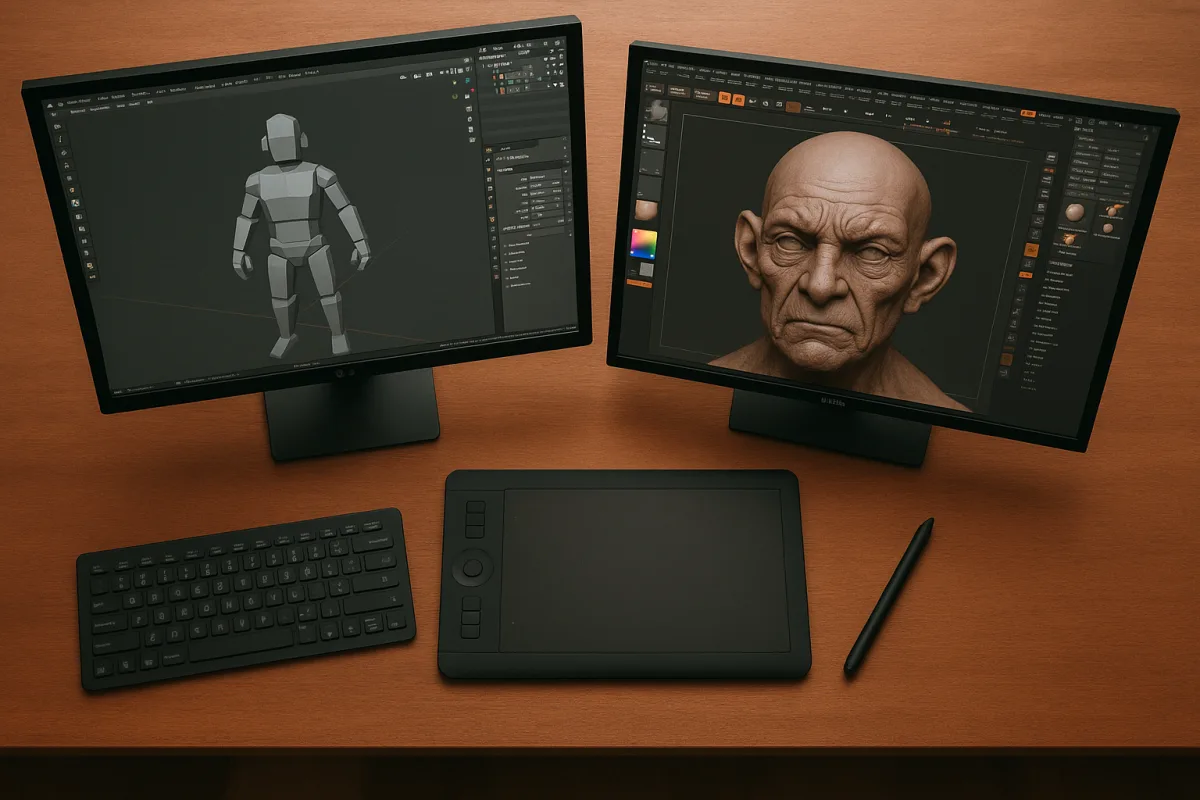
Blender vs. ZBrush: the short answer
A head blockout can become a production asset quickly: pores need to read at close range, the mouth needs clean deformation space, and the final mesh needs UVs, textures, and a render. That is where Blender and ZBrush split.
Blender is a free, open-source 3D suite with sculpting, retopology, UV mapping, rigging, and rendering in the same application. ZBrush by Maxon is a specialized digital-sculpting application built around dense organic forms and deep surface work. [1][3]
For a complete character made by one artist or a small team, we would reach for Blender first. Keeping the sculpt, retopology, UVs, and render scene together reduces handoffs, provided you keep transforms, coordinates, and exports disciplined.
For a hero creature, close-up head, or character whose identity lives in skin, wrinkles, scales, and secondary forms, we would reach for ZBrush. It puts sculpting first, while Blender asks sculpting to share room with the rest of the pipeline.
Neither choice removes the need for topology judgment. A detailed sculpt can still be a poor production asset if its lower-resolution mesh cannot deform, bake, unwrap, or export cleanly.
The comparison at a glance
| Criterion | Blender | ZBrush |
|---|---|---|
| Core role | Full 3D suite, from sculpting through rendering | Specialized high-resolution sculpting and painting |
| Best character work | Complete indie, freelance, and generalist pipelines | Film and game characters, creatures, and detail-heavy hero assets |
| Sculpting ceiling | Serious sculpting within an all-in-one workflow | Built for extremely dense organic work, including models above 40 million polygons |
| Retopology and UVs | Integrated retopology and UV tools | Requires topology planning and often a companion workflow |
| Texturing and rendering | Includes tools for both within the suite | Focuses on sculpting and 2D or 2.5D painting, not a complete render pipeline |
| Hardware emphasis | Benefits from balanced CPU and GPU capability | Relies heavily on strong single-core CPU performance and ample RAM, with limited GPU dependence |
| Learning investment | Broad interface and a steep curve because it covers many disciplines | Narrower focus, but its sculpting conventions still need dedicated study |
| Character-pipeline handoff | Fewer application handoffs, but exports require transform discipline | Strong sculpt handoff, including a newer Substance Painter bridge, though plugin issues remain reported |
| Cost position | Free and open source | Premium subscription software |
| We would choose it for | Artists who need one desktop tool to finish a character | Artists whose paid work depends on speed and control at very high sculpt resolution |
Sculpting range and surface control
ZBrush is the stronger pure sculpting choice. Its dynamic resolution approach is designed for high-poly organic modeling, and it is associated with character and creature work where iteration must continue long after a mesh has passed ordinary modeling density. [1][3]
That capacity changes how you approach a face. You can establish large planes, refine eyelids and lips, then continue into pores and skin breakup without making the application’s wider modeling, shading, or rendering systems your immediate concern.
ZBrush is reported to handle models exceeding 40 million polygons. That makes it the premium option here for artists building detailed film and game characters, especially when a high-resolution sculpt is the source for normal, displacement, or texture maps. [1]
Blender can produce serious character sculpts, but it is fundamentally a generalist environment. Its advantage is continuity: you can make the base mesh, sculpt it, retopologize it, unwrap it, rig it, and render it without changing applications. [1]
For many characters, that continuity beats a higher sculpt ceiling. An indie game character may need clean topology, UVs, bakes, and a presentable turnaround far sooner than it needs individually sculpted skin pores.
Topology, UVs, and the asset that leaves the sculpt room
Blender wins the complete-asset criterion because retopology and UV mapping are part of the same suite. That makes it easier to keep the production mesh, UV layout, and render-ready version connected to the sculpted source. [1]
This is a workflow advantage, not a rule that every character must remain in one file. A separate sculpting application can be the right move when it gives you better form control, but each export introduces opportunities for scale, axis, and transform mistakes.
Blender’s procedural and cross-application exports require discipline to maintain consistent coordinates and transforms. The risk varies with project complexity, but it is enough to establish naming, scale, and export conventions before the character reaches texturing or rigging. [1]
ZBrush requires more deliberate topology planning because its strength is dense sculpting, not being an all-in-one character-production suite. Treat the sculpt as the high-resolution source, then decide early where the animation-ready mesh, UVs, and material work will live.
For a freelance artist delivering a finished character render, Blender can keep those decisions visible. For a sculptor handing a high-resolution creature to a separate modeling, surfacing, or technical-art team, ZBrush’s narrower role may fit cleanly.
Hardware and learning time
ZBrush is CPU and RAM driven. A strong single-core CPU and substantial memory are important for dense sculpting, while GPU power has a smaller role than many artists expect. [16]
Blender benefits from a more balanced machine because its scope includes viewport work, rendering, simulation, and other GPU-aware tasks alongside sculpting. If your computer is built for rendering as well as modeling, Blender uses that broader balance well. [1]
Nomad Sculpt shows the opposite end of the hardware spectrum. It is optimized for mobile devices, which makes it portable and approachable, but mobile limits can reduce the sculpt complexity that a desktop ZBrush workflow can sustain. [2][4]
The interface commitment differs too. A Blender sculpting course can run about 37.5 hours and may assume prior 3D familiarity, reflecting how much of the wider suite sits around the sculpting workspace. [17]
ZBrush training can focus more tightly on professional sculpting methods, with courses around 10 hours, while beginner-oriented Nomad Sculpt courses can run around nine hours. Course length is not a measure of difficulty, but it does show the narrower initial scope of mobile sculpting. [7][8]
Pipeline handoff and Substance Painter
A sculpt is usually not the final surface. You still need a plan for retopology, UVs, baking, painted materials, and the renderer or game engine that will show the character.
ZBrush gained a direct bridge to Substance Painter in 2026 that uses FBX, improving the route from sculpt to texturing. Reported plugin loading failures mean you should test the bridge on your own version combination before building a delivery schedule around it. [18]
Blender can keep more stages under one roof, but that does not automatically make it the faster route. If the final character needs dedicated texture painting, you may still export, bake, and work in another application.
Our preference is straightforward. Use Blender as the hub when asset completion is the bottleneck. Use ZBrush as the sculpting specialist when the quality and speed of organic surface work are the bottleneck.
Where the other character tools fit
3DCoat sits in the mid-range desktop category and is the strongest all-in-one alternative for artists who want voxel sculpting, retopology, and texturing together. It suits someone who wants a broader sculpt-to-surface toolkit without making Blender or ZBrush the center of the workflow. [5]
Mudbox by Autodesk is also a mid-range option, aimed at character and prop artists who prefer a sculpt-first workflow that produces texture-ready maps. It fits artists who want sculpting connected closely to map output. [13]
Nomad Sculpt is the entry-level mobile sculpting option for tablet artists who want a friendly interface and essential sculpting tools. It falls down as a full production application because it lacks advanced UV mapping and rendering features. [2][4]
ZBrush for iPad is the other serious tablet choice. Its free plan includes 28 brushes and a 20 million polygon cap, making it the closer tablet route to learning actual ZBrush workflows before moving into the fuller subscription version. [12]
Plasticity occupies a different niche from either Blender or ZBrush. It is a lightweight CAD-style modeler suited to precise forms, prototyping, and 3D-print-oriented work, but it lacks the sculpting features needed to replace a character sculpting application. [14]
SculptGL is the fastest entry point for a beginner who wants to try sculpting in a browser, with no download or account. It suits a first encounter with digital clay, not a complete character-production pipeline. [3]
MagicaVoxel is a voxel blockout and color-export tool for small teams. It suits stylized characters and environments where quick silhouette iteration matters more than anatomical sculpting or deformation-ready topology.
Daz Studio is a free character posing and rendering tool with a large asset library and accessible controls. It suits artists and developers who need posed characters and rendered scenes, rather than a primary sculpting workspace. [5]
Wings 3D is a clean, free, open-source subdivision modeler for artists focused on polygon modeling. It belongs beside sculpting tools as a base-mesh option, not as a replacement for either Blender’s or ZBrush’s sculpting systems. [5]
MakeHuman is a free parametric human-character tool, and its MPFB 2.0.18 release arrived in October 2026. It suits artists who need a customizable realistic human starting point, then intend to refine or adapt that base elsewhere. [11]
Houdini and Plasticity can also be complementary tools, but neither has documented support here as a primary replacement for traditional character sculpting. Houdini is associated with procedural modeling and complex simulation, while Plasticity favors exact CAD-like construction. [9][10][14]
Who each option suits
Choose Blender if you are a beginner, indie developer, freelancer, or generalist building complete character assets. Its free, all-in-one structure suits you when the same project needs sculpting, retopology, UVs, rigging, and rendering.
Blender falls down when your work repeatedly demands the deepest high-resolution organic sculpting and your time is spent fighting for finer control. Its wide scope also means a larger interface and a learning commitment across several disciplines.
Choose ZBrush if you are a professional character or creature artist, or work in an AAA-style pipeline where sculpted form and surface detail carry the asset. It suits high-resolution iteration, dense anatomy, skin, scales, wrinkles, and detailed production sculpts.
ZBrush falls down when you need one application to carry the character through every later stage. Its premium subscription model, CPU-and-RAM-heavy demands, and narrower pipeline role make it a weaker starting point for artists who need a free generalist workstation.
They are close if your characters need capable desktop sculpting but not extreme mesh density. In that middle ground, choose Blender for pipeline coverage and ZBrush for sculpting focus.
Frequently Asked Questions
Which sculpting software is best for character creation?
Blender is best for artists or small teams who want a single free application to handle the entire character pipeline, including sculpting, retopology, UV mapping, and rendering. ZBrush is better suited for creating highly detailed, dense organic models where surface detail and rapid iteration at very high polygon counts are critical.
How to choose between Blender and ZBrush for sculpting characters?
Choose Blender if you need an all-in-one tool that supports the full character creation process with fewer application handoffs. Opt for ZBrush when your work demands extreme sculpting detail, such as pores and skin breakup, especially for hero characters or creatures where sculptural control is paramount.
What are the hardware requirements for character sculpting software?
ZBrush relies heavily on a strong single-core CPU and ample RAM (32GB or more recommended) but has limited GPU dependence. Blender benefits from a balanced system with both capable CPU and GPU performance to handle its broader range of 3D tasks effectively.
Can I complete a character pipeline using only Blender?
Yes, Blender includes integrated tools for sculpting, retopology, UV mapping, rigging, and rendering, allowing a character to be created from blockout to final render within one application. However, maintaining consistent transforms and exports requires disciplined workflow management.
When should I use ZBrush instead of Blender for sculpting?
Use ZBrush when the project requires extremely high-resolution sculpting with dense organic detail that goes beyond Blender’s sculpting ceiling, such as for film-quality hero characters or creatures. ZBrush’s focus on sculpting allows for deep surface work that Blender’s all-in-one approach cannot prioritize.
How we researched this
This article was assembled from 18 cited references.
Nothing here is based on hands-on testing. Where a figure or finding appears, it belongs to the source cited beside it, and the writing says so rather than implying otherwise. Every source is listed below so you can check it.
Sources
- Blender vs ZBrush (2026): Features, Pricing & Which to Pick
- Sculpting Software for Beginners: Blender vs Nomad Sculpt
- What Is Digital Sculpting? A Plain Guide for 2026, Re:Form Sculpt Blog
- Nomad Sculpt Review: Version, Pricing, License and Technical Details
- Best 3D modeling software of 2025
- Tips | Nomad
- FlippedNormals, Character Concept Sculpting in ZBrush | CG Persia
- Introduction to 3D with Nomad Sculpt | Coursera
- Create a Procedural Character | SideFX
- 3D Modeling Tools: Choosing the Right Software for Design, Animation, and Digital Creation, SurgeryPlanet
- Best All 3D Modeling Software | 2026 Rankings
- ZBrush by Maxon
- Mudbox by Autodesk
- Plasticity
- ZBrush
- ZBrush is CPU and RAM-driven, not GPU-bound
- The Ultimate Blender 3D Sculpting Course
- ZBrush 2027.0.1 Bridge fails to install/load in Substance Painter 2026.12.2.0 (Steam), Missing zbrush_painter_plugin | Community
Related Articles
Blender vs Nomad Sculpt for Beginners: Which to Choose?
Compare Blender 4.5 LTS and Nomad Sculpt to find the best 3D sculpting app for beginners based on workflow, hardware, and learning goals.
Sculpting Software for Beginners: Blender vs Nomad Sculpt
Learn how to choose the right sculpting software for beginners by comparing Blender and Nomad Sculpt features, ease of use, and workflow fit.
Best Software for Procedural Texture Creation in 2026
Explore the best software for procedural texture creation, comparing Substance Designer and Houdini for different workflows and material needs.
Maya vs 3ds Max Modeling Tools: Key Differences Explained
Explore the key differences between Maya vs 3ds Max modeling tools to choose the best fit for your 3D modeling needs in 2026.