
Blender Ergonomic Setup for Beginners: Safe Workspace Tips
Learn Blender ergonomic setup for beginners to reduce strain with posture, monitor placement, breaks, and peripheral recommendations.
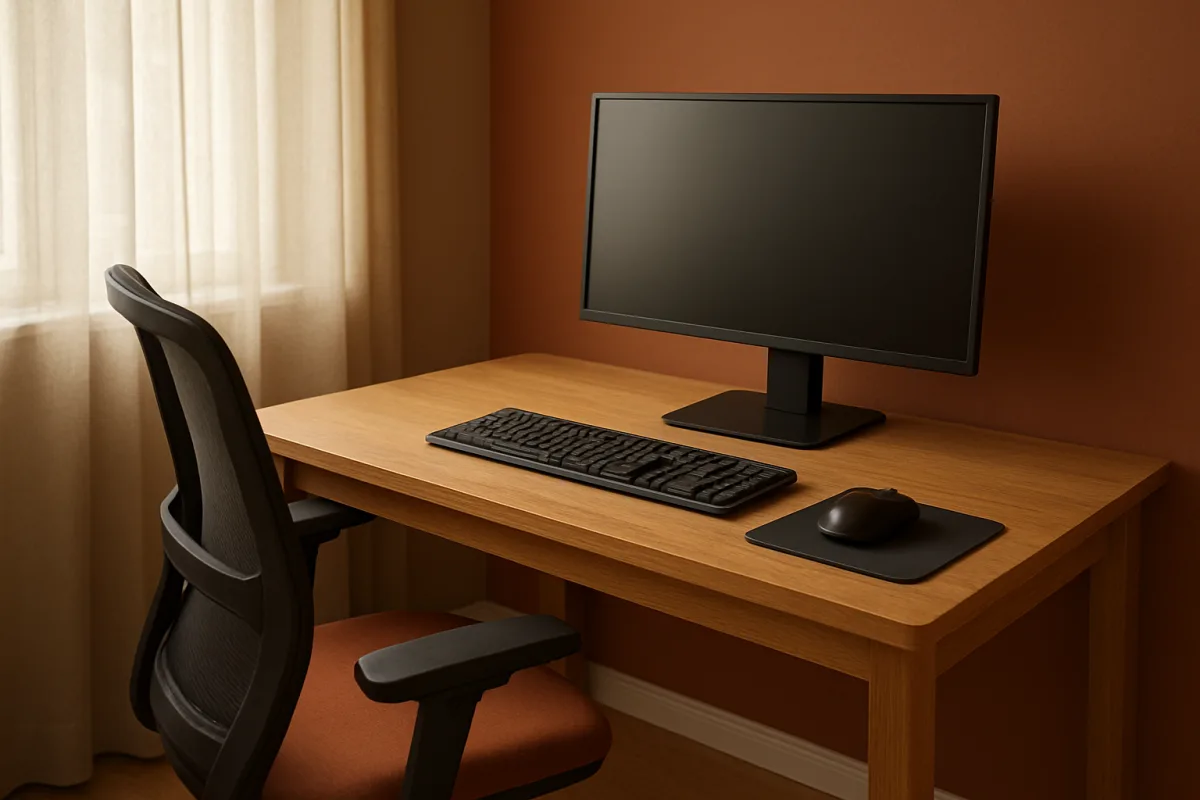
The mouse hand on the edge of the desk
The warning sign is often small: your mouse hand drifts off the desk edge while you orbit a model, or your shoulder rises during a long evening of box modeling. Nothing crashes. Your body is carrying the cost.
For Blender beginners, safe practice starts with reducing repeated strain. This is the single system behind chair height, monitor position, mouse choice, lighting, breaks, and workspace organization: keep force low, posture neutral, and static time short.
A repetitive strain injury, often grouped with other musculoskeletal disorders, develops through repeated movement, awkward positions, force, and insufficient recovery. Modeling can combine all four, especially when you hold navigation keys while making fine mouse movements. [1][2]
The goal is not a perfect frozen posture. No one maintains one for hours. Your goal is to create a setup that lets you shift position often without repeatedly loading the same wrist, neck, shoulder, or lower-back angle.
Neutral posture is the starting point
Start with the chair, because its height changes everything above it. Harvard Environmental Health and Safety recommends a setup in which your feet are supported, your knees sit around hip level, and your back has support from the chair. [1]
Your elbows should remain close to your body while working, with the forearms roughly level with the desk. The mouse and keyboard belong near enough that you do not have to reach forward from the shoulder for common Blender 5.2 LTS commands. [1][2]
Keep your wrists straight when using the mouse and keyboard. A bent wrist narrows the comfortable range in which tendons and nerves move, then every orbit, selection, shortcut, and numeric entry repeats that loaded position. [1][2]
This is why a desk that looks tidy can still be a poor modeling station. If the keyboard is centered but the mouse sits far to the side, your dominant arm spends every session extended away from the body.
Move the mouse closer first. If the keyboard’s numeric keypad pushes the mouse too far right, try centering the letter keys with your body instead of centering the whole keyboard, then assess whether your shoulder can stay relaxed.
Blender 5.2 LTS documents a keyboard with a numeric keypad and a three-button mouse with a scroll wheel as the standard peripheral setup. The keypad supports established view controls, while the mouse supports orbiting, panning, zooming, and selection. [11]
We would begin with that conventional input arrangement. It gives you the navigation Blender 5.2 LTS expects without adding new hardware, new hand positions, or a second learning curve while basic viewport movement is still becoming automatic.
Monitor height protects your neck, not your eyes alone
A monitor placed too low pulls your head forward. A monitor placed too high encourages you to lift your chin. Either position turns a task such as retopology, UV layout, or node editing into prolonged neck work.
Harvard’s ergonomic guidance places the top of the monitor at or slightly below eye level, with the screen directly in front of you. That lets you look forward or gently down, instead of twisting or bending your neck. [1]
Screen distance also affects posture. Put the monitor far enough away that you are not leaning toward it to inspect wireframes, small Outliner labels, or shader nodes, but near enough that you are not squinting. [1][3]
A 27-inch display is often suggested for comfortable work, while Blender 5.2 LTS supports Full HD resolution, 1920 by 1080, and higher resolutions. Blender also supports multiple monitors, which can give dedicated space to reference, documentation, or render output. [11]
More screen area does not automatically solve strain. A large display set too close can still make you turn your head repeatedly, while a second screen placed far to one side can create a new neck rotation problem.
Keep the screen you inspect most often directly ahead. If you add another display for reference images or render monitoring, place it close enough that moving between screens means turning your eyes first, then your head, not twisting through the torso.
Breaks are part of the modeling workflow
A static posture becomes tiring even when it begins in a good position. Time magazine’s reporting on work-from-home ergonomics emphasizes regular movement and changing position, because remaining seated in one posture for too long contributes to back discomfort. [3]
For Blender beginners, this means treating breaks as part of the work rather than a reward after it. Use a natural stopping point: after blocking the silhouette, finishing a UV island group, baking maps, or setting a render to run.
Stand up, walk a few steps, relax your hands, and let your eyes focus beyond the monitor. The point is to interrupt the same small movements before they become the only movement your body has made for an hour.
Task variation helps for the same reason. Alternate dense mouse work, such as sculpting or weight painting, with a task that changes hand movement or lets you step away, such as reviewing reference, naming objects, organizing collections, or checking a render.
Do not interpret discomfort as a technique problem you can solve by gripping the mouse harder or speeding through shortcuts. Pain, numbness, tingling, or persistent stiffness are signals to stop loading that area and reassess the workstation. [1][2]
If symptoms persist, seek advice from a qualified health professional. Ergonomic changes can reduce workplace strain, but they are not a diagnosis or a replacement for care when discomfort continues. [1][2]
Reduce the force in common Blender actions
Many beginners grip a mouse tightly while trying to orbit accurately around a mesh. The tension can travel from fingers to wrist, forearm, shoulder, and neck, especially when the mouse lacks room to move.
Give the mouse enough clear desk surface that you can move it with the arm and forearm, not only by repeatedly bending the wrist. Keep its cable, if it has one, from dragging across the desk or catching on objects.
Blender 5.2 LTS also supports optional NDOF devices, commonly called 3D mice, for navigation. They can separate viewport movement from the regular mouse, but they introduce another device, another cost, and another coordination habit. [11]
We would skip a 3D mouse at the beginning unless navigation is already your clear bottleneck. Learn the standard mouse-and-keyboard scheme first, then add specialized hardware when you understand exactly which repeated action it would reduce.
For sculpting and texture painting, Blender 5.2 LTS supports graphic tablets. A stylus can suit brush-based work because pressure and drawing motion map naturally to sculpting or painting, though it does not remove the need for neutral wrist and shoulder positions. [11]
Switching tools can be valuable when it changes the movement itself. It is less helpful when you keep the same hunched posture, hold the stylus too tightly, and continue working without pauses because the new device feels more creative.
Make the interface easier to read
Tiny text and crowded panels increase the urge to lean closer. Blender workspaces organize editors for different tasks, so a modeling layout can prioritize the 3D Viewport and Outliner, while a shading layout can give the Shader Editor room to breathe. [4]
Organizing workspaces by task reduces unnecessary visual clutter. You do not need every editor open while you are moving vertices, and you do not need an oversized 3D Viewport when the job is carefully adjusting a material node network. [4]
Use interface scaling and readable theme contrast where your Blender 5.2 LTS configuration allows it. The safety reason is straightforward: if you can read text and identify controls from a supported posture, you have less reason to crane forward.
Avoid building a highly customized shortcut map during your first days. A few changes that solve a real reach or repetitive-action problem can help, but changing every familiar command makes tutorials, shared workstations, and troubleshooting harder to follow.
Keep changes intentional. If a shortcut requires an awkward chord, repeats constantly, and causes your hand to tense, change that one. If it merely feels unfamiliar because you are new, give the standard mapping time first.
Light the desk, not the glare
The bright rectangle of a Blender 5.2 LTS viewport can hide a poor room setup until your eyes feel tired. Reflections, window glare, and a dark room surrounding a bright monitor make detailed work harder to view comfortably.
Gebesa recommends positioning a desk perpendicular to windows to reduce glare. It gives daylight access without placing a window directly behind the monitor or directly in your line of sight. [12]
For general desk work, Gebesa gives an illuminance range of 300 to 500 lux. Detailed tasks need 500 to 750 lux, a range that fits close inspection of texture seams, small topology defects, or reference photographs. [12]
Neutral-white lighting around 3500K to 4500K is commonly recommended for a home office. Artevaris advises balancing color temperature with adequate brightness, rather than relying on warmer light alone to make a room feel comfortable. [5]
Warmer lighting in the 2700K to 3000K range may feel cozier in colder months, but Livingetc reports that the feeling of warmth can come partly from visual cues. It does not replace enough light on the desk. [6]
Do not chase an exact seasonal Blender rule. None is established. Keep the room ventilated and comfortably temperate, then correct obvious glare, darkness, or reflections before assuming the software itself is causing visual fatigue.
Build a station that lets you continue
A safe Blender 5.2 LTS setup is a system with several modest adjustments working together. The chair supports you, the display meets your gaze, the mouse stays close, the desk is lit, and breaks interrupt static loading.
That system costs less than trying to solve every discomfort with premium gear. We would spend time on chair adjustment, monitor placement, mouse space, and lighting before adding tablets, secondary displays, or navigation controllers.
The habit to keep is simple: whenever you notice yourself leaning, gripping, reaching, or holding still, change the workstation or the task before you push through another hour. Your model can wait a few minutes.
Frequently Asked Questions
How do I set up an ergonomic workspace for Blender as a beginner?
Start by adjusting your chair so your feet are supported, knees are about hip level, and your back is well supported. Position your keyboard and mouse close enough to keep your elbows near your body and forearms roughly level with the desk. Keep your wrists straight while using input devices, and arrange your desk and peripherals to allow frequent shifts in posture without strain.
What is the best posture to use while modeling in Blender?
Maintain a neutral posture with your shoulders relaxed, elbows close to your body, and wrists straight. Avoid reaching forward or bending your wrists while using the mouse and keyboard. The goal is to keep your body aligned so you can move naturally and avoid holding any position that loads the same muscles or tendons repeatedly.
How should I position my monitor and peripherals for Blender work?
Place the top of your monitor at or slightly below eye level, directly in front of you, so your neck stays neutral. The screen should be far enough away to avoid leaning forward but close enough to read interface details without squinting. Keep your mouse and keyboard near your body to prevent reaching and shoulder strain, ideally centering the letter keys rather than the whole keyboard if the numeric keypad pushes the mouse too far to the side.
What breaks and movements help prevent strain during Blender sessions?
Take short breaks to move and change focus regularly during modeling sessions to avoid prolonged static posture. These breaks reduce the risk of discomfort and repetitive strain injury by allowing muscles and tendons to recover. Shifting your position often and incorporating brief stretches or movements supports long-term comfort.
Which mouse and keyboard setup is recommended for Blender beginners?
A standard three-button mouse with a scroll wheel and a keyboard that includes a numeric keypad is recommended for Blender beginners. This setup supports Blender’s established navigation controls without requiring additional hardware or new hand positions, helping beginners focus on learning viewport movement efficiently.
How we researched this
This article was assembled from 12 cited references.
Nothing here is based on hands-on testing. Where a figure or finding appears, it belongs to the source cited beside it, and the writing says so rather than implying otherwise. Every source is listed below so you can check it.
Sources
- Ergonomics | Harvard Environmental Health and Safety
- Ergonomics Prevention
- Getting Back Pain While Working From Home? An Ergonomics Expert Offers Advice
- Blender Interface for Beginners: Editors and Workspaces
- Home Office Lighting: How to Light a Desk (Focus & Video Calls) | Artevaris
- I Asked Lighting Experts: "Does Turning on Your Home's Lighting Actually Make You Feel Warmer?" It Comes Down to Reducing 'Visual Cues', They Tell Me
- Blender File Management Tips for Organized Projects
- Getting Started | Nomad
- Blender on Android vs. Nomad Sculpt: Which Should You Use?
- Best 3D modeling software of 2025
- Configuring Peripherals - Blender 5.2 LTS Manual
- Office Lighting for Productivity: Lux, Color and Glare | Blog Gebesa
Related Articles
Blender Ergonomics for Beginners: Safe Setup and Breaks
Learn Blender ergonomics for beginners with tips on posture, breaks, and workspace setup to work safely and comfortably.
Blender Safety Tips for Beginners
Learn essential Blender safety tips for beginners on ergonomics, data backup, hardware care, and digital security to work safely and efficiently.
Sculpting in Blender for Beginners
Learn sculpting in Blender for beginners with key brushes, workspace setup, and dynamic topology tips to start your 3D sculpting journey.
Blender vs Nomad Sculpt for Beginners: Which to Choose?
Compare Blender 4.5 LTS and Nomad Sculpt to find the best 3D sculpting app for beginners based on workflow, hardware, and learning goals.