
Realistic Fire Effect in Blender
Learn how to create a realistic fire effect in Blender using Mantaflow, shaders, lighting, and simulation tips for photorealistic results.
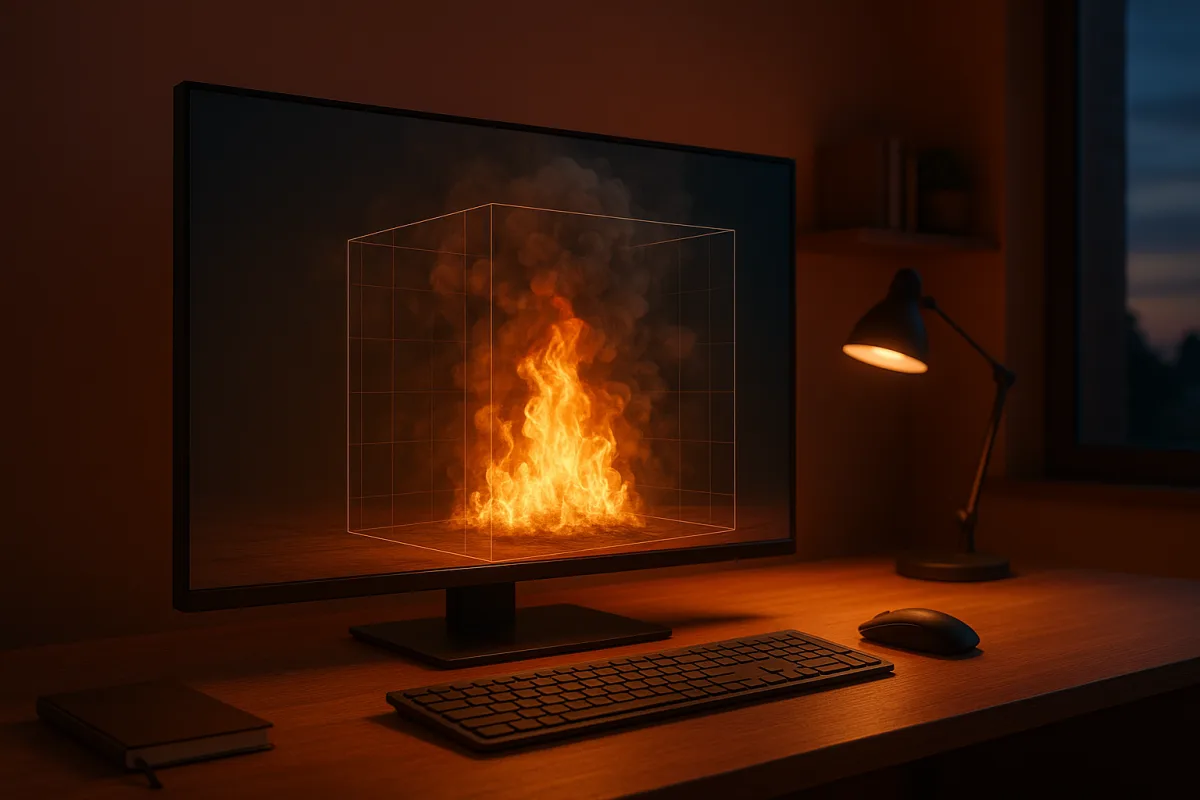
Start with the shot, not the simulation
I am working in Blender 5.2 for this guide. Mantaflow fundamentals from older Blender 2.93-era material remain useful, but panel positions and labels can move, so verify the current Blender 5.2 documentation when something does not match your interface. [1]
Before adding Quick Smoke, decide what the fire is doing in the story. A candle flame, a campfire, a burning doorway and a propane burst need different scale, motion, smoke volume and lighting consequences.
This matters because a fire simulation is not just a moving orange shape. It is a volumetric light source, a smoke generator and a directional cue. Viewers read its size partly from what it illuminates, obscures and pushes around.
For a close prop shot, you may only need a compact flame that reveals surface detail on nearby metal or skin. For a wide night scene, the smoke silhouette and warm pool of light may do more narrative work than the flame itself.
Set the scene to a plausible real-world scale before simulating. Mantaflow behaviour is tied to scene units, and working in metres helps avoid flames that rise or billow in a way that feels disconnected from the object burning. [1]
A common mistake is making a tiny object, surrounding it with an enormous domain, then compensating with arbitrary settings. That wastes resolution on empty space and makes it harder to judge whether the result is physically legible.
Create an emitter that describes the fuel
For a straightforward setup in Blender 5.2, create an emitter mesh such as an Icosphere, then use Quick Smoke to create a flow object and a domain. Change the flow type to Fire before baking. [1]
The emitter is not the visible fire mesh. Think of it as the volume where fuel enters the simulation. Its shape, placement and animation tell Mantaflow where combustion begins, so use geometry that resembles the source.
An Icosphere is suitable for a torch tip, brazier or small burst because it gives a compact emission area. A stretched mesh can better suit a burning beam, while several small emitters can suggest scattered coals or multiple burners.
Do not expect topology detail to create realistic turbulence. The available research does not support a direct link between dense emitter topology and better fire quality. What matters here is the emitter’s volume, scale, placement and flow configuration.
After Quick Smoke creates the setup, inspect the domain bounds immediately. The fire and smoke can only exist inside that box. If the top of the plume hits its ceiling, it will look clipped rather than naturally dissipating.
Leave space above the source for the flame to stretch and for smoke to develop, but keep the domain as tight as the intended camera shot allows. This is one of the most useful practical controls over both bake time and detail.
Keep the domain efficient before raising resolution
Enable Adaptive Domain when the shot allows it. Blender’s adaptive domain resizes around the active simulation, reducing the empty volume Mantaflow must calculate and saving memory and computation. [1]
This is particularly helpful for a localized campfire or handheld torch, where a static oversized box would spend most of its voxels on empty air. It is less useful if the fire must fill a consistently large space throughout the shot.
Domain resolution is where beginners often reach for a cure-all setting. More divisions can produce finer structure, but they also increase memory use and bake time. There is no agreed universal optimum for every scene and machine. [12]
A practical starting point for a final bake is 128 divisions, then assess the result at the actual camera distance. [1] A flame in the background does not need the same voxel density as a close-up licking across a foreground object.
Do not assume 600 divisions guarantees a clean image. A Blender Stack Exchange discussion on Mantaflow fire pixelation reports visible problems even at that level, which is a reminder to check shading, scale and render resolution too. [12]
Bake early at lower resolution to judge timing, framing and wind direction. Then commit compute time only after the action works. This is a production habit, not a hard rule, but it prevents repeatedly baking expensive simulations for a camera problem.
Simulation time steps are less settled territory. The supplied research does not establish reliable values that work across scenes, so avoid copying a supposedly magic number. Change one variable at a time and keep notes on what improves the shot.
Direct the flame with wind and staging
A perfectly vertical fire can look dead unless the story calls for still air. Add a Wind force field in Blender 5.2 when you need the fire and smoke to lean, trail or react to an implied draft. [1]
Use wind to support the composition. A plume pushed across frame can lead the eye toward a character, an exit or a threat. A plume blowing toward camera can create depth, but can also hide the most important visual information.
The important point is consistency. If the smoke goes left while loose papers, foliage and other environmental cues imply wind from the opposite direction, the audience may not articulate the problem, but the shot will feel assembled rather than observed.
Preview the simulated motion from the final camera, not only in perspective view. A flame that looks energetic from the side may become a thin, unreadable strip from camera angle, especially against a bright or busy background.
If the fire must feel dangerous, give it something to affect. Let it cast changing light on the floor, catch in a reflective surface or partially obscure a form with smoke. Those interactions sell heat better than simply increasing orange emission.
Put the material on the right object
The fire material belongs on the Mantaflow domain, not on the emitter. Incorrect shader assignment is a frequent reason that a simulation appears absent, wrong or unrelated to its source object. [1][8]
In Blender 5.2’s Shader Editor, use a Principled Volume shader connected to the Volume input of Material Output. This is the core material arrangement for a volumetric fire and smoke domain. [1][13]
An emission contribution can strengthen the apparent glow, particularly for a stylised or highly exposed shot, but it should support the volume rather than replace it. A pure emissive surface often reads as a solid orange object, not hot gas. [2]
Tune the material while looking at the relationship between flame, smoke and surrounding darkness. Fire is brightest near active combustion, while smoke often needs to remain visible as a softer, darker volume above and around the flame.
If the result seems to have disappeared, do not immediately rebuild the simulation. Check that the current cache has been baked, the domain has the intended material, and the flow object is still configured to emit fire. [8][9]
Outdated or missing caches are another familiar failure point. Any substantial domain or flow change can invalidate what you are viewing, so make cache state part of your troubleshooting routine before blaming render settings. [8]
Choose the renderer based on what the fire must do
Use Cycles when the goal is photorealistic fire. Its volumetric lighting behaviour is the better fit when the flame must illuminate smoke and nearby geometry in a believable way. Eevee renders faster, but sacrifices accuracy in this particular job. [3]
For Cycles previews, begin around 64 to 128 samples. For still images, the research recommends 256 to 1024 samples, while animation commonly falls around 128 to 256 samples depending on noise, motion and available render time. [3]
Those are working ranges, not promises of a clean frame. A close-up volume lit by multiple sources can need more sampling than a distant flame. Judge noise in the darkest smoke and in the indirect warm light, not only in the bright core.
Enable Multiple Importance Sampling in Cycles when working with emissive fire sources, as it can improve the efficiency of sampling the light contribution. [3] This matters most when the flame is expected to cast visible illumination into the scene.
Eevee remains useful for layout and rapid look development. Enable Bloom when you need a fast glow preview, but do not mistake bloom for physically convincing firelight. Bloom softens highlights, while believable lighting requires interaction with the scene. [3]
Add an HDRI or area lights when the scene needs ambient context beyond the fire itself. A fire burning in complete blackness can be appropriate for a graphic image, but most realistic settings have moonlight, sky fill or reflected environmental light. [3]
Control render cost before buying more detail
Reduce the domain resolution, simulation steps and render samples before assuming hardware is the only answer. Use proxy geometry and level-of-detail thinking for objects outside the camera’s main area, especially when the fire is one part of a larger scene. [4]
For GPU-focused professional rendering, the hardware guidance in GPUCost’s 2026 recommendations identifies an NVIDIA RTX 4070 Ti with 12GB VRAM as a minimum example, while an RTX 4090 with 24GB VRAM is presented as a stronger option. [5]
TechnoRar’s real-time rendering guidance recommends at least 16GB of VRAM for professional workflows. [6] That is not a guarantee that every heavy fire scene fits, since volume resolution, textures and the rest of the scene compete for memory.
Multi-GPU rendering can help where the renderer and hardware configuration support it, and cloud rendering is another option for unusually heavy volume work. [4][7] Neither option repairs an inefficient domain, so optimise the scene before outsourcing the bill.
Finally, save versions around major bakes. Keep one file before domain changes, one after the approved low-resolution motion bake, and one for final settings. Fire work is iterative, and a recoverable cache is more valuable than a remembered setting.
Frequently Asked Questions
How do I create a realistic fire effect in Blender using Mantaflow?
Start by creating an emitter mesh that represents the fuel source, such as an Icosphere for a compact flame. Use Quick Smoke to generate a flow object and domain, then set the flow type to Fire before baking the simulation. Ensure the domain is correctly scaled to real-world units and sized tightly around the fire to optimize detail and performance.
What are the best domain settings for fire simulation in Blender?
Begin with a domain resolution of around 128 divisions for a final-quality bake and increase resolution selectively where more detail is needed. Enable Adaptive Domain to dynamically resize the simulation volume, reducing empty space and saving memory and computation time. Keep the domain size tight to the intended camera shot to avoid wasted resolution on empty space.
How can I improve fire realism with lighting and shading in Blender?
Apply the fire shader to the domain using a Principled Volume shader connected to the Material Output volume socket. Use lighting setups such as HDRi or area lights and enable features like Bloom in Eevee or Multiple Importance Sampling in Cycles to enhance the volumetric light effect of the fire. Proper lighting helps the fire illuminate nearby objects and smoke, adding to realism.
When should I use Cycles vs Eevee for rendering fire in Blender?
Use Cycles for photorealistic fire renders, especially when the fire needs to light smoke, props, or characters accurately, as it handles volumetric lighting better. Eevee is suitable for fast previews and look development but lacks the same level of light interaction fidelity needed for final fire shots.
How do wind and camera framing affect fire simulation in Blender?
Wind force fields can be added to influence the direction and motion of fire and smoke, contributing to storytelling by matching environmental conditions. Camera framing should guide domain size and simulation detail, as the fire’s interaction with its surroundings and how it lights or obscures objects helps viewers interpret its scale and intensity.
How we researched this
This article was assembled from 13 cited references.
Nothing here is based on hands-on testing. Where a figure or finding appears, it belongs to the source cited beside it, and the writing says so rather than implying otherwise. Every source is listed below so you can check it.
Sources
- Blender 5.2 Fluid Simulation: Mantaflow Guide for Beginners
- Creating a flame effect using shader nodes - BlenderNation
- [Blender] Complete Guide to Render Settings - Choosing Between Cycles and Eevee | UhiyamaLab
- How to Speed Up Rendering in Blender (Cycles & EEVEE)
- Best GPUs for 3D Rendering 2026 – Recommendations
- PC Hardware Requirements for Real-Time 3D Rendering - TechnoRar
- Octane Render Farm Guide 2026: Heavy OpenVDB Volumes
- Why Can't I Bake Smoke Simulation In Blender? Troubleshooting Guide
- Blender Fire Not Working 2.78: Quick Fixes and Solutions
- Fire Simulations for Beginners 🔥 (Blender Tutorial) – Blender.fi
- How to Simulate Fire and Smoke in Blender - blender
- Diagnosing pixelation in mantaflow fire render - Blender Stack Exchange
- Working with Blender Shaders (2026): Nodes & Scripting - CGWire's Blog
Related Articles
Realistic Water in Blender
Learn the best techniques for creating realistic water in Blender using Ocean Modifier, fluid sims, and layered shading for stunning results.

Create Realistic Sky in Blender
Learn how to create a realistic sky in Blender using procedural textures, HDRIs, and sun direction for believable outdoor lighting.
Best Lighting Techniques for Blender Rendering
Discover the best lighting techniques for Blender rendering using Cycles and Eevee to create realistic, well-shaped 3D models.
Using Nodes for Shading in Blender: A Practical Guide
Learn how to use nodes for shading in Blender with tips on Principled BSDF, texture color spaces, and Cycles vs Eevee differences.