
Realistic Hair Techniques in Blender: Guide to Particle Hair
Learn realistic hair techniques in Blender using particle systems, guide hairs, and grooming tools for natural, believable hairstyles.
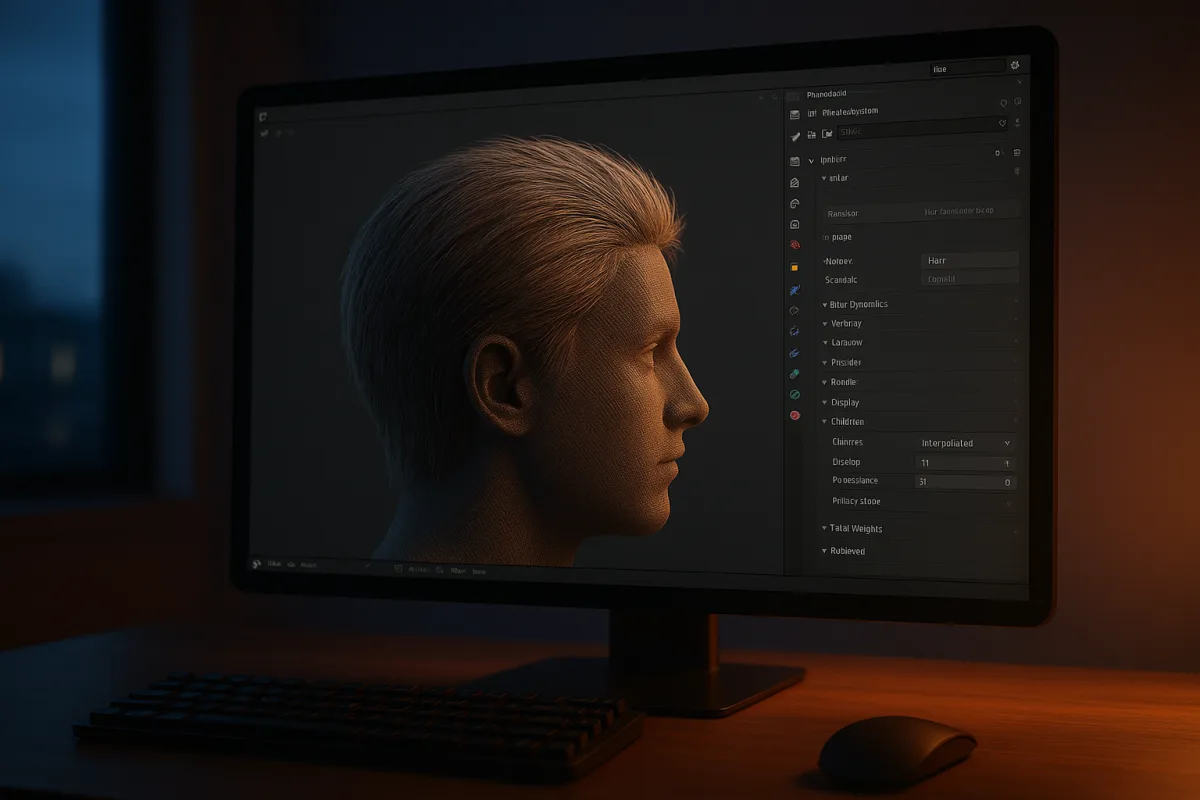
Realistic hair is a density hierarchy, not a strand-count contest
The most useful concept for improving character hair is density hierarchy. Real hair is not perceived as millions of isolated fibers. We read the large silhouette first, then grouped locks, then a broken edge of flyaways and individual strands catching light.
That order matters because a hair system can contain an intimidating number of curves and still look synthetic. If every strand is evenly spaced, equally long, equally glossy and equally affected by clumping, the result resembles a brush rather than a hairstyle.
In Blender 3.5, the legacy particle hair system gives you a practical way to build this hierarchy. Parent hairs establish direction and shape. Child hairs fill the empty space between them. The parent strands are the design, while the children are the visual density. [1]
This is why I would spend more time grooming a modest particle count than increasing it blindly. More strands can conceal a weak guide layout for a while, but they do not fix a wrong parting, a flat crown, an implausible hairline or locks that ignore gravity.
The useful question is not, “How many hairs does this character need?” Ask instead, “At what distance does the viewer stop seeing gaps that break the hairstyle?” That answer changes with camera distance, render resolution, haircut, colour and lighting.
What interpolated children actually do
A parent particle hair is a guide curve grown from the scalp emitter. It has a root location, a direction and a sequence of segments that describe its path. These parent curves are what you comb, puff, shorten and arrange into the hairstyle.
Child particles are generated from that parent system. With the Interpolated method, Blender distributes child hairs by blending the nearby parent hairs, producing continuous coverage across the scalp rather than obvious little clusters around each guide. [1]
Think of the parent hairs as sparsely placed contour lines. Interpolated children fill the terrain between those lines. If the guide hairs flow cleanly from the hairline, around the crown and into the larger locks, children reinforce that motion.
If the guides cross chaotically or point away from the intended styling, interpolated children make the failure denser. This is one of the reasons that adding children early can be misleading. The hair looks fuller, but it is harder to see where the structure is wrong.
For an ordinary haircut, Blender’s particle documentation and community guidance describe a few thousand parent hairs as a reasonable starting range before children are added. [1] Treat that as a starting point, not a target to hit.
A close portrait with long backlit hair may need more visual complexity than a medium-shot game character. Conversely, short dark hair can appear solid with fewer visible strands because its silhouette and highlights do much of the perceptual work.
There is no useful universal strand count because a strand is not a fixed rendering cost in isolation. Length, segment count, child density, shader complexity, transparency, lighting and resolution all alter the practical result. The supplied research does not provide reliable render-time benchmarks, so do not pretend that one number guarantees performance.
Start with the scalp, not the surface noise
The scalp emitter is the source of the whole system, so its topology and density distribution matter. You want clean enough surface flow that roots can follow the intended hair growth direction, especially around partings, temples, ears and the nape.
A hairline should not be a perfectly smooth border. Human hair thins and breaks irregularly around the forehead, but that irregularity must support the larger hairstyle. Randomly deleting roots everywhere produces patchiness, not a believable transition from skin to hair.
In Blender 3.5, establish the broad design with the Comb tool first. Comb is not merely a cleanup brush. It determines the directional field that every child hair will inherit, and therefore controls whether highlights travel through the hairstyle as coherent bands.
Use Puff after the directional flow is credible. Puff creates separation from the scalp and helps establish volume at the crown or around curls. Used too early, it can make every guide hair stand away from the head, producing the familiar helmet effect.
The Length tool belongs later in the process. A real hairstyle often has a controlled overall length with local variation: shorter hair around a fringe, broken ends, thinner temple regions and layered transitions. Length variation is useful when it follows a styling decision.
Comb, Puff and Length are tools, not rules. I would use layers or separate particle systems when the hair has genuinely distinct behaviours, such as a scalp layer, a fringe and a small flyaway layer. That makes each density level editable without wrecking the others.
Clump is for locks, not for making hair look detailed
Clumping is powerful because viewers expect hair to gather into locks. But it is also among the quickest ways to make a particle groom look procedural. Large, uniform clumps repeat their spacing and expose the system’s underlying regularity.
For realistic human hair, guidance around the Blender particle workflow recommends low clump values, roughly 0.1 to 0.2, rather than aggressive grouping. [2] The point is to introduce local agreement between strands, not to turn the entire head into separated spikes.
Start with barely visible clumping, then inspect the silhouette and specular response. If the hair reads as a uniform cloud under a rim light, increase grouping selectively. If the scalp begins to show broad channels between locks, back it down.
Wave works the same way. A low-amplitude, low-frequency wave can interrupt computer-perfect straightness. Guidance for the Blender particle system suggests values around 0.05 amplitude and 0.1 frequency as a restrained starting point. [2]
Those figures are habits, not laws. A loose natural wave, tight curl pattern and styled blowout need different shapes. The important principle is scale separation: the overall hairstyle supplies the large curve, lock formation supplies the medium curve, and wave adds only fine deviation.
Do not ask wave to create the haircut. If the parent strands have no convincing major flow, noise will only make the bad flow harder to diagnose. Groom the silhouette and major locks manually, then use subtle variation to remove uniformity.
Segment count controls bend quality
Hair curves need enough segments to bend smoothly, but adding segments where the hair is nearly straight is wasted complexity. In Blender’s particle display guidance, long hair is commonly given around 10 steps, medium hair around five, and short fur around two or three. [1]
These values are about curve description, not guaranteed realism. Long hair swinging around shoulders needs enough points to arc and deform. A very short buzz cut has little visible curvature, so dense segmentation does not improve the image much.
Watch for faceting in the silhouette and abrupt angular kinks in highlights. Those are practical signs that the strand resolution is too low. If the hair is smooth in motion and at the final framing, more steps probably buy little besides scene weight.
This is also why close-up hair and distant hair should not necessarily share one groom. A cinematic head shot may justify fine strands and several density layers. A background character benefits more from a clean silhouette and restrained shader response than from invisible curve detail.
The shader tells the viewer whether the curves are hair
A convincing groom can still fail under a generic glossy material. Hair is read through elongated highlights, partial transmission and variation along and across the strand. The shader has to support that light behaviour, not just apply a brown or blonde colour.
Cycles is the stronger final-render choice when hair realism is the priority. Blender’s hair shading support is designed around reflection and transmission components, while older strand-material documentation also identifies translucency as important for believable strand rendering. [8]
That does not mean every project must use Cycles. Eevee is useful when iteration speed or real-time delivery matters. But Eevee has limitations around some lighting shader functionality and can produce harder, less natural-looking reflections on glossy subjects. [3]
A common workaround is to light a scene in Cycles, bake that lighting into an HDRI, then use the HDRI in Eevee. [3] It can improve the environment contribution, but it does not make Eevee identical to a full Cycles hair render.
Roughness deserves more attention than most colour tweaks. A broad practical range for hair is roughly 0.2 to 0.8, because wet dark hair, bleached hair, coarse curls and soft diffuse hair do not reflect light alike. [5]
Avoid setting one perfectly even roughness value over the entire head. Slight variation can stop highlights from forming a plastic shell, but extreme noisy variation merely looks dirty. The task is to preserve the larger highlight flow created by your groom.
Hair cards use the same hierarchy, with different geometry
For real-time characters, hair cards are not a lesser version of strand hair. They are a different way of representing the same density hierarchy. A few larger cards define the mass, medium cards define locks, and small cards or planes soften the outer contour.
The main failure mode is not simply low polygon count. It is a card texture that advertises its rectangle. Poor UV alignment stretches strand texture, while hard alpha edges reveal seams and make individual cards read as separate pieces of plastic. [4]
Soft alpha fades and careful card intersection help break those borders. [4] Intersections are not automatically bad in a hair-card asset. They are often necessary for overlap, depth and the visual confusion that stops the viewer tracing each card’s outline.
Normal maps can contribute detail, but overusing them makes hair look inflated or plastic. [5] Most of the realism should still come from directional colour variation, alpha shape, roughness breakup and lighting. A normal map cannot rescue cards whose strand direction disagrees with their geometry.
Ambient occlusion can also help define the spaces where cards overlap, especially at the scalp and within dense locks. Ignoring that depth information can leave the hairstyle looking flat even when the silhouette is good. [5]
Light the hair before declaring it finished
Hair needs lighting that reveals form from several directions. A three-point setup, key, fill and rim, remains a useful starting structure because the rim light tests the silhouette while the key reveals lock direction and the fill prevents the interior mass from collapsing into black. [4]
An HDRI is useful because hair responds strongly to environmental reflections and ambient illumination. Rotating the HDRI changes where those long highlight bands sit, so it is not just background decoration. [6]
A softbox around 5000K is one real-world reference point for soft, neutral illumination when building a portrait-style setup. [5] The value is not magic. It simply reminds you that light size, direction and colour temperature influence whether the same shader reads as dry, oily, soft or harsh.
Do not tune hair under a single viewport lamp and assume it will survive the final scene. A groom that looks rich under a dramatic rim can look sparse under flat overcast light. Test at least the lighting condition the character will actually inhabit.
Where other tools fit
A cross-tool workflow is sensible when the character needs more than a procedural scalp groom. ZBrush is well suited to sculpting a hair base or large stylised locks, Blender handles retopology and UV work, and Substance Painter can bake and texture the asset before it returns to Blender for grooming and rendering. [7][9]
The supplied training material supports that division of labour, but does not provide a controlled comparison proving one application creates more realistic hair than another. [7][9] Use the tool that solves the current asset problem, rather than forcing every stage into Blender.
For Blender 3.5 particle hair specifically, the enduring lesson is simple: the children inherit your decisions. If the parents establish a convincing scalp flow, layered volume and restrained lock structure, density and shading have something believable to amplify.
Frequently Asked Questions
How do I create realistic hair in Blender using particle systems?
Start by grooming a modest number of parent guide hairs that define the overall shape and flow of the hairstyle. Use the Comb tool to establish directional flow from the scalp, then add volume with the Puff tool and adjust length later. Avoid simply increasing strand count; focus on a believable density hierarchy where children hairs fill the space between well-styled guides.
What is the best way to use guide hairs and children for hair density in Blender?
Use a few thousand parent hairs to set the hairstyle’s structure, then enable interpolated children to fill gaps smoothly across the scalp. Parents act as design guides, while children add visual density by blending nearby parent directions. This approach creates continuous coverage without obvious clustering and maintains the intended hair flow.
How can I avoid procedural repetition when styling hair in Blender?
Keep clump and wave settings subtle, typically around 0.1 to 0.2 for clumping and low values for wave amplitude and frequency. Excessive clumping or wave exaggeration causes visible repetitive patterns that look unnatural. Instead, rely on sufficient density and varied guide hair grooming to reduce the appearance of procedural repetition.
Why should I render hair in Cycles instead of Eevee for realism?
Cycles supports advanced hair shaders with realistic light reflection and transmission, allowing thin glossy strands to interact naturally with lighting. Eevee’s limitations in lighting and reflection cause hard-edged highlights and less believable hair appearance. For final character renders where realism matters, Cycles produces more convincing results.
How do clump and wave settings affect hair realism in Blender?
Clump and wave settings influence how hair strands group and undulate, affecting the hairstyle’s natural look. Subtle clumping (0.1–0.2) and low wave values help avoid artificial uniformity and procedural repetition. Overusing these effects can make hair look like a brush rather than a natural style, so moderation is key.
How we researched this
This article was assembled from 9 cited references.
Nothing here is based on hands-on testing. Where a figure or finding appears, it belongs to the source cited beside it, and the writing says so rather than implying otherwise. Every source is listed below so you can check it.
Sources
- Blender 3.5 Hair system question - Particles and Physics Simulations - Blender Artists Community
- Particle Systems in Blender
- Product Lighting for Glossy Objects in Eevee — Blender Lighting
- Hair Cards In Blender: Game-Ready Easy 3D Character Workflow
- Blender Renders Acting Up? Let's Fix That - Toxigon
- Blender Render Setup Tutorial: Photorealistic Guide | CGAxis
- Stylized Game Asset Course. Blender & Substance Painter 2026
- https://wiki.blender.jp/%E5%88%A9%E7%94%A8%E8%80%85%3ASascha_Uncia/Doc%3A2.6/Manual/Materials/Properties/Strands?utm_source=openai
- 9 - Hair Retopology - Stylized Character Workflow - Blender Studio
Related Articles
Particle Systems in Blender
Learn how to use particle systems in Blender for grass, fur, and effects with hair and emitter particles, grooming, and density control.
Realistic Clouds in Blender: Best Techniques for Volumetrics
Learn the best techniques for creating realistic clouds in Blender using volumetric shaders, procedural noise, and lighting tips.
Blender Tips for Creating Landscapes
Learn Blender tips for creating landscapes, including sculpting, resolution management, and using Geometry Nodes for natural detail.
Realistic Water in Blender
Learn the best techniques for creating realistic water in Blender using Ocean Modifier, fluid sims, and layered shading for stunning results.