
Particle Systems in Blender
Learn how to use particle systems in Blender for grass, fur, and effects with hair and emitter particles, grooming, and density control.
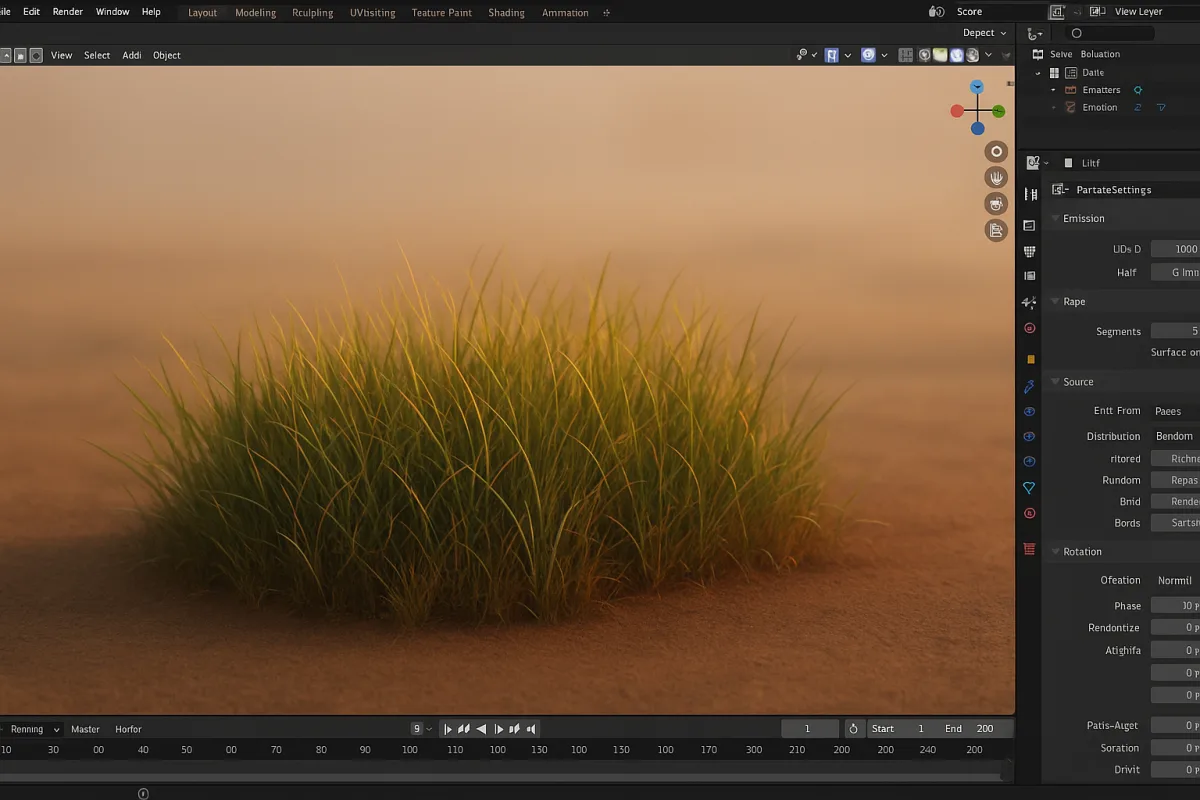
Start by deciding what kind of complexity you need
The first problem is usually not how to add particles. It is choosing whether particles are the right way to add complexity at all. In Blender 3.5, use the legacy particle workflow when you need many repeated elements attached to a surface.
That makes Hair particles a practical fit for lawn grass, carpet fibres, animal fur, moss-like coverage and stylised hair. Hair is static until you deliberately groom or simulate it, unlike Emitter particles, which are born over time and have a lifespan. [6]
Choose Emitter particles when the complexity is temporal: rainfall, sparks, drifting debris or anything expected to enter and leave frame. If the visual question is “what grows from this surface?”, Hair is normally the clearer starting point. [6]
This distinction matters because a grass field built as an Emitter system asks Blender to manage timing you do not need. Conversely, a rainstorm made from Hair particles has no natural lifecycle. Correct category choice removes work before you touch a density slider.
Give the surface enough resolution to carry variation
For the basic Blender 3.5 grass or fur setup, start with a plane and subdivide it before creating the particle system. A commonly used practical starting point is 20 cuts, which provides enough vertices for later weight painting and local control. [6]
That subdivision is not there because particles require a visibly dense mesh everywhere. It is there because density masks and painted transitions need vertices to interpolate across. A four-corner plane cannot describe a convincing bare path through grass.
With the plane selected in Blender 3.5, add a particle system and change its type to Hair. Begin with a modest test count, then establish the strand length and randomness before trying to make the system visually dense. [6]
A count around 6,000 strands is a useful documented example for a simple grass or fur exercise, not a universal production target. Scene scale, camera distance, strand width, Children settings and available hardware change the viable count substantially. [5]
The important habit is to judge density from the render camera, not from an orbit view inches above the ground. A lawn that looks sparse in a close viewport inspection may be perfectly adequate behind a mid-distance character.
Control where particles appear before styling them
The next failure readers hit is uniform coverage. Real grass avoids footpaths, fur thins around scars, and hair has a parting. Solving those patterns with random settings alone produces noise rather than intentional distribution.
In Blender 3.5, create a vertex group in Object Data Properties, then enter Weight Paint Mode. Paint black for zero influence and white for full influence, with grey values where you need a transition from sparse to dense coverage. [6]
Assign that vertex group to the particle system’s Density control. The same basic mask logic can also drive Length, Clump and Twist, allowing the system to change character across a single emitter rather than requiring separate particle objects. [6]
For example, paint lower density along a dirt track through the grass plane, then reduce Length around the same edge. That creates a readable worn route because both the number of blades and their silhouette support the story.
The Neg option reverses a vertex group’s influence. It is useful when you have already painted the area to protect, such as bare skin beneath fur, and want particles everywhere except that painted region. [6]
Weight painting is one of those habits that becomes close to a rule on asset work. It gives an art-directable map, survives iteration, and is far easier to revise than deleting particles manually after the scene has become heavy.
Establish a simple strand before adding realism controls
Once coverage is right, set the basic hair length and randomness. Do not begin with clumping, curls and children. Those controls can disguise a bad base distribution, but they cannot make an uncontrolled field look deliberately designed.
Enter Particle Edit Mode in Blender 3.5 when the strands need direct grooming. Comb moves the flow, Length adjusts local strand extent, and Smooth reduces abrupt edits. These are appropriate for a fur direction change or a groomed grass edge. [6]
For broad grass, keep grooming restrained. Individual comb strokes can create obvious brush-shaped patterns across a large field. Use weight maps for large-scale density decisions, then use particle editing for directional detail that needs a human touch.
Materials should support the strand structure rather than compensate for it. Assign the particle material and test it under the scene lighting early. A plausible green base colour does not make flat, evenly spaced blades read as grass.
Avoid baking lighting or shadow information into an albedo texture just to make the particles appear richer in one test render. Lighting baked into base colour responds incorrectly when the asset moves into a different environment. [2]
Add Children when the parent guides are working
A sparse set of parent hairs can look mechanical, while a massive count of independently edited hairs can become difficult to manage. Children address that gap by generating secondary particles from the parent hairs and increasing apparent density. [6]
Simple Children follow individual parent strands more directly. Interpolated Children derive their placement from nearby parent hairs, which can produce a smoother, more continuous mass for fur, grass or groomed surfaces. [6]
Use the parent count as your editable guide structure. If you cannot identify the flow, length and distribution of those guides, raising child density will only multiply the problem. This is why Children belong after weight painting and basic grooming.
Clumping and roughness are where the system stops looking like identical fibres generated by a machine. Introduce them in small increments and render comparisons, because strong clumps can read as wet fur, damaged grass or synthetic brush bristles. [6]
There is no research-supported magic count for parents, children or viewport percentage. Blender permits very high limits, including up to 10 million particles and 10,000 children per particle, but those are ceilings, not sensible scene targets. [6]
Use Kink for a specific silhouette, not generic noise
Kink adds structured deformation to strands, including curls, waves, braids and spirals. Its amplitude, frequency and flatness controls make it more purposeful than increasing random roughness when the reference calls for a recognisable fibre shape. [6]
A short fuzzy animal coat may need subtle waviness. A stylised plant might need a deliberate curl at each blade tip. A braided hairstyle needs a much more ordered pattern. Those are different visual problems, and Kink should answer one of them.
Kink is also an easy way to spend performance without improving the shot. Add it after testing the straight or gently groomed version, then isolate whether the new silhouette still reads at camera distance. That comparison is more useful than chasing maximum complexity.
Keep the viewport responsive while you work
A particle system can feel broken when it is simply showing too much detail in the viewport. In Blender’s particle display settings, reduce Display Percentage while grooming and use Point or Circle display types instead of fully drawn strands. [5]
This is not a quality setting for the final image. It is an interaction setting. Lowering the displayed fraction lets you work on distribution, masks and overall flow without asking the viewport to draw every strand at every adjustment. [5]
Before final output, restore the required render density and inspect a representative final-resolution render. Viewport reduction can conceal bald patches, flicker, excessive clumping or strand intersections that become obvious when all particles are evaluated.
Children and Kink deserve the same iterative discipline. Change one control, make a short render check, then continue. The brief supports no fixed performance formula because hardware, geometry complexity, shading and lighting all alter the cost. [5]
Check the render, not only the particle settings
Particles are geometry-like complexity, so their appearance depends heavily on lighting and render settings. A dense fur groom can disappear under flat illumination, while strong grazing light can make an ordinary grass system look much fuller than its raw count suggests.
In Blender 3.5, inspect the system under the actual lighting direction and contrast intended for the shot before committing to more strands. This is look development, not cheating. The camera only sees the illuminated, shaded result.
Be wary of textures with overlapping UVs when they are used to drive the surface beneath particles. Overlaps can cause texture artefacts, which may look like a particle distribution issue even though the fault lies in the emitter’s texture setup. [2]
Cycles and Eevee can present the same particle system differently because renderer settings, shadows and sampling affect how fine strands resolve. Do not assume that a viewport preview establishes the final density or material response.
Fix simulation and cache problems before rebuilding the effect
Emitter effects introduce a new class of failure: particles may appear at the wrong time, refuse to collide, or change between tests. First confirm that the relevant objects have the correct roles, such as emitter, collider or simulation domain where applicable. [1]
Then check object scale. Incorrect scale can make physical behaviour appear implausibly fast, slow, light or heavy. Applying a sensible real-world scale before simulation is a setup requirement, not a cosmetic clean-up performed after the cache is made. [1]
If a cache has not been baked, is stale after a change, or has become corrupted, final output can disagree with what you thought you approved. Clear and rebake deliberately after meaningful changes to timing, collisions or the simulated scene. [1]
This is especially important for animation. A still frame can hide a cache problem that reveals itself as popping, incorrect timing or missing interaction across a sequence. Test the full relevant frame range, not only the first attractive frame.
Know where the workflow is heading
The practical workflow above is specifically for Blender 3.5’s established particle interface. Blender 5.2 LTS, released on July 14, 2026, introduces a fully node-based particle system and expands Geometry Nodes physics workflows. [3]
That newer approach is relevant when the job needs declarative behaviours that combine emitters, forces and colliders, rather than a conventional panel-driven particle setup. Geometry Nodes physics also incorporates an XPBD solver for hair and cloth dynamics. [3]
For a straightforward lawn, fur patch or static groom, the Blender 3.5 workflow remains easier to reason about: surface, guide hairs, masks, children, material and render check. For more interconnected simulation logic, Blender 5.2’s node direction is the better long-term path. [7]
The principle survives both interfaces. Start with an intentional distribution, make a small number of guides do useful visual work, and only then multiply detail. Complexity is convincing when it has structure, not when the particle count is merely large.
Frequently Asked Questions
How do I choose between hair and emitter particle systems in Blender?
Use Hair particles for static elements like grass, fur, or groomed strands that remain fixed unless styled or simulated. Choose Emitter particles for time-based effects such as rain, sparks, or debris that appear and disappear over time. The choice depends on whether the particles represent growing elements (Hair) or transient phenomena (Emitter).
How can I control particle distribution using vertex groups in Blender?
Create a vertex group in Object Data Properties and paint weights in Weight Paint Mode, where black means zero influence and white means full influence. Assign this vertex group to the particle system’s Density control to direct where particles appear. You can also use the same vertex group to control Length, Clump, and Twist, and invert the effect with the Neg option for more precise distribution.
What are best practices for grooming hair particles in Blender?
Start by setting a simple base strand with appropriate length and randomness before adding complexity like clumping or curls. Use Particle Edit Mode tools such as Comb and Length to style strands directly. Avoid relying on variation controls to fix poor base distribution; instead, ensure the initial particle placement and density are intentional and art-directed.
How do particle children improve hair or grass density in Blender?
Children particles add secondary strands to each parent particle, increasing apparent density without adding more base particles. They come in Simple and Interpolated types and can include controls for clumping and roughness to add natural variation. Use Children as a look-development tool carefully, testing incrementally since they add computational cost.
How do I optimize viewport performance when using particle systems in Blender?
Reduce the Display Percentage in the particle system settings to show fewer particles in the viewport, and use simpler display types like Point or Circle to lower computational load. For final rendering, restore the Display Percentage to 100% to achieve full density. This approach keeps the viewport responsive while maintaining high-quality renders.
How we researched this
This article was assembled from 8 cited references.
Nothing here is based on hands-on testing. Where a figure or finding appears, it belongs to the source cited beside it, and the writing says so rather than implying otherwise. Every source is listed below so you can check it.
Sources
- Blender Simulation Not Working? Top Fixes to Solve Common Issues
- PBR Texture Baking in Blender: A Beginner's Guide to Getting It Right | StraySpark
- Blender 5.2 LTS lands with node physics | DIGITAL PRODUCTION
- Blender 5.2 LTS released — two years of stable support, EEVEE and Cycles changes for production — ReasonCore
- Why do I have more particles in the render than the viewport? - Blender Stack Exchange
- Introduction - Blender 4.2 LTS Manual
- Representing Particle Systems with Nodes - Blender Developer Documentation
- Geometry Nodes Physics — Blender Developers Blog
Related Articles
Realistic Hair Techniques in Blender: Guide to Particle Hair
Learn realistic hair techniques in Blender using particle systems, guide hairs, and grooming tools for natural, believable hairstyles.
How to Use Grease Pencil in Blender: A Practical Guide
Learn how to use Grease Pencil in Blender with tips on drawing, animation frames, brush settings, and onion skinning for effective 2D/3D workflows.

Best Practices Exporting Models from Blender
Learn best practices exporting models from Blender, including applying transforms and choosing correct export settings for FBX and OBJ formats.
Realistic Character Skin Shader Blender: Step-by-Step Guide
Learn how to create a realistic character skin shader in Blender using subsurface scattering, proper texture setup, and scale considerations.