
Animate Facial Expressions in Blender: Topology and Workflow
Learn how to animate facial expressions in Blender with topology tips, shape keys, rigging, and lighting for realistic results.
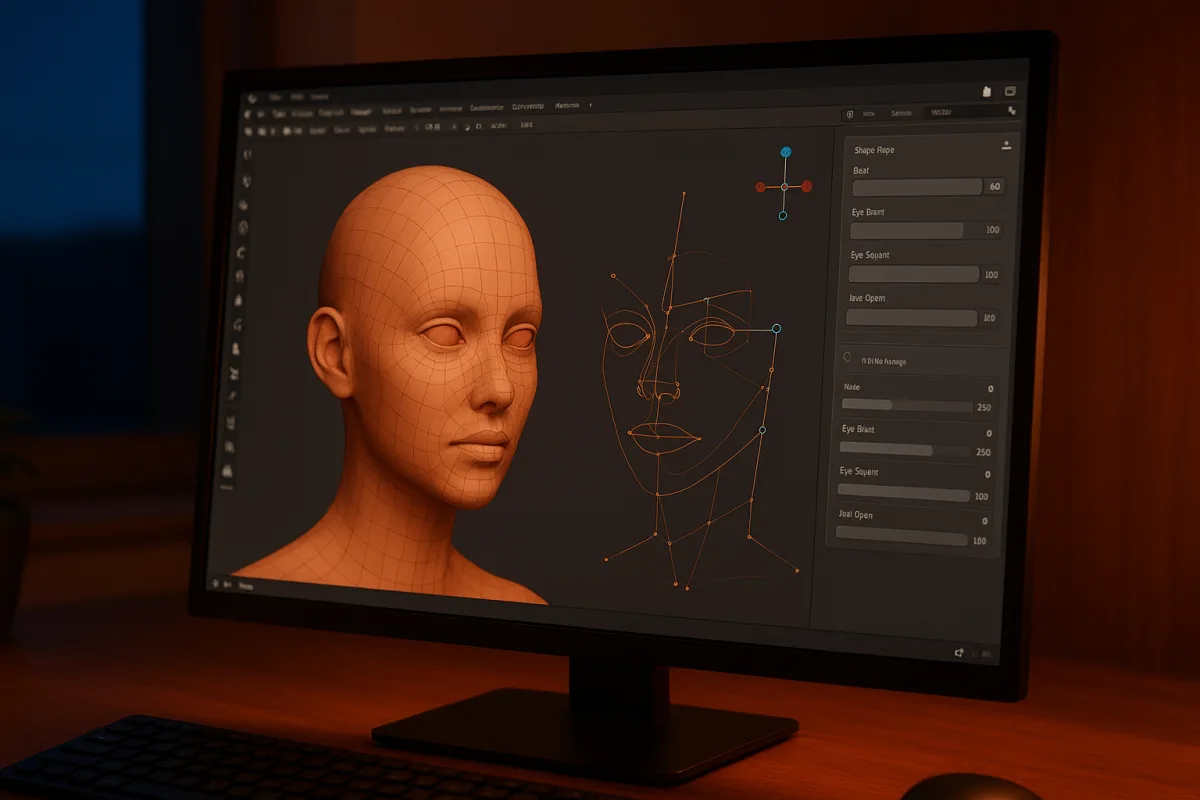
Start by deciding what the rig actually needs to perform
I am working in Blender 5.2 LTS, released in July 2026. Blender remains a versatile character tool, but its facial-animation workflow is still less specialised than Houdini’s procedural systems, while ZBrush is better suited to high-density sculpting and Substance tools remain focused on texturing rather than animation. [4][5][17]
That does not make Blender a poor choice. It means you should avoid building a hero-film facial setup for a character that only needs a few dialogue shots, or relying on a handful of blend shapes when the performance needs eyes, cheeks, jaw and brows to work independently.
For a stylised game character, a set of expression shape keys plus jaw, eye and brow controls may be enough. For a close-up character, expect a hybrid setup: shape keys for skin shapes and correctives, bones for posing and directional control. This is a workflow choice, not a rule. [15][18]
Set scene units and character scale before you begin the face. Incorrect scale can create trouble later with physics, camera framing and light behaviour, which makes it harder to judge whether a facial performance feels wrong because of animation or presentation. [19]
Solve topology before you sculpt a smile
A face can have a detailed sculpt and still animate badly if its edge flow ignores how skin stretches and compresses. The usable target is not simply a high polygon count. It is topology that gives the mouth, lids, nasolabial region and jaw enough geometry to change shape cleanly. [2][16]
General modelling guidance places an animatable face at roughly 2,500 polygons minimum, with 5,000 to 10,000 a practical working range. Around 15,000 to 20,000 polygons is often treated as an upper limit before animation performance becomes a concern. [2][16]
Those are planning ranges, not Blender-specific guarantees. A stylised character may work below them, while a close camera shot may need more local density around the lips and eyelids. Spend polygons on moving forms, not on a uniformly dense forehead or skull. [2][3]
Use quads wherever possible and run loops around the eyes and mouth. Guidance on character topology recommends at least three loops around both areas, giving the mesh room to roll lips inward, close lids, puff cheeks and form wrinkles without pulling distant surfaces. [3][16]
Avoid triangles and n-gons across deformation zones. They are not forbidden everywhere on a character, but they make a facial surface less predictable when you sculpt corrective shapes or adjust weights. Put unavoidable topology compromises in low-motion, low-visibility regions. [2][3]
Before making the complete face, test a crude smile, frown, blink and open jaw. If the upper lip drags the nostrils, the eyelid collapses, or the cheek caves in, correct the loops now. Retrofitting topology after a finished rig is one of the expensive mistakes. [2][16]
Build the neutral face as a believable resting state
The Basis shape in Blender’s shape key system is not an empty technical default. It is the face every other expression will inherit, so give it relaxed lids, a plausible lip seal, soft cheek volume and a jaw position that does not look clenched. [15][18]
Work from facial anatomy rather than from expression labels. A smile is not merely mouth corners moving sideways: cheeks lift, lower lids compress, brows may react, and the mouth changes volume. Facial-action approaches such as FACS are useful because they break an emotion into observable movements. [1][18]
In Blender 5.2 LTS, create the Basis key first, then add expression-specific shape keys. Edit each in Edit Mode or Sculpt Mode, keeping the base mesh unchanged and setting the new key’s Value slider only when you want to inspect or animate that expression. [15]
Use wireframe overlays while sculpting shapes. They make it easier to spot unwanted stretching, uneven density and edge loops that are sliding farther than neighbouring skin. The goal is consistent skin movement, not perfectly even movement everywhere. [6][7]
Dynamic Topology is useful when exploring a high-resolution facial sculpt because it can add density where you need it. It is not a replacement for animation topology, so use it on a sculpt source or exploratory pass, then retain or rebuild clean deformation-ready topology for the final rig. [6][7]
Group related facial action units into reusable shapes where that improves control and performance. For example, separate upper-lip raise, lip corner pull and cheek lift can be combined into a smile pose, while remaining available for other expressions and corrective work. [18]
Choose shape keys when the deformation matters most
Shape keys are usually the fastest route to expressive facial forms in Blender. They are especially useful for blinks, squints, lip compression, sneers, cheek bulges and other shapes where an artist wants to sculpt the exact surface result. [15][18]
Create a key for one movement at a time, name it by what it does, and test it at full Value before moving on. Names such as Blink_L, Blink_R, BrowInnerUp_L and MouthCornerPull_R make later animation and corrective work much less error-prone. [15][18]
Keyframe the shape key Value sliders in Blender’s animation system rather than treating the keys as static presets. Start with broad poses, then add corrective keys for combinations that break, such as a smile with closed eyes or an open jaw with rounded lips. [15]
Do not make every expression a single, complete face. A library of smaller shapes gives you better control over timing and asymmetry. It also prevents the common result where every smile, frown and line of dialogue has the same locked-in intensity. [8][18]
This is where many characters become too symmetrical. Leave left and right eye closures, brow raises and mouth-corner pulls independently available. A slight difference in value or a delay of a few frames can make a pose feel observed rather than mirrored. [8][19]
Add bones when posing needs to stay flexible
Use facial bones when a movement is better described as a direction or pivot than as a frozen sculpt. Jaw opening, eye direction, head motion and broad brow controls are obvious candidates, while lips and cheeks often benefit from bones plus shape-key correctives. [15][18]
Create an armature, parent the mesh with automatic weights, then inspect the result immediately in Pose Mode. Automatic weights are a starting point, not evidence that the face is rigged. Problem areas should be corrected through weight painting and additional controls. [15][19]
Paint and test one region at a time. Move the jaw, then inspect lips, chin and cheeks. Move an eye control, then inspect lids and surrounding skin. If an area must deform differently, add a bone or corrective shape rather than trying to force one weight group to solve everything. [19]
Blender’s Rigify add-on can accelerate general rig construction, but it does not remove the need to assess facial deformation. Reports on rigging time place a standard humanoid character rig anywhere from 20 to 100 hours, while complex hero faces can take weeks. [11][12]
A stylised indie rig may be assembled in a day, but that estimate is not transferable to a realistic speaking character. Community reports also identify facial rigging as the slowest part of a full-character setup, largely because testing and correction take time. [11][12]
Emerging AI-assisted rigging workflows are being promoted in current facial-animation guides, but broad validation is limited. Use them only if they save setup work without preventing you from inspecting weights, topology and expressions yourself. [8]
Block emotion from the eyes outward
A common beginner mistake is animating the mouth first because dialogue is obvious. Viewers read the eyes, lids and brows heavily when judging intent, so block eye direction and brow shape before refining lip movement. [8][10][19]
Give the character one emotional objective per shot. If the brows say concern, the eyes say delight and the mouth says irritation, the result may feel artificial even if every individual control moves correctly. Consistency of intent matters more than constant motion. [8][19]
Avoid fixed blinking patterns. Blinks often support a thought change, emotional shift or head movement, rather than arriving every few seconds like a timer. Excessive blinking also hides the eyes, which are carrying much of the performance. [8][19]
Add restrained head drifts, nods or turns after the facial pose reads. A completely fixed head can make even good facial work look detached, but large head motion should not be used to disguise an unclear expression. [10][19]
For dialogue, animate to phonetics rather than the written script. The audience sees mouth shapes and timing, not spelling, so build poses around the sounds being made and preserve coarticulation between them instead of snapping from one letter-shaped mouth to another. [9]
Keep the first pass underplayed. If a pose is readable at low intensity, you can add a small cheek lift, lid compression or asymmetrical brow adjustment. Starting broad tends to produce the overexaggerated expressions that make realistic characters look theatrical. [8][19]
Light and shade the face you actually animated
Do not judge facial realism only in solid shading or neutral viewport light. Lighting controls which wrinkles appear, whether the eyes sit in the skull, how soft the cheeks look and whether the skin material suggests depth rather than plastic. [13][14]
A three-point setup gives a practical review baseline: a key light defines the primary form, fill prevents shadows becoming unreadable, and rim light separates the character from the background. Change light size as well as brightness, because source size changes shadow softness. [13][14]
Use physically plausible colour temperatures where the shot calls for them, and keep the lighting consistent with the environment. Global illumination and believable bounce light help integrate skin, eyes and facial shadows, though the research does not provide Blender-specific measurements of their effect on facial realism. [13][14]
Finally, inspect expressions in the intended camera framing. Skin texture, material response and subtle compression may disappear at distance, while a close lens can expose a weighting error that looked harmless in the viewport. Lighting, shading and animation need review together. [13][14]
Frequently Asked Questions
How do I animate facial expressions in Blender?
Facial animation in Blender typically combines shape keys and facial bones. Shape keys are used for broad, sculpted expressions and corrective deformations, while bones provide directional control for eyes, jaw, brows, and asymmetrical posing. Animating eyes, brows, lids, and head movement before focusing on the mouth helps achieve realistic coordinated facial performance.
What is the best topology for facial animation in Blender?
The best facial topology uses quad-based edge loops that follow muscle and joint lines, with at least three loops around the mouth and eyes. Polygon density should concentrate where the face folds and moves most, such as lips and eyelids, while avoiding unnecessary density on static areas like the forehead. A practical polygon count ranges from about 2,500 minimum to 5,000–10,000 for working models, with an upper limit near 15,000–20,000 to maintain animation performance.
How do shape keys and bones work together for facial animation in Blender?
Shape keys handle broad skin deformations and corrective shapes, sculpted to refine expressions, while bones add directional control for posing specific facial parts like the jaw, eyes, and brows. This hybrid approach allows for both smooth skin movement and precise control over facial features, enabling more nuanced and realistic animation.
What are common mistakes when animating faces in Blender?
Common mistakes include overemphasizing mouth movement while neglecting eyes and brows, maintaining perfect symmetry without natural variation, using inappropriate blinking patterns, overexaggerating expressions, ignoring subtle head motions, and poor rigging or weight painting. Also, failing to set correct scene units and scale can cause issues with physics and lighting that affect the perceived animation quality.
How can lighting affect facial animation in Blender?
Lighting and skin shading are crucial for reviewing facial animation realism. A rig that looks believable under flat viewport lighting can appear stiff or unnatural when proper key light, fill, rim light, shadow softness, and subsurface scattering reveal the face's forms and skin response. Proper lighting helps highlight the subtle deformations and timing that make facial animation convincing.
How we researched this
This article was assembled from 19 cited references.
Nothing here is based on hands-on testing. Where a figure or finding appears, it belongs to the source cited beside it, and the writing says so rather than implying otherwise. Every source is listed below so you can check it.
Sources
- Mapping and Manipulating Facial Expression - PMC
- The Relationship Between Animation and Polygon Modeling Optimization - CGVista Resources
- Introduction to Topology in Blender|npaka
- Blender vs Houdini (2026): which animation software should you pick?
- 3D artists are so blown away by Blender's latest update, it's hard to believe it's free software
- High-Poly Sculpting: Blender's Best Practices - Blender Base Camp
- Blender Sculpt Mode: Complete Beginner Walkthrough - Sandboxr
- Animated Facial Expressions: Guide + AI Workflow (2026)
- How to Lip Sync Animation in 2026: A Practical Workflow That Looks Natural | LipsyncX
- Best animation software and techniques in 2026 - Toxigon
- 3D Character Rigging Time by Bones Online | 1001Ferramentas
- For you how much time usually it takes to rig a character? - Animation and Rigging - Blender Artists Community
- 7 Ways to Achieve Realistic Lighting in Blender - Blendergrid
- Lighting and Shading Pipeline | Full Guide
- Workflow - Blender 5.1 Manual
- Character Modeling Topology Standards — Character Design | LearnlyAI
- ZBrush vs Blender for Sculpting: Best in 2026 | Hitem3D | Hi3D Blog
- What are FACS? - Realistic Character Workflow - Blender Studio
- Common Mistakes in Blender Video Production | 2026 Guide
Related Articles
Blender Project Setup for Animation: Best Practices
Learn how to set up a Blender project for animation with proper folder structure, naming, frame rate, and collaboration tips.

Animate Walk Cycle in Blender: Step-by-Step Guide
Learn how to animate a walk cycle in Blender with key poses, IK rig setup, timing tips, and using Dope Sheet and Graph Editor for smooth animation.
Create a Character Rig in Blender: Step-by-Step Guide
Learn how to create a character rig in Blender with bone placement, weight painting, and testing for smooth animation.
Blender Add-Ons for Architectural Modeling: Tools & Workflow
Explore Blender add-ons for architectural modeling, managing design intent, BIM support, and data exchange for efficient workflows.