
Blender File Management Tips for Organized Projects
Learn Blender file management tips to organize projects, name files clearly, use relative paths, and manage backups effectively.
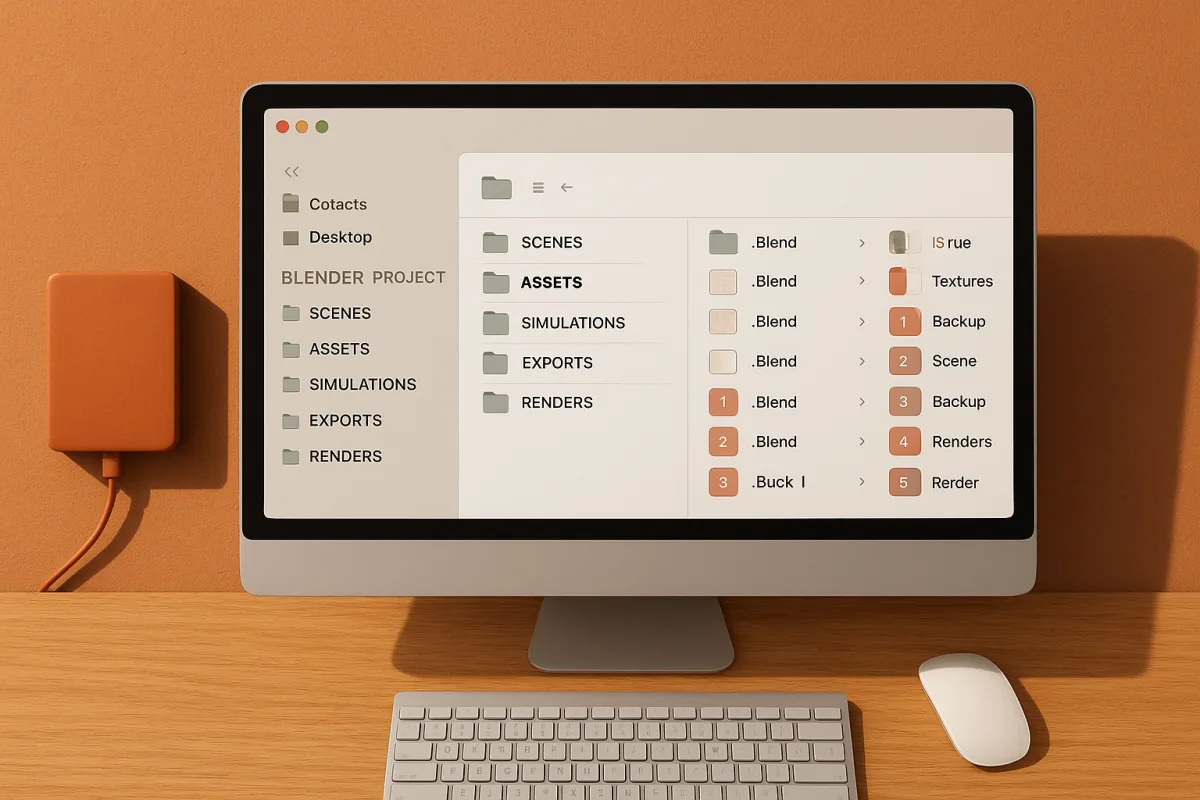
Organize the project root, not one giant folder
The most useful file-management idea is simple: a Blender project is a package, not a folder full of miscellaneous files. The package has one root directory, and every project-specific dependency lives somewhere below it.
This matters because “put everything in one folder” stops working once a scene becomes a real production job. Several-gigabyte .blend files, baked simulations, texture sets, reference images and delivery renders quickly become difficult to locate, duplicate and archive. [6]
A single flat folder also makes deletion risky. If a texture, alembic cache or HDRI shares a directory with final exports, there is no visible distinction between a disposable working file and something the client has approved.
Blender Studio’s production guidance separates local application data, shared temporary data, version-controlled Blender files and optional render output. [13] You do not need Blender Studio’s infrastructure to borrow the underlying principle: files should be grouped by what they are for.
For a freelance prop, product render or short animation, I would build a root directory around those responsibilities:
project_name/
    blend/
    assets/
    textures/
    cache/
    reference/
    renders/
    exports/
    delivery/
The names are not sacred. cache might become sim, geo_cache or houdini_cache if that better describes the work. This is a habit, not a topology rule. The important part is that the meaning remains stable across projects.
blend holds scene files. assets holds imported geometry such as kitbash pieces, CAD conversions, scan data or external character meshes. textures holds maps that the scene needs at render time. cache holds data that can often be regenerated, but may be slow to rebuild.
renders is for test frames and output sequences. exports is for FBX, USD, Alembic or game-ready packages that move to another application. delivery contains the files actually sent to a client, which should not be mixed with half-finished exports.
That distinction sounds bureaucratic until you need to find the final 4K turntable six months later. A clean project root answers two practical questions immediately: what does this scene depend on, and what can I safely remove?
The project root makes relative paths work
In Blender 4.5 LTS, an image texture node does not store the pixels inside the scene by default. It stores a path to an external image file. The same basic problem applies to linked libraries, fonts, image sequences and many cache formats.
An absolute path points to one particular place on one machine, such as a drive letter or a user folder. It may work perfectly on your workstation, then fail when the project is opened on a laptop, render node or collaborator’s computer.
A relative path instead describes a location from the .blend file or project directory. If blend/chair-model-v012.blend refers to ../textures/chair_basecolor.exr, moving the whole root folder preserves that relationship.
This is why the folder structure is more than tidiness. Relative paths only remain dependable when the folder relationships are deliberate. If textures float around a downloads folder, a desktop folder and two external drives, Blender has no coherent project location to resolve.
The practical workflow is to create the root directory before serious work starts, save the first .blend into blend, then bring every project-owned dependency under that root. It is much easier to enforce this on day one than after a month of look development.
For assets that must travel with a scene, Blender can use Pack Resources to embed external items such as textures and fonts within the .blend file. [18] That is useful for a handoff, an archived still-image scene or a compact portfolio file.
Packing is not a substitute for project structure, though. A packed file can be much heavier, and some production data does not sensibly belong inside a .blend. Simulation caches, high-resolution image sequences and source geometry should generally remain in the project directory.
Think of packing as a portability checkpoint. Before sending a scene, pack the resources that Blender supports, save a copy, then open that copy on a clean system or user account. If it opens with pink textures, the handoff is not complete.
Name files so their role survives outside Blender
File names are metadata that remain visible when Blender is closed. A thumbnail may tell you that a scene contains a chair, but it cannot reliably tell you whether it is the retopology pass, material pass or approved render scene.
Blender Studio recommends a structured format such as type-asset name-task.blend, with variants and versions added where necessary. [13] A readable adaptation might be prop-reading_lamp-shading-v006.blend.
That name tells a future you three useful things: the file is about a prop, the prop is a reading lamp, and the active task is shading. v006 says it is a discrete revision, not merely whatever happened to be saved last.
Avoid names such as final.blend, final_final.blend and newone.blend. They are not evidence of a final state. They are evidence that the naming system failed when the work became stressful, which is exactly when the system needs to help.
Version numbers are especially valuable before risky operations. Duplicating a scene before destructive mesh cleanup, a major material rewrite or a lighting pivot costs little compared with recovering a broken setup from an auto-save.
Use leading zeroes if you expect more than nine iterations: v001, v002, v010. File browsers sort those correctly, while v10 can appear between v1 and v2 depending on the system.
This is also where task-specific scenes earn their keep. A sculpting scene, retopology scene and render scene may share an asset, but they should not necessarily be one increasingly overloaded .blend. Separate task files make the active intent obvious.
Keep source assets separate from scene copies
Blender offers two different ways to reuse data: append it into a file, or link it from a library. Appending makes an independent copy. Linking leaves the source asset authoritative, while the receiving file references it.
Linked data is read-only in the referencing scene, so changes belong in the source asset file rather than in every shot or render scene that uses it. That constraint is exactly what makes linked libraries useful for repeated assets. [17]
For example, a product-animation project might keep the approved bottle model in an asset library, then link it into lighting scenes, turntable scenes and advertising layouts. A geometry correction happens once at the asset source rather than in every duplicate.
The cost is coordination. A library change can affect multiple scenes, so the asset owner needs to know whether the update is safe. For a solo artist, that might be a simple note in the file name or a deliberate version increment.
Blender’s Asset Browser is useful when you have recurring materials, node groups, models or lighting rigs, but it requires setup and an agreed library location. Asset reuse is qualitatively cleaner than copying files everywhere, but there is no solid benchmark proving a universal size or performance gain.
For one-off work, appending may be the sensible choice. For a recurring kit of studio props, architectural elements or character accessories, a linked library is usually the more disciplined system. The decision should follow reuse, not fashion.
Recovery is layered, not one checkbox
Blender 4.5 LTS includes auto-save recovery and save-version files such as .blend1 and .blend2. The default auto-save interval is two minutes, and save prompts on exit reduce the chance of casually closing unsaved work. [16]
Those tools protect against crashes and obvious mistakes, but they are not an archive strategy. Auto-saves may be overwritten, save versions remain on the same drive, and neither protects against a failed disk, accidental project deletion or a bad change discovered weeks later.
Use numbered working files for meaningful revisions, then keep an independent copy somewhere outside the active drive. A version-control system is more robust when a project has multiple contributors or when you need to know exactly who changed an asset.
For large binary production files, Blender workflow guidance commonly recommends SVN, while Git LFS and Perforce are other systems used to manage versioned binary assets. [5] The right system depends on the team and infrastructure, not on Blender alone.
Third-party tools can add convenience rather than replace that structure. Project Backup offers configurable automatic and manual backup behaviour, while Tiny Backup is another Blender backup add-on option. [3][4] I have not used every add-on mentioned here, so judge them by their documentation and your recovery requirements.
The useful question is not “how often should I back up?” There is no evidence-backed universal interval beyond Blender’s default auto-save timing. [16] Instead ask how much work you can afford to lose, and store backups accordingly.
Manage size by separating what can be regenerated
There is no meaningful average size for a Blender project. A low-poly asset with a few JPEG maps is nothing like a film scene with 16-bit texture sets, geometry caches, particle simulations and rendered image sequences.
File size is influenced by mesh density, texture resolution and format, embedded data, simulations, render output and imported assets. Blender’s newer Cycles texture-cache work can reduce rendering memory pressure, but it does not magically reduce the disk footprint of your project files. [14]
Treat regenerable cache data differently from irreplaceable source material. Keep both inside the root project folder while active, but label caches clearly so an archive or cleanup pass does not confuse them with original sculpts, textures or approved exports.
Before archiving, open the project, remove genuinely unused data, confirm that external paths resolve correctly, and decide whether the cache is worth retaining. Do not delete it merely because it is large if rebuilding it would cost days.
The end result is not a prettier file browser. It is a project that can move between drives, survive a handoff, reopen after a year and show you where the real source of each asset lives.
Frequently Asked Questions
How should I organize Blender project files for better workflow?
Organize your Blender project as a package with a fixed root folder containing separate subfolders for different file types, such as blend, assets, textures, cache, renders, exports, and delivery. This separation reflects different lifecycles and makes it easier to locate, archive, and safely delete files. Keeping dependencies grouped under one root folder also supports consistent relative paths and better project portability.
What are best practices for naming Blender files and versions?
Use descriptive, structured file names that convey the asset, task, and revision, such as prop-reading_lamp-shading-v006.blend. Avoid vague names like final.blend or newone.blend that do not clearly indicate file purpose or version. Including version numbers before risky operations helps track discrete revisions and prevents confusion during iterative work.
How do relative paths work in Blender file management?
Relative paths describe file locations relative to the .blend file or project root directory, making project dependencies portable across different machines. For example, a texture referenced as ../textures/chair_basecolor.exr remains valid if the entire project folder is moved. This only works reliably if the folder structure is stable and deliberate from the start of the project.
How can I manage assets and caches separately in Blender projects?
Keep imported geometry and source assets in an assets folder, textures in a textures folder, and simulation or cache data in a cache folder. Caches and simulations often have different lifecycles and can be large or regenerable, so separating them prevents accidental deletion of important files and simplifies backups. Use Blender’s Pack Resources feature for assets that must travel with a .blend file, but avoid packing large caches or high-resolution sequences.
What backup and version control strategies work well with Blender?
Blender’s auto-save and save versions provide useful recovery layers, but independent backup and version control systems are essential for collaborative or paid work. Use structured backups and consider version control tools like SVN for large binary files. Third-party add-ons can enhance backup workflows, and saving incremental versions before major changes helps protect work progress.
How we researched this
This article was assembled from 18 cited references.
Nothing here is based on hands-on testing. Where a figure or finding appears, it belongs to the source cited beside it, and the writing says so rather than implying otherwise. Every source is listed below so you can check it.
Sources
- How Big Are Peoples' Computer Files? File Size Distributions Among User-managed Collections
- FAQ | Nomad
- Project Backup - Documentation - Superhive (formerly Blender Market)
- Tiny Backup — Blender Plugin: Free Download Guide · AnyPlugins
- Blender Project Setup for Animation: Best Practices
- Blender files are getting bigger and your workflow isn't keeping up - Fabric – your self-organizing workspace and file explorer
- Organizing Data | Blender for Visual Investigation
- Bloated .blend Files Are Quietly Wrecking Your Workflow — Here's How to Clean House — BlenderCG
- How to Share Blender Projects and Assets | Largetransfer
- Best Cloud Storage for Videos 2026: Top 5 for Large Files
- Cloud Storage Pricing Comparison 2026: Cost per TB, Free Tiers & Egress Fees
- Cloud Storage Comparison 2026 — Google Drive, iCloud, Dropbox, Proton, OneDrive — ToolVaults
- Folder Structure Overview | Blender Studio
- Cycles Texture Cache — Blender Developers Blog
- System Requirements - Marmoset Toolbag Documentation
- Recovering Data - Blender 4.5 LTS Manual
- Blender Projects - Blender Developer Documentation
- How to Pack External Files and Textures in Blender - blender
Related Articles
Blender Project Setup for Animation: Best Practices
Learn how to set up a Blender project for animation with proper folder structure, naming, frame rate, and collaboration tips.
Using Blender for Education
Learn how to use Blender for education with tips on setup, hardware, and teaching modeling, lighting, and rendering effectively.
Create Game Asset in Blender: Modeling, Topology, and Export
Learn how to create game assets in Blender with tips on modeling, topology, optimization, and exporting for game engines.
Best Practices for Creating 3D Environments in Blender
Learn best practices for creating modular, efficient 3D environments in Blender with topology, LOD, and Geometry Nodes tips.