
Best Rendering Settings for Product Visualization in Blender
Learn the best rendering settings for product visualization in Blender, including samples, adaptive sampling, denoising, and Cycles setup.
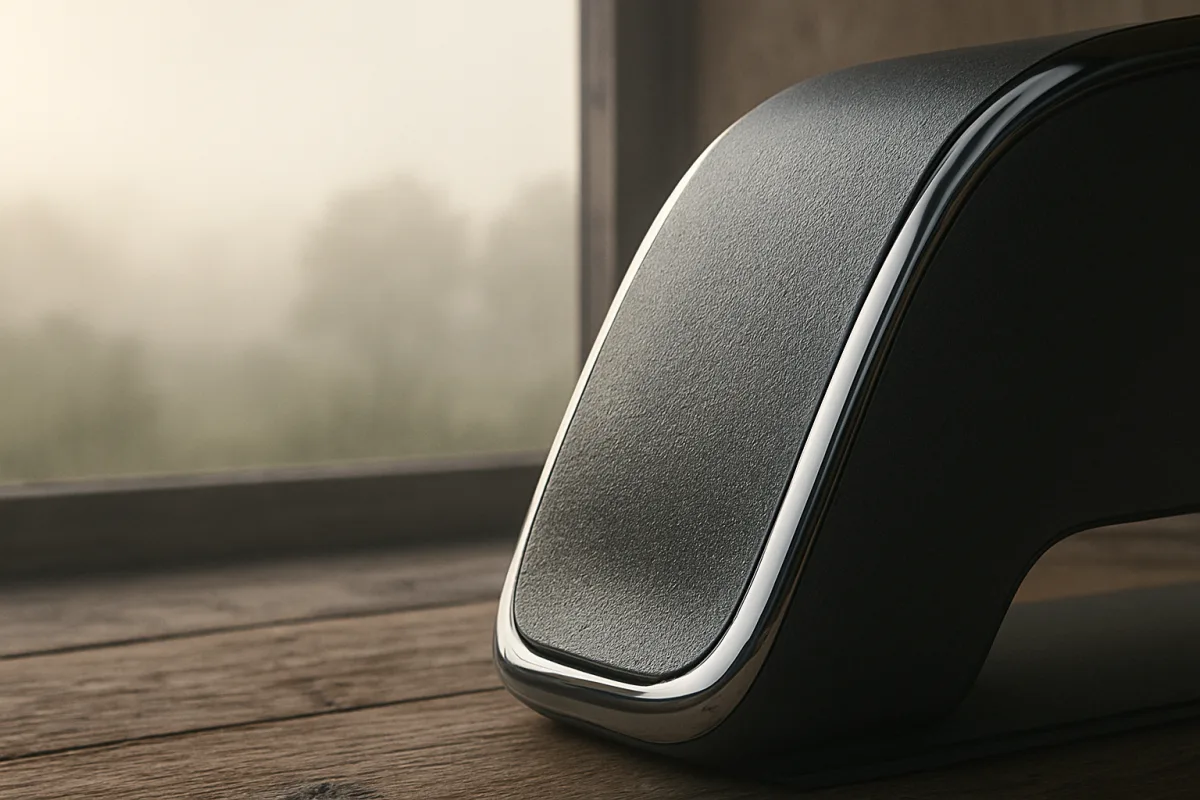
The noisy reflection on the product edge
A chrome edge with grainy reflections is where a product render often gives itself away. The model may be accurate, the camera may be composed well, and the material may have the right roughness, yet the render still looks unfinished.
The setting behind that problem is sampling. In Blender 4.5 LTS Cycles, a sample is one attempt to calculate how light travels through a pixel, including direct illumination, reflections, shadows, and indirect light.
Cycles improves an image by repeating those calculations. More samples reduce random noise, but every added sample also adds render time. Product visualization makes this trade especially visible because polished metals, glass, clear plastic, dark finishes, and soft studio gradients expose noise quickly. [13][14]
We would begin with Cycles for a presentation render whose job is to make a manufactured object feel present and credible. Its path-traced lighting is better suited to physically convincing reflections and light transport than Blender 4.5 LTS EEVEE. [5][13]
Blender 4.5 LTS EEVEE still has a role. It is the faster option for rapid iteration and stylized work, but its shortcuts can limit realism in the reflective and transparent materials that dominate many product images. [13][14]
What samples actually buy you
A pixel in a Cycles render is not solved in one calculation. Cycles sends rays through the camera, lets them encounter surfaces and lights, then averages many results to estimate the final color for that pixel.
That averaging is why noise fades gradually instead of disappearing at a particular magic number. A low-sample render can look clean across a flat white background while remaining visibly unstable in a glossy black housing or inside a glass bottle.
The cost rises with image size as well as sampling. A 3,000 by 2,400 pixel print image contains 7.2 million pixels, so increasing the sample limit affects millions of calculations across the frame. [4]
Published guidance varies widely because scenes vary widely. Learn Blender recommends 64 to 128 samples for clean still images, while higher-end product-visualization guidance reaches 1,000 to 5,000 samples for demanding final work. [1][13]
Neither number is a rule. A matte ceramic object under broad, soft lighting may settle quickly, while a watch with brushed metal, polished edges, glass, small engraved features, and a high-contrast HDRI can keep noise visible long after 128 samples.
For that reason, do not begin by assigning an ambitious maximum. Make a small test render at the final camera angle and inspect the areas that matter to the presentation: highlight transitions, reflections, contact shadows, transparent parts, and dark recesses. [8]
A test render prevents a common waste of time, over-sampling a scene whose remaining problem is lighting, camera placement, or material definition. Poor lighting can make a technically clean render feel flat, and no sample limit can create a reflection that was never placed. [6][11]
Adaptive sampling is the control system
Adaptive sampling is the setting that makes a sample budget behave intelligently. Instead of giving every pixel the same amount of work, Blender 4.5 LTS Cycles can stop sampling areas that have become clean and continue working on noisier ones. [1]
A plain backdrop or evenly lit matte face may converge early. A pixel showing a tiny bright reflection on metal, a glossy curved corner, or a deep shadow may need substantially more calculations before its changing values settle.
The noise threshold decides when Cycles considers a pixel clean enough to stop. A lower threshold asks for a cleaner result and generally takes longer, while a higher threshold ends work sooner and accepts more remaining noise. [1]
This creates a better workflow than guessing a single sample count. Set an initial maximum, enable adaptive sampling, render the real camera view, then lower the noise threshold or raise the maximum only if the important surfaces remain visibly noisy. [1]
We would keep denoising enabled for viewport previews and final renders. Denoising removes residual grain without forcing every pixel toward an excessive sample count, which can cut the time required to reach a clean presentation image. [1][6]
Denoisers have costs. They can soften fine texture detail, blur tiny engraved marks, or smooth delicate reflection breakup when the render is too under-sampled, so they work best as a finishing pass on a reasonably converged image.
Blender supports different denoising approaches depending on hardware, including CPU-based OpenImageDenoise and NVIDIA GPU-based OptiX. Automatic selection is available, but the best choice depends on the scene and the machine rendering it. [1]
Make that comparison with a crop, not a full-frame final. Render a close area containing the product’s sharpest texture, smallest branding, or most demanding reflection, then compare denoised and non-denoised results at the size the client will see.
Light paths decide how expensive each sample becomes
Sample count describes how many times Cycles estimates each pixel. Light bounces describe how far a ray may continue after it hits a surface, and they decide how much work each of those samples can require.
More bounces can improve indirect illumination, reflections, and transmission through materials. They can also raise render time sharply, particularly in scenes with glass, nested reflections, reflective studio floors, or many bright surfaces. [1][15]
For product presentations, a Max Bounces value around 4 is a documented balance between believable lighting and render cost. [1] It is a starting point, not an instruction to ignore obvious missing reflections or dark, unrealistic transparent parts.
This is why samples and bounces must be tuned together. If the image is noisy, more samples may help. If the image lacks a needed reflection path or the glass looks wrong, raising samples can spend hours refining an incorrect lighting calculation.
Material construction changes the same budget. Blender 4.5 LTS Cycles displacement can produce actual surface relief and improve visual accuracy, but it increases render expense. Bump mapping is cheaper because it changes shading without creating true geometric displacement. [15]
Use displacement where the silhouette or close-up relief must read, such as a deeply textured molded surface. Use bump where you need fine surface variation without changing the object’s actual outline, especially on broader product shots. [15]
HDRIs make the sample problem visible
An HDRI environment map surrounds the product with captured high-dynamic-range lighting. It can provide the broad reflections and natural variation that make an object read as a real material instead of a colored shader ball. [2][3]
In Blender 4.5 LTS Cycles, that environment contributes to the path-traced lighting directly. Rotate the HDRI through the Mapping node to place bright windows, dark areas, or defined highlights where they describe the form best. [2][3]
Background Strength controls the HDRI’s brightness. A small adjustment can change how bright reflections appear on metal or how much fill light reaches shadowed sides, so change it before assuming a material needs different roughness. [2]
Blender 4.5 LTS EEVEE handles HDRI sunlight differently from Cycles. Since Blender 4.2, EEVEE can extract sunlight from an HDRI, while Cycles traces the environment as part of its light transport. [2][13]
That engine difference is another reason to judge a final product image in the renderer that will produce it. A studio lighting setup that is convincing in EEVEE may not reproduce the same reflections, shadow character, or exposure behavior in Cycles. [13][14]
Hardware settings and repeat renders
Tile size can affect how efficiently Blender uses your hardware. A 2048-pixel tile size is often cited as optimal, but memory limits can make 1024 or 512 the better choice on a particular system. [1]
There is no universal tile value because scene complexity and available memory change the result. Test a representative camera view with your actual textures, geometry, HDRI, and resolution before treating any tile recommendation as a fixed rule. [1]
Persistent Data can speed repeated renders by retaining scene data between renders, which suits a presentation workflow with many lighting, camera, or material adjustments. The trade is higher memory use. [1]
Use it when you are rendering the same loaded scene repeatedly. Skip it if memory is already the constraint, because a faster re-render is no help if the scene cannot fit comfortably during the render. [1]
Keep your settings consistent across test renders. Changing samples, denoising, lights, camera exposure, material roughness, and output resolution simultaneously leaves you unable to tell which alteration improved the image. [6][7]
Output settings finish the presentation
A product image intended for an 10 by 8 inch print needs 3,000 by 2,400 pixels at 300 PPI. Set those pixel dimensions in Blender before final rendering, because enlarging a smaller output later cannot add rendered texture or edge detail. [4]
Use PNG or TIFF when print quality is the priority. JPEG is acceptable for digital delivery, but it is not the preferred format for print-quality output because compression can compromise the finished image. [4]
For a client presentation viewed on screens, resolution still affects the sample budget. Render only as large as the deliverable requires, then make a final crop test at that exact size before committing to a long render. [8]
The reliable order is clear: establish the camera and lighting, test materials under that lighting, enable adaptive sampling and denoising, set bounces near 4, then spend additional samples only on the areas that remain noisy. [1][6][8]
Frequently Asked Questions
What are the best rendering settings for product visualization in Blender?
For client-facing product images, use Blender 4.5 LTS Cycles with Max Bounces set near 4 to balance realism and render time. Enable adaptive sampling and denoising first, then increase samples only where noise remains visible. Deliver final images at 300 PPI in PNG or TIFF, setting pixel dimensions based on the physical output size.
How many samples should I use for product rendering in Blender Cycles?
Start with 64 to 128 samples for clean still-image tests, but expect complex products with glossy or refractive materials to require between 1,000 and 5,000 samples. Sample counts depend heavily on scene complexity and should be adjusted after inspecting test renders of critical areas like reflections and shadows.
How does adaptive sampling improve product visualization renders in Blender?
Adaptive sampling lets Blender focus sampling effort on noisy pixels while stopping work on areas that have already converged. This approach reduces render times by avoiding unnecessary samples in clean regions, making the sampling budget more efficient and improving overall image quality.
Should I use Cycles or Eevee for product visualization in Blender?
Cycles is preferred for photorealistic product visualization because its path-traced lighting produces more believable reflections, shadows, and transparent materials. Eevee is faster and useful for rapid iteration or stylized work but may limit realism in reflective or transparent surfaces common in product renders.
What denoising options are best for product visualization in Blender?
Enable denoising both in the viewport and final render to improve image clarity without needing excessive samples. Options like OpenImageDenoise (CPU-based) or OptiX (NVIDIA GPU-based) can be used depending on hardware, with automatic selection available but not always optimal.
How we researched this
This article was assembled from 15 cited references.
Nothing here is based on hands-on testing. Where a figure or finding appears, it belongs to the source cited beside it, and the writing says so rather than implying otherwise. Every source is listed below so you can check it.
Sources
- Blender Render Settings: Optimal Setup for Cycles & Eevee
- Blender HDRI Lighting: Sun, Shadows & Lighting Only | HDRI Hub
- Blender HDRI lighting: load, rotate, hide the background
- Blender Product Visualization Workflow for Realistic Renders
- Cycles vs EEVEE: which to use for a final render
- Mastering Blender Render Settings: Get High-Quality Renders Faster |
- Top Blender Rendering Mistakes & Key Tips for Better Results
- Do Test Render Blender: A Complete Guide
- Why your 3D renders look wrong, and how the camera object fixes it
- Common 3D Rendering Mistakes and How to Avoid Them, ProPixel Agency
- Stop Blaming Your Materials: The Real Reason Your Blender Renders Look Lifeless, BlenderCG
- Environment Lighting in Blender | docs
- Lighting & Rendering Theory Cycles and EEVEE - Blender Fundamentals 4.5 LTS - Blender Studio
- Blender Eevee vs Cycles: Main Differences Explained - blender
- Material Settings - Blender 4.5 LTS Manual
Related Articles
Best Practices for Rendering Animations in Blender
Learn the best practices for rendering animations in Blender, including sample settings, adaptive sampling, denoising, and output formats.

Optimize Blender for Faster Rendering: Key Settings and Tips
Learn how to optimize Blender for faster rendering with GPU use, adaptive sampling, denoising, and bounce settings for efficient Cycles renders.
Blender Tips for Optimizing Scene Performance in Cycles
Learn Blender tips for optimizing scene performance in Cycles, including adaptive sampling, tile size, samples, bounces, and denoising techniques.
Blender Product Visualization Workflow for Realistic Renders
Learn a practical Blender product visualization workflow with lighting, rendering, and camera tips for photorealistic product renders.