
Blender Tips for Optimizing Scene Performance in Cycles
Learn Blender tips for optimizing scene performance in Cycles, including adaptive sampling, tile size, samples, bounces, and denoising techniques.
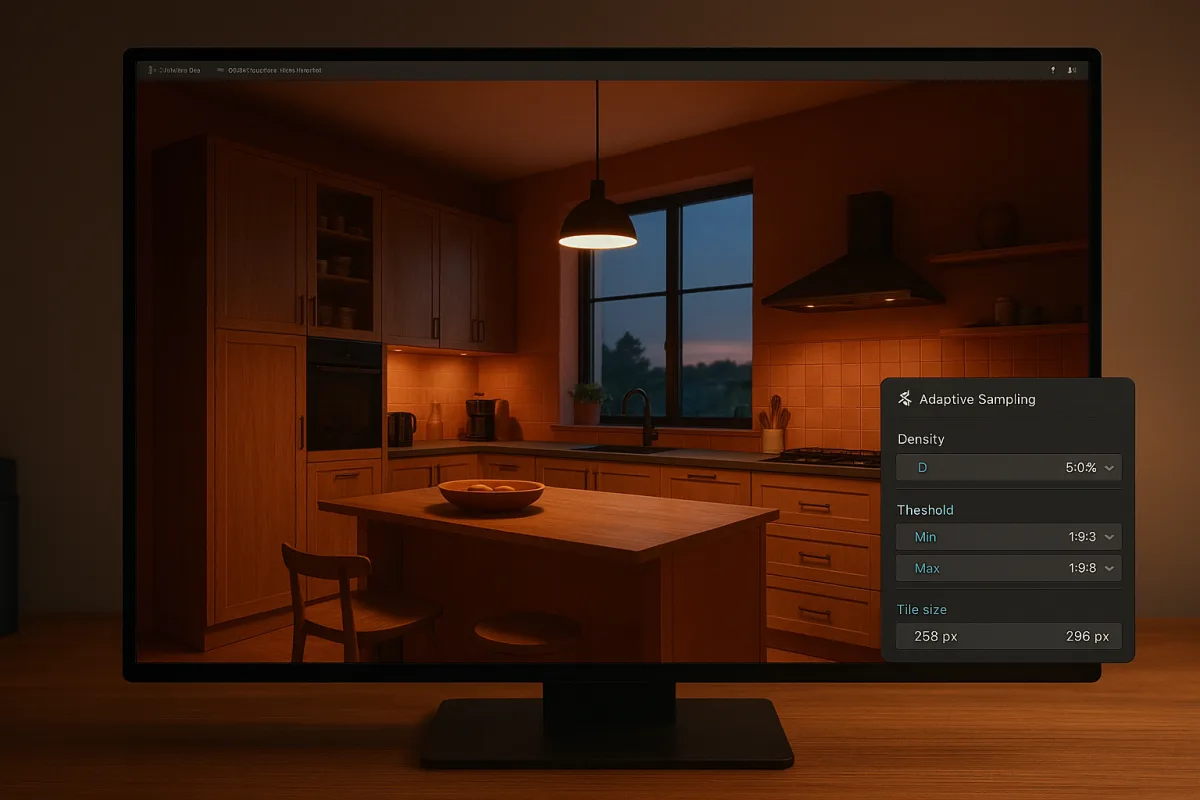
Your render time is a work budget
You press Render in Blender 4.5 LTS, watch a kitchen, product shot, or character frame crawl forward, and start looking for the heaviest object. That object may matter, but Cycles often spends far more time deciding where to send rays.
Every rendered pixel asks Cycles to simulate light paths through the scene. Samples repeat that calculation to reduce noise. Bounces extend each path when light reflects, refracts, or passes through transparent materials. Geometry, textures, lights, and volumes all influence how costly those calculations become. [1]
Think of render time as a work budget. You can ask Cycles for more samples, deeper light paths, higher-quality shadows, and more detailed materials, but each request consumes processing time, memory, or both.
That framing keeps optimization from becoming a checklist of random toggles. You are not trying to make every setting lower. You are trying to stop Cycles from performing work that cannot improve the final image enough to justify its cost.
We would start with sample distribution. It reaches the largest part of the Cycles workload, it affects every frame, and Blender’s Adaptive Sampling can reduce work without demanding that you guess one low sample count for an entire image. [1]
Samples are the cost you see
A sample is one attempt to estimate the lighting at a pixel. More samples generally reduce grain, especially in dark reflections, glossy highlights, transparent surfaces, indirect light, and volumes. They also increase render time because Cycles must trace more paths. [1]
The trouble is that an image rarely needs equal effort everywhere. A flat painted wall may become clean quickly, while a chrome edge reflecting a bright light remains noisy much longer. Fixed sampling spends the same maximum allocation across both areas.
Adaptive Sampling changes that distribution. In Blender Cycles, it allows pixels that have become sufficiently noise-free to stop receiving additional samples, while noisier pixels continue. The renderer can therefore reduce total render time without lowering quality in already clean regions. [1]
This is why Adaptive Sampling is a stronger first move than globally cutting samples. A global reduction gives every pixel less information, including pixels that genuinely need more. Adaptive Sampling directs the available work toward the parts of the frame that still need it. [1]
Denoising supports the same strategy. Cycles denoisers, including OptiX and OpenImageDenoise options described in Cycles optimization guidance, can clean residual noise so you can finish at a lower sample count. [1]
A denoiser is not free image quality. Fine texture, tiny displacement detail, sharp specular features, and high-frequency material variation can be affected if the image is too noisy before denoising. Render a crop containing the hardest material, not only a clean center area.
Your target is the lowest sample workload that produces an acceptable frame after denoising. There is no universal sample number, because hardware, lighting, shader complexity, resolution, geometry, and the camera’s view determine how quickly a scene converges. [1]
Bounces multiply the work behind each sample
Samples tell Cycles how often to estimate a pixel. Bounces tell it how far light may continue through the scene during each estimate. A ray can reflect from metal, pass through glass, pick up indirect color, and continue again.
More permitted bounces can produce more complete indirect light, reflections, and refractions. They also add render work. Reducing bounce limits can therefore shorten renders, but it can remove lighting information that the image needs. [1]
A product render with a glossy object sitting on a bright floor may depend on several reflection and indirect-light interactions. A simple matte object under direct lighting may not. You should judge bounce reductions where the effect occurs, especially inside glass, reflective cavities, and shadowed corners.
Clamp lighting addresses another expensive failure: fireflies. These are unusually bright noise pixels, often associated with difficult light paths. Clamping limits those extreme values, helping Cycles reduce visible fireflies and reach a cleaner result sooner. [1]
The trade-off is image accuracy. If you clamp too aggressively, bright highlights and indirect-light contributions can be altered. Use it to solve a visible noise problem, then inspect the highlight and reflective areas that made you enable it.
Bounces, clamping, samples, and denoising belong together. If you reduce bounces, you may lower noise and need fewer samples, but you may also remove wanted light. If you retain complex paths, denoising and Adaptive Sampling can contain their cost. [1]
Tiles decide how the device receives work
Tile size does not change what your scene looks like. It changes the chunks of the image Blender Cycles gives to the render device. This affects workload scheduling and memory behavior, which is why one tile setting cannot suit every machine. [1]
Smaller tiles, such as 32 by 32 pixels, are associated with CPU rendering. Larger tiles, such as 256 by 256 pixels, are associated with GPU rendering. The reason is the different way CPUs and GPUs handle parallel work. [1]
A CPU has comparatively few powerful processing cores and can benefit from many smaller pieces of work. A GPU handles large numbers of parallel operations, so larger tiles can better feed that kind of processor. The best result still depends on your hardware and scene. [1]
Very large tiles also carry a memory cost. Guidance for Blender Cycles notes that lowering a default 2048 tile size to 1024 or 512 can reduce memory use with little performance loss. [1]
That makes tile tuning especially relevant when a scene is near the available memory limit. A setting that looks efficient until the render runs out of memory is not efficient. Start with the CPU or GPU direction above, then compare a few completed frames on your own machine.
Blender’s Threads Mode set to Auto-Detect is another scheduling setting intended to let the application use the available CPU resources. Persistent Data can also speed repeated renders by retaining data between renders, trading increased memory use for faster rerenders. [2]
Persistent Data suits a sequence or repeated lighting and material iterations where much of the scene remains loaded. It can be a poor fit when memory is already constrained. This is another budget choice: spend RAM to avoid rebuilding render data.
The scene must be easy to organize
Before Cycles can trace rays, it needs an acceleration structure that helps it find intersections with scene geometry. Without such organization, every ray would need to test far too many objects and polygons.
Blender Cycles offers acceleration-structure options including Spatial Splits, Curves BVH, and Compact BVH. These settings balance render speed, build time, and memory use, so they affect how quickly a render begins as well as how it proceeds. [2]
Spatial Splits can improve handling of scenes with mixed polygon content, but it increases BVH build time and memory use. It can help a difficult scene, yet it is not an automatic setting for every asset or every frame. [2]
Compact BVH points toward the opposite pressure, conserving memory through a more compact acceleration structure. The right choice depends on whether your bottleneck is available memory, BVH construction, or ray traversal during the render. [2]
Repeated objects create another opportunity. Linked duplicates and instances share mesh data, reducing memory use when a scene contains many copies of the same chair, bolt, leaf, prop, or architectural module. They can also improve render performance. [2]
Do not promise yourself a specific percentage gain from instancing. The improvement depends on the repeated asset, the scene, available hardware, materials, and the amount of memory pressure you were experiencing. No standardized benchmark establishes one figure for every Blender scene.
We would instance genuinely repeated objects early, because it preserves a cleaner scene structure as well as sharing data. We would not force near-identical hero assets into one linked mesh when their silhouette, texture, or wear needs individual control.
Simplify is a quality decision, not a speed button
Blender’s Simplify controls can reduce scene complexity by limiting details such as texture sizes or particle counts. This can reduce demand on the system, but it can also remove the exact detail that sells a close-up, a hair groom, or a textured surface.
Use Simplify for the shot and stage where the reduced detail cannot be seen. It is a habit for previews and broad layout work. It becomes a rule only when you have compared the result at the delivery resolution and confirmed the missing detail does not matter.
Viewport display modes deserve the same restraint. An anecdotal Blender Stack Exchange report described render time increasing from seven seconds in Solid display to 13 seconds in Material Preview, but this does not establish a general rule for high-polygon production scenes. [3]
There is no reliable quantitative evidence here for a universal claim that Bounding Box display, Simplify, or other viewport choices will speed every scene above one million polygons. Use them to keep interaction manageable, then measure final renders separately. [3]
Polygon counts and texture resolutions also resist fixed thresholds. Hardware and scene complexity change the answer. A dense sculpt far from camera may be wasteful, while the same density could be necessary for a close-up silhouette or displacement-driven surface.
Eevee solves a different problem
Blender 4.5 LTS Eevee is a real-time renderer, so its performance model differs from Cycles. It uses systems including Virtual Shadow Mapping, Screen-Space Reflections, and Light Probes to produce fast results through real-time rendering techniques. [4] [5]
Those systems change what you optimize. In Eevee, shadow settings, screen-space effects, light setup, and probe placement can carry major visual and performance consequences. Eevee can be fast, but its real-time methods have limitations for photorealism. [4] [5]
Do not transfer a Cycles setting strategy wholesale into Eevee. Adaptive Sampling, denoising, tile scheduling, and path bounces address Cycles’ path-tracing workload. Eevee’s visual compromises and controls come from its real-time lighting and reflection systems. [1] [5]
For a Cycles image, we would tune Adaptive Sampling, denoising, bounces, tile size, and memory-related scene structure in that order. For Blender 4.5 LTS Eevee, we would inspect shadows, reflections, and probe-driven lighting where the image visibly breaks first. [1] [4]
Frequently Asked Questions
How can I optimize scene performance in Blender Cycles?
Start by reducing wasted sampling using Adaptive Sampling, which focuses rendering effort on noisy areas while skipping clean regions. Use denoising to lower sample counts without sacrificing image quality. Adjust samples, light bounces, tile size, and acceleration structures together as a render-work budget to balance speed, noise, memory use, and lighting accuracy.
What are the best Blender tips to reduce render time?
Prioritize Adaptive Sampling and denoising before lowering global quality settings. Tune tile size to your hardware, smaller tiles like 32×32 for CPUs and larger tiles like 256×256 for GPUs. Use linked duplicates and instances to reduce memory pressure when repeating geometry. Clamp lighting to reduce fireflies and avoid excessive bounces where possible.
How does adaptive sampling improve Blender render speed?
Adaptive Sampling lets pixels that have reached acceptable noise levels stop receiving more samples, while noisier pixels continue to get sampled. This targeted approach reduces total render time without lowering quality in clean areas, unlike a fixed global sample count that wastes effort on already noise-free pixels.
What tile size should I use for CPU vs GPU rendering in Blender?
For CPU rendering, smaller tiles such as 32 by 32 pixels are recommended to improve efficiency. For GPU rendering, larger tiles like 256 by 256 pixels work better to maximize throughput. Adjusting tile size to the device performing the render helps balance memory use and speed.
How do samples and bounces affect Blender render times?
Samples determine how many times Cycles estimates lighting per pixel; more samples reduce noise but increase render time. Bounces control how far light rays travel through the scene, with more bounces producing more accurate indirect lighting but also increasing computation. Reducing bounces can speed up renders but may sacrifice lighting realism in reflective or transparent areas.
How we researched this
This article was assembled from 5 cited references.
Nothing here is based on hands-on testing. Where a figure or finding appears, it belongs to the source cited beside it, and the writing says so rather than implying otherwise. Every source is listed below so you can check it.
Sources
- Blender Render Settings: Cycles & Eevee Guide (2026)
- Blender Render Settings: Optimal Setup for Cycles & Eevee
- rendering - Blender render time depends on viewport display setting - Blender Stack Exchange
- Light Settings (EEVEE) - Blender 4.5 LTS Manual
- EEEVEE - Blender Developer Documentation
Related Articles

Optimize Blender for Faster Rendering: Key Settings and Tips
Learn how to optimize Blender for faster rendering with GPU use, adaptive sampling, denoising, and bounce settings for efficient Cycles renders.
Best Practices for Rendering Animations in Blender
Learn the best practices for rendering animations in Blender, including sample settings, adaptive sampling, denoising, and output formats.
Blender Project Setup for Rendering: Organize and Optimize
Learn how to set up a Blender project for rendering with proper file organization, scale, render engine choice, and output settings for efficient
Blender Rendering Settings for Animation: Best Practices
Learn the best Blender rendering settings for animation, including Cycles vs Eevee, samples, output formats, and hardware optimization tips.