
How to Animate Objects in Blender: Step-by-Step Guide
Learn how to animate objects in Blender with keyframes, poses, and timing adjustments for smooth motion in this step-by-step tutorial.
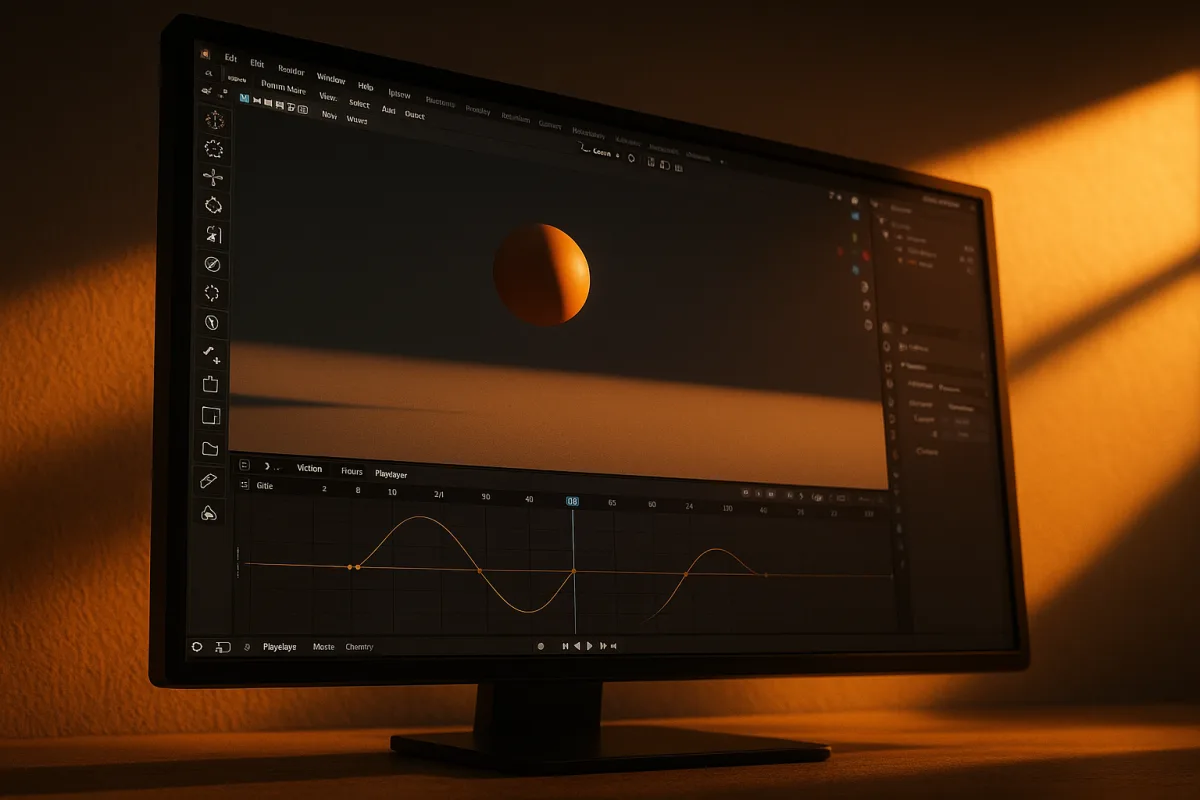
Set the first pose at frame 1
The Timeline playhead begins at frame 1, and your object is sitting in its starting position. In Blender 4.5 LTS, select that object before doing anything else, because keyframes are attached to the selected object. [4]
Press I with the cursor in the 3D Viewport to open the Insert Keyframe menu. For a basic moving object, choose Location, Rotation, or Scale, depending on which transform you want Blender 4.5 LTS to record. [4]
Choose Location for a cube sliding across a table, Rotation for a spinning wheel, and Scale for something growing or squashing. Choose Location and Rotation together when an object must travel while changing direction, such as a thrown bottle.
A keyframe records the transform values at one particular frame. If your cube is at the left side of the scene on frame 1 and has a Location keyframe, Blender 4.5 LTS knows where that cube begins. [4]
We would begin with Location only. It keeps the first exercise readable, and it lets you see whether your timing is working before rotation, scale, materials, or camera work make the scene harder to diagnose.
Set the ending pose on a later frame
Move the Timeline playhead to a later frame, such as frame 48. In Blender 4.5 LTS, reposition the selected object in the 3D Viewport, then press I again and insert the same keyframe type. [4]
If you keyed Location at frame 1, key Location again at frame 48. Blender 4.5 LTS interpolates between those two recorded positions, creating motion without requiring you to position the object on every intervening frame. [4]
Press Play and watch the object travel. The motion may be plain at first, but that is a good result: you have confirmed that selection, transforms, Timeline position, and keyframes are all connected correctly.
Blender 4.5 LTS uses 24 frames per second by default, and a new scene’s Timeline extends to frame 250 by default. Both settings can be changed, but 24 fps gives a straightforward starting point for short exercises. [9]
At 24 fps, 48 frames equal two seconds of screen time. That makes it easier to think about duration: a ball crossing the frame in 12 frames feels much quicker than the same trip stretched across 96 frames.
Choose which transforms deserve keyframes
Key only the channels that you intend to animate. A prop that only moves across the floor does not need Scale keyframes, and an object that stays upright does not need Rotation keyframes.
Extra keyframes create extra curves and make later editing harder. This becomes especially noticeable when you revisit a shot and need to find out why an object is drifting, scaling, or turning unexpectedly.
For a rolling object, separate the job into travel and spin. Key Location for forward movement and Rotation for the roll, then check whether the amount of rotation visually matches the distance covered.
Scale is best reserved for deliberate changes in form: a bouncing ball compressing on impact, a stylized object expanding, or a simple pop-in. Do not key scale by habit, because accidental scale animation can make objects appear to breathe.
Apply transforms before you animate
Before creating the first keyframe, select the object and use Ctrl+A in Blender 4.5 LTS to apply Scale and Rotation when those transforms have been altered during modeling or placement. [11]
Unapplied scale and rotation can produce confusing results when you animate, especially when you add modifiers, parent objects, or move toward deformation work. The object may look correct while its underlying transform values remain awkward.
This is a habit for most asset work, not a rule that every object must follow. Leave transforms unapplied when their existing values are intentionally part of the setup, but know why they are there before you begin keyframing.
Check the object’s size in the scene as well. Lighting, camera perspective, and motion all become harder to judge when objects are built at inconsistent scales or placed without a clear relationship to the scene. [11]
Let Blender make the in-betweens
The first playback often reveals an object moving at a constant rate from one pose to another. Blender 4.5 LTS can generate those in-between frames, but automatic interpolation is only the starting point for believable movement. [4]
A door should not usually snap from stillness to full speed. A ball should not travel through the air with the same spacing it has at the instant it hits the floor.
Watch the object’s spacing between frames. Wide spacing means faster movement, while tight spacing means slower movement. This is why a short animation can look fast or slow even when its start and end positions are identical.
For a first pass, make the start and finish clear before refining the middle. Add a third keyframe only when the movement needs a distinct event, such as a ball’s ground contact or a box pausing before it tips.
Adjust timing in the Dope Sheet
Open the Dope Sheet in Blender 4.5 LTS when you need to see all your keyframes as marks on a timeline. It gives you an overview of timing, so you can move keyframes without guessing where each pose lives. [10]
Select a keyframe and slide it earlier to make an action happen sooner, or later to give the movement more time. Moving a group of keyframes together preserves the internal timing of a short action.
The Dope Sheet is where you fix a common first-animation problem: every event happens at evenly spaced intervals. Even spacing can make motion feel mechanical because real actions often include pauses, accelerations, and quick impacts.
Keep the starting keyframe at frame 1. Missing that initial keyframe is a frequent beginner error, and it can leave Blender 4.5 LTS without a defined first pose when you play the animation from the beginning. [11]
Blender’s 2026 animation updates include an operator for selecting keyframes by type in the Action Editor. That becomes helpful once an action contains many keyed channels and you need to isolate a particular kind of keyframe. [7]
Shape motion in the Graph Editor
Open the Graph Editor in Blender 4.5 LTS when the timing is right but the movement still feels wrong. The editor displays animation as F-curves, with each curve representing how one animated value changes over time. [10]
A straight, linear curve produces steady, unchanging motion. That can suit a conveyor belt or a machine part, but it often looks robotic on objects that need to start gently, gather speed, then settle. [11]
Use easing to soften the departure from a pose or arrival at one. In the Graph Editor, you are changing the curve between keyframes, which changes how quickly Blender 4.5 LTS moves through the values between them. [10]
For a bouncing ball, the curve should produce quick movement through the middle of the fall and tighter timing around the top of the arc. At impact, scale can briefly compress before the ball returns to its round form.
The Graph Editor is not an advanced-only tool. We would introduce it as soon as you have two keyframes, because it teaches you that animation is controlled by change over time, not by the number of keys you add.
Build a bouncing ball before a complicated scene
Create a sphere, place it above a ground plane, and key its first position. Move forward on the Timeline, lower the sphere to the ground, and insert another Location keyframe in Blender 4.5 LTS. [4]
Add a third Location keyframe after the impact, with the sphere rising to a lower height than before. This gives you a basic bounce and introduces the idea that energy decreases after each contact.
Add Scale keyframes only at the ground-contact frame if you want a squash effect. Keep the sphere round in the air, compress it briefly at impact, then restore its original scale as it leaves the ground.
Blender’s updated Fundamentals training, released July 31, 2026, includes a bouncing-ball exercise focused on timing and spacing. It is a strong first assignment because every adjustment is visible in the object’s path and rhythm. [7]
Skip elaborate cameras while learning this exercise. Overused camera movement can hide weak timing and make it difficult to tell whether the ball itself is moving convincingly. [11]
Keep topology ready for deformation
A rigid cube sliding across a floor can have simple geometry. A character’s elbow, a bending hose, or a squashed creature needs topology that supports the change in shape.
Poor edge flow and excessive triangles can produce weak or unpredictable deformation. Quads arranged around joints and areas of bending give you a clearer structure for sculpting, skinning, and weight painting later. [3]
This is a rule when a surface must deform smoothly, not a requirement for every static prop. A background crate or a hard-surface part can use a different topology strategy from a face, knee, or rubber toy.
Do not try to solve bad deformation with more animation keys. First inspect the mesh, then inspect weights if the object is rigged, and only afterward refine the animation curve or pose.
Know when object animation stops being enough
Direct transform keyframes suit objects: a lamp swinging, a product rotating, a camera moving, or a vehicle body traveling through a shot. You select the object and animate its Location, Rotation, and Scale. [4]
A character uses a different system. In Blender 4.5 LTS, character animation requires an armature, skinning the mesh to that skeleton, weight painting to control influence, then posing bones and keyframing those poses. [4]
Do not begin a first animation project with a fully rigged character unless rigging is the lesson. A simple object reveals timing errors quickly, while a character adds mesh deformation, weight distribution, bone controls, and posing problems.
Once object animation feels familiar, Blender’s 2026 Learning Roadmap offers a 12-week project-based path that includes animation alongside related workflows. [8] The sequence helps connect modeling, lighting, and animation instead of treating them as separate crafts.
Check playback before blaming the animation
A stuttering viewport can make clean animation look broken. Blender 5.3 lists a minimum of a four-core CPU with SSE4.2 support, 8 GB of RAM, and a 2 GB VRAM GPU supporting OpenGL 4.3 and Vulkan 1.3. [6]
Blender 5.3 recommends an eight-core CPU, 32 GB of RAM, and 8 GB of VRAM for a stronger working baseline. Supported GPU rendering technologies include CUDA, OptiX, HIP, oneAPI, and Metal. [6]
On supported Windows systems and Linux, Vulkan is the default graphics backend in Blender 5.3. Linux Journal reported that Vulkan rendering was enabled by default with the Blender 5.3 release. [5]
If playback is slow, reduce scene complexity before adding more animation detail. Heavy geometry, unnecessary objects, and neglected lighting can make it harder to judge timing, even when the keyframes themselves are correct. [11]
Frequently Asked Questions
How do I animate objects using keyframes in Blender?
To animate objects in Blender, start by selecting the object and positioning the Timeline playhead at frame 1. Press I in the 3D Viewport to insert a keyframe for Location, Rotation, or Scale depending on the desired transform. Then move the playhead to a later frame, reposition the object, and insert another keyframe of the same type. Blender automatically interpolates the motion between these keyframes.
What is the best way to set poses and keyframes in Blender?
Set the first pose at frame 1 by positioning the object and inserting keyframes for the intended transforms. Move the Timeline playhead to a later frame, adjust the object’s pose, and insert matching keyframes. Only key the transforms you plan to animate to keep the animation clean and easier to edit later.
How can I adjust timing and interpolation for object animation in Blender?
Blender interpolates motion between keyframes automatically, but you can refine timing and smoothness using the Dope Sheet and Graph Editor. The Dope Sheet helps adjust the timing of keyframes along the timeline, while the Graph Editor allows you to manipulate interpolation curves to remove robotic or stiff movement.
Why should I apply scale and rotation before animating in Blender?
Applying scale and rotation with Ctrl+A ensures that the object's transform values are reset to a clean state before animating. Unapplied transforms can cause confusing animation results, especially when modifiers, parenting, or deformations are involved. This practice helps maintain consistent and predictable animation behavior.
How do I use the Dope Sheet and Graph Editor to refine animations in Blender?
Use the Dope Sheet to get an overview of all keyframes and adjust their placement in time for better timing and spacing. The Graph Editor displays animation curves (F-curves) for each transform channel, allowing you to fine-tune the interpolation between keyframes to create smoother or more dynamic motion. Switching between these editors can be done via workspace options or shortcuts.
How we researched this
This article was assembled from 12 cited references.
Nothing here is based on hands-on testing. Where a figure or finding appears, it belongs to the source cited beside it, and the writing says so rather than implying otherwise. Every source is listed below so you can check it.
Sources
- Getting Started With Blender: A Beginner's Guide - TechYorker
- 15 Essential Blender Tips and Tricks for Beginners in 2026 - Toxigon
- Why perfectly built models can still look wrong in motion, and how to fix it
- How Do You Animate With Blender? Full Guide - Technicskeyboard.com
- Blender 5.3 Released With Vulkan Rendering Enabled by Default | Linux Journal
- Requirements, Blender
- Blender 2026: Development Notes and New Features in Animation
- Blender Learning Roadmap: From Beginner to Expertise (2026) | Coursera
- Timeline - Blender 4.5 LTS Manual
- Graph Editor - Blender Fundamentals 4.5 LTS - Blender Studio
- Common Mistakes in Blender Video Production | 2026 Guide
- Index - Blender Developer Documentation
Related Articles
Blender Character Animation Tutorial: Rigging to Posing
Learn Blender character animation with rigging, weight painting, posing, and timing in this step-by-step tutorial for Blender 5.2 users.
Animate Facial Expressions in Blender: Topology and Workflow
Learn how to animate facial expressions in Blender with topology tips, shape keys, rigging, and lighting for realistic results.
How to Use Sculpt Mode in Blender: A Practical Guide
Learn how to use sculpt mode in Blender with tips on brushes, mesh resolution, masking, and workflows for effective 3D sculpting.
Complete Beginner Blender Project Workflow Explained
Learn the complete beginner Blender project workflow from modeling to rendering with the donut tutorial and course length tips.